Support article for Lexmark XM1145
Installing print drivers on Windows 10
Overview
Microsoft Windows 10 contains many In-box or In-OS Lexmark printer drivers that are automatically installed using Plug and Play (PnP). To determine the best-fit or most recently updated driver, the operating system searches a local driver store and performs a Windows Update (WU) before finalizing printer driver installation.
Note: This multiple-step process may cause a slight delay in the creation of a printer object.
Plug and Play requirements
- A network connection with no more than 30 devices.
- The network cannot be part of domain.
- The Lexmark device cannot be connected to a virtual private network (VPN).
- Administrator privileges or rights are required.
Determining the installation method
| Action or Scenario | For help... |
|---|---|
FIRST! Determine whether your device supports Windows 10. | Click here to access the recommended driver list. Notes:
|
First-time installation of network or USB connected printer. Note: The in-OS driver is required to support Windows 10. | Click here for this procedure. |
The operating system does not detect the printer when attached via USB or network cable. | Click here for this procedure. |
|
|
Automatic Driver Installation in Windows 10:
This installation path is the most common since Windows 10 will include many current Lexmark printer drivers. Moreover, drivers not currently available in the operating system's driver store will be made available via Windows Update.
Before you begin
- Verify if the Windows 10 printer driver is supported.
- If installing a network printer, make sure that your printer is already communicating on the network.
- Obtain the printer's IP address or hostname. This information is easily obtained by printing a network settings page.
- Windows Update requires an active Internet connection, so:
- Make sure your Firewall software allows for exceptions or exclusions for the Windows Update service.
- Make sure the Windows Updateservice is running; e.g., type services.msc.
Note: Contact Microsoft or your system administrator if you are unable to activate the Windows Update service.
Automatic Installation using Windows 10 Plug n Play:
Class Drivers – V4 drivers that ship with Windows 10 are known as Class Drivers. Drivers of this type should always display Class Driver in the name.
Model Specific Drivers – V4 drivers that are downloaded directly from a printer manufacturer website or downloaded from Windows Update are known as model specific drivers.
Verify your USB connection and network connectivity, and then wait while Windows 10 detects your printer hardware.
If USB is connected, then the successful detection and installation of the drivers will result in a Your devices are ready to use notification message, and the printer will automatically appear in Devices and Printers.
If the network is connected, then no notification message is displayed, but the printer will automatically appear in Devices and Printers.
Add Printer: Manual Install – Run Windows Update:
If your printer is on a network, you will want to obtain your printer's IP address; this will ensure a clean new driver installation. You can delete the existing printer object after the newest driver has been installed.
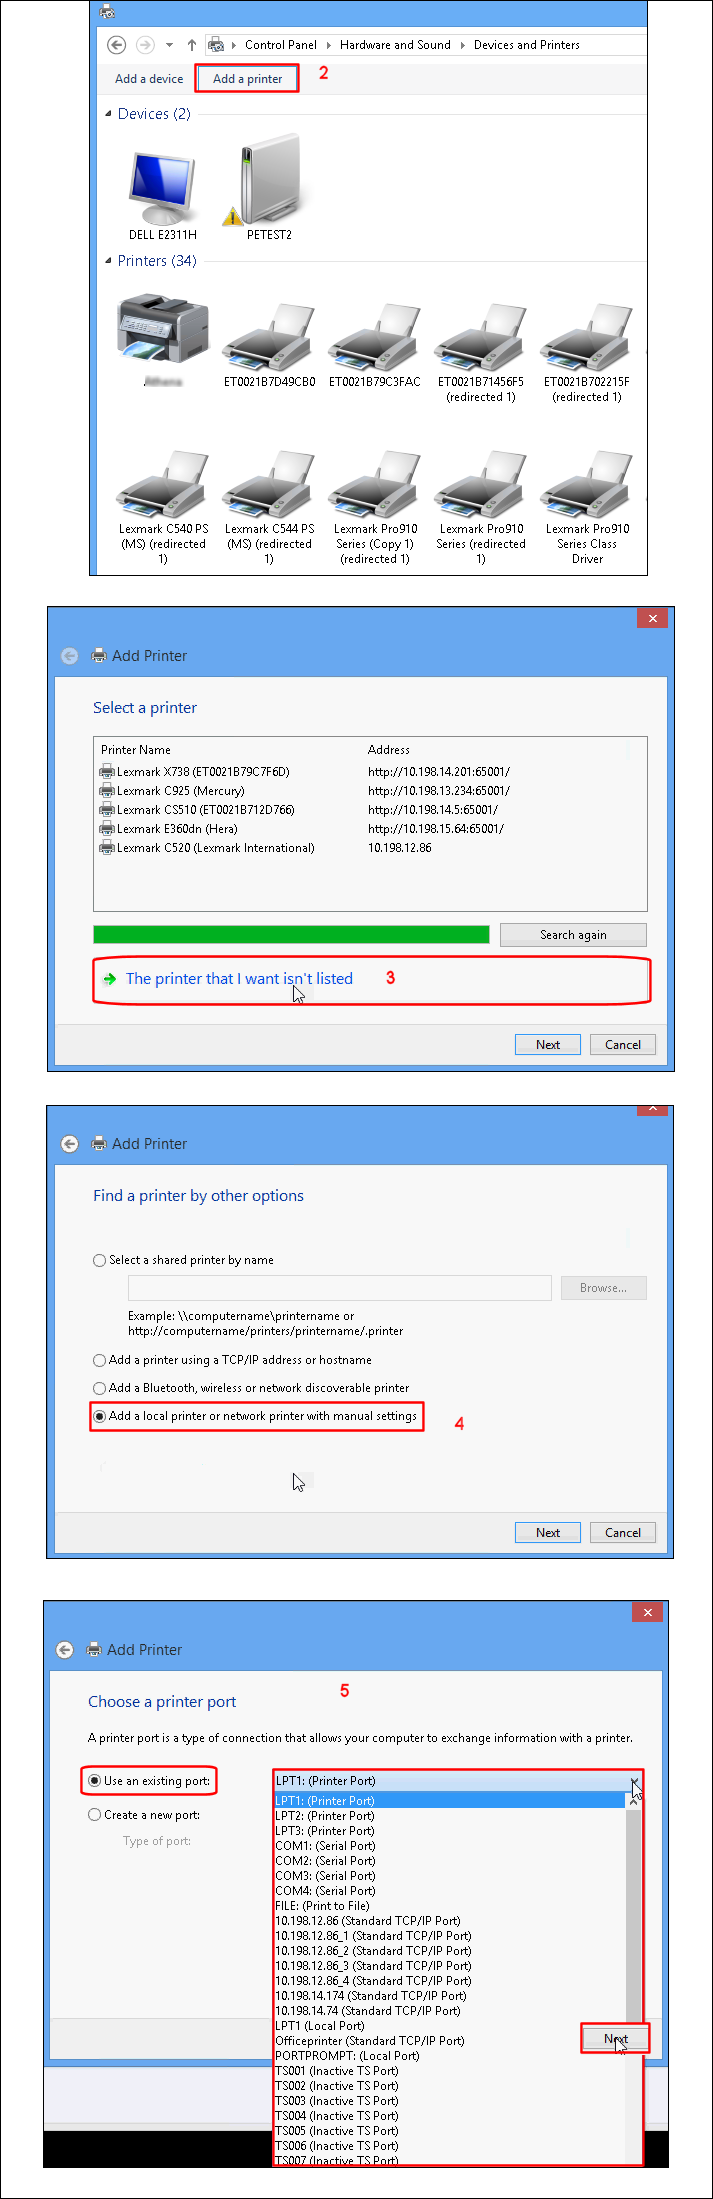
Access Devices and Printers. To do so, perform either of the following:
- Right-click on the Start menu to display the Advanced User shortcuts, select Control Panel, and then go to Hardware and Sound > Devices and Printers.
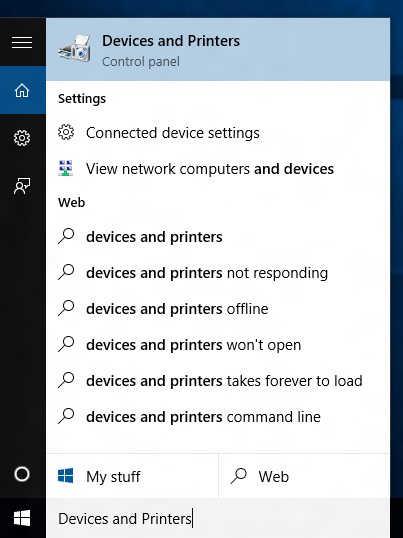
- Alternatively, you may type “devices and printers” in the search field on the taskbar and select Devices and Printers from the search results.
Click Add a Printer.
When the system starts searching for available printers, click The printer that I want isn't listed.
Select Add a local printer or network printer with manual settings, and then click Next.
Check the table below:
If connected... Then select... And... USB
Use an existing port.
Click Next and wait for the port to be located and then proceed to Step 10
Refer to Steps 2‑ 5.
Ethernet or Wireless
Create a new port.
Proceed to Step 6.
From the Type of Port list, select Standard TCP/IP port.
Click Next.
Enter the appropriate information in the following required dialog entry fields:
Hostname or IP address: – e.g., 10.10.10.10
Port Name: – e.g., IP_10.10.10.10
Note: The port name can be changed at the end user's discretion.
If... Then... You want to select which driver type is best for your needs...
Clear the Query the printer and automatically select the driver to use check box.
You want Windows to select a driver for you...
Select the Query the printer and automatically select the driver to use check box.
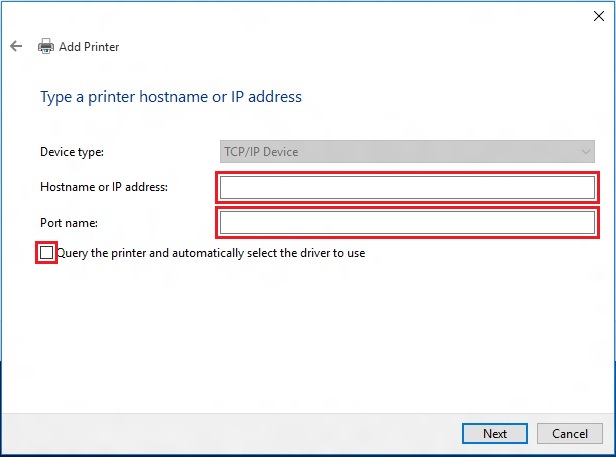
Click Next. Windows will query the printer to confirm successful communication.
Click on Windows Update.
You will see the message "Windows is updating the list of printers. This might take a few minutes."
Note: This procedure may take up to an hour to complete.
Once complete, select Lexmark from the Manufacturers list and select your Printer driver from the Printers list.
Possible driver types that may become available:
- PS3
- XL
- XPS
- Class (V4)
- HBP (Host Based)
- MS
Click Next.
If... Then... Updating an existing driver...
See next step.
Adding a new driver...
See Step 14.
Which version of the driver do you want to use? is displayed if you are updating or replacing an existing driver (type).
Although Add Printer suggests the following... Instead, you should actually select... This ensures... Use the driver that is currently installed (recommended)
REPLACE THE CURRENT DRIVER, and then select NEXT.
Full replacement and update of driver files.
Type a printer name is displayed. Change the printer name if preferred.
Note: When you replace the current driver, you will see a (Copy1, 2, 3...) after the printer name.
Click Next.
Select Set as the default printer, and then click Print a test page, or skip both options and simply click Finish to finalize your printer driver update or installation.
LEGACY ID: HO3979
Rate this article
We appreciate your feedback. We use it to identify content which needs to be updated for accuracy or usefulness.
Thank you for your feedback!