Support article for Lexmark X792
Paper jams in the fuser
Overview
The printer experiences a paper jam in the fuser because paper/media wraps around the fuser roll.
IMPORTANT: As with any paper jam, the following can help preventing paper jam issues;
- Confirm that the media being used are within the printer's specifications for supported media.
- Never mix media types within a tray.
- Flex the print media back and forth to loosen the sheets and then fan them. Do NOT fold or crease the print media. If possible, straighten the edges of the stack on a level surface.
- Ensure that the media trays are being loaded correctly.
- Do not load too much paper. Make sure the stack height does not exceed the indicated maximum height.
- Ensure that the guides in the tray or the multi-purpose feeder are properly positioned and are not pressing too tightly against the paper or envelopes.
- Ensure all sizes and types are set correctly in the printer control panel menus.
Clearing the paper jam
NOTE: The images in the following table show the Lexmark C792 models. However, these directions also apply to the Lexmark X792 models.
Steps | Action | Image |
1 | Open the left-hand access door assembly. | 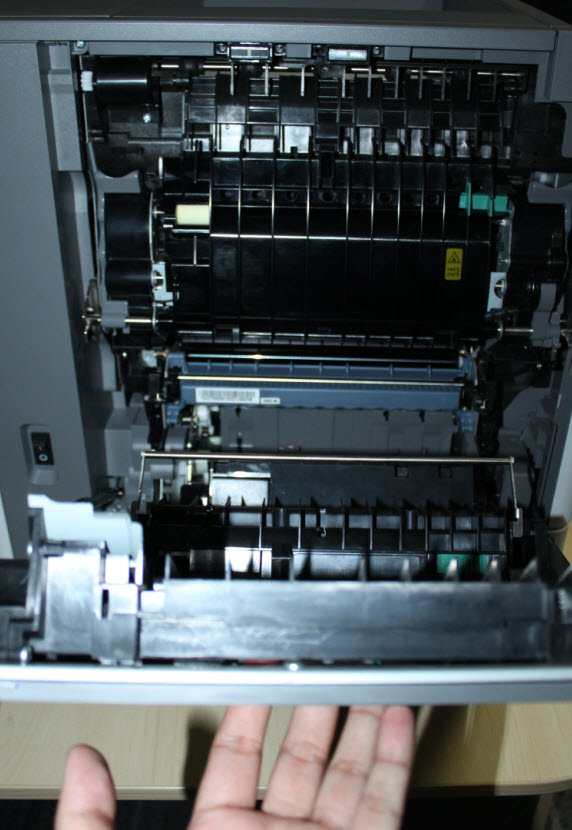 |
2 | If paper is inside the fuser unit, press the greenlever and pull the fuser access door down. Caution! The inside of the printer/MFP may be hot. Allow it to cool before continuing. | 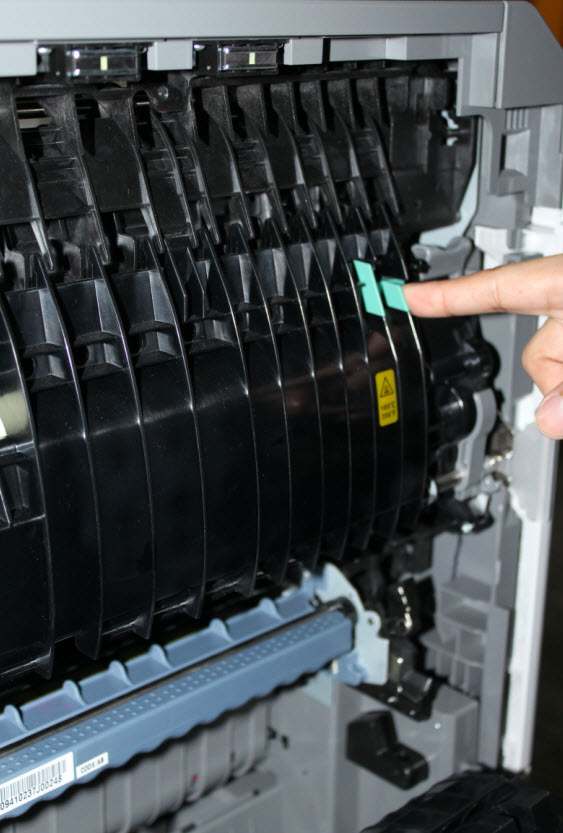 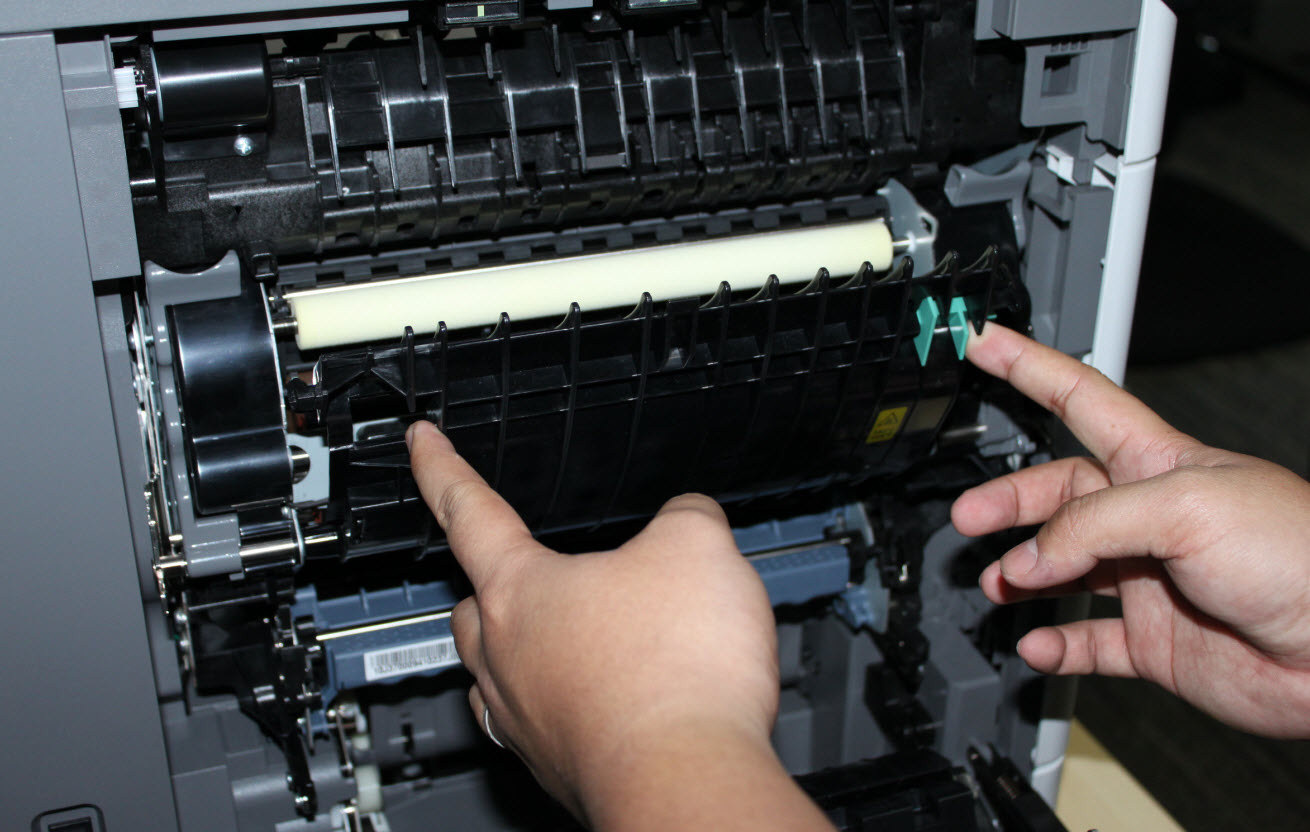 |
3 | Firmly grasp the jammed paper on each side, and then gently pull it out to prevent tearing. Ensure all paper fragments are removed. Note: Do not touch the center of the fuser unit. Doing so will damage the fuser. | No Image |
4 | Close the fuser access door. | 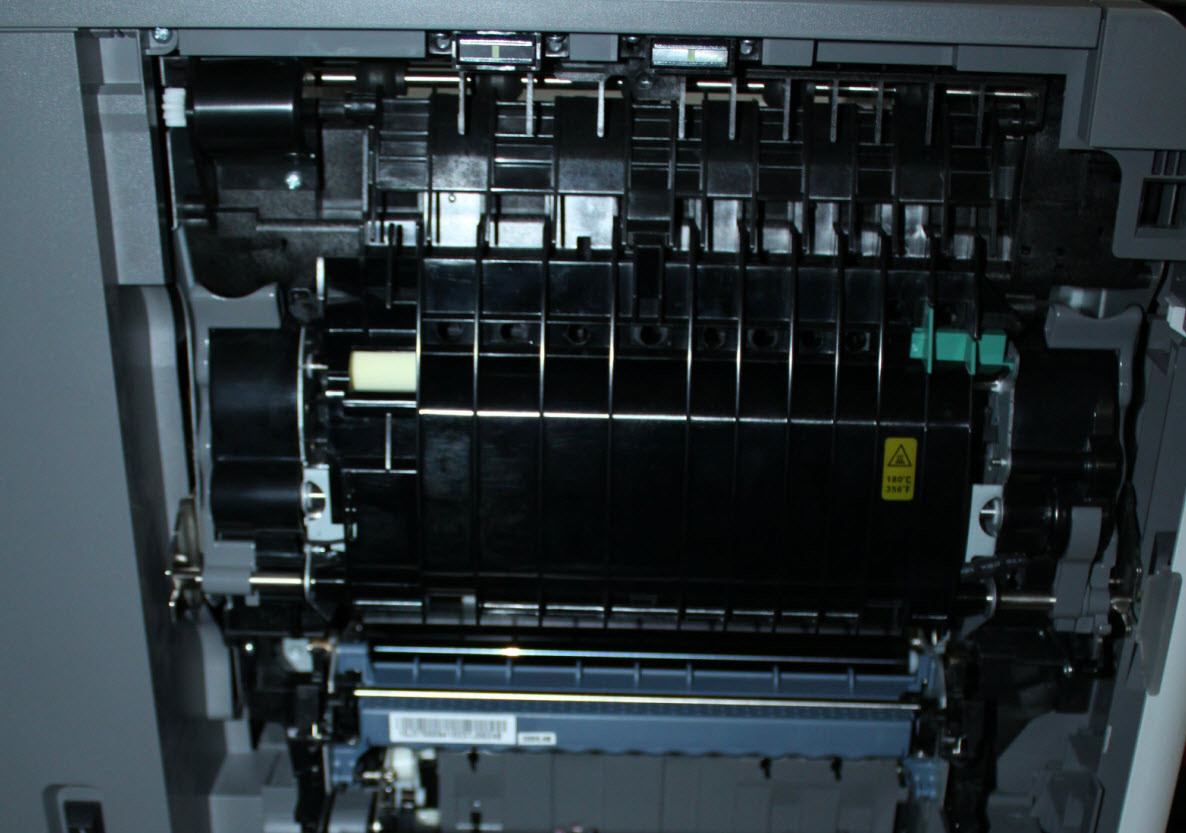 |
5 | Close the left-hand access door assembly. | 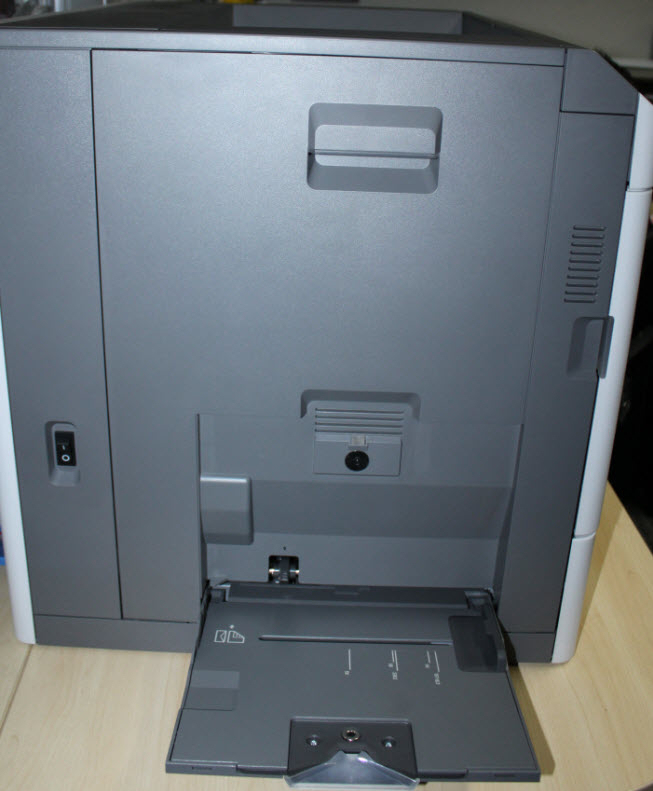 |
6 | From the operator panel, touch Continue, jam cleared. | No Image |
Try printing a test page. If the page prints, the printer is functioning correctly. If the paper jams continue, try the following suggestions below.
Steps | Action | Image |
1 | Power off the printer/MFP completely and disconnect the power cable from its power supply. | No Image |
2 | Open the left-hand access door assembly. | 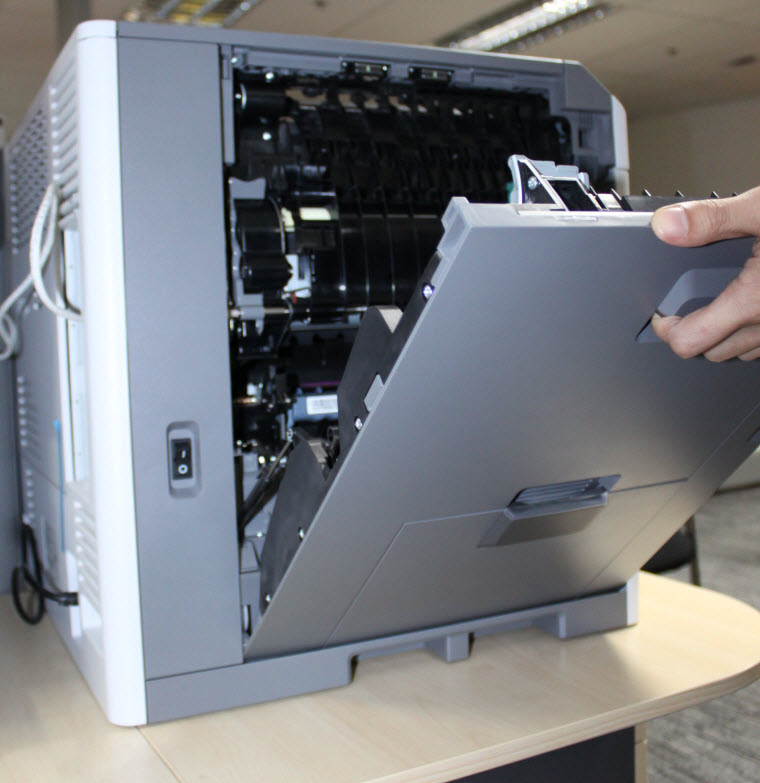 |
3 | If the paper is not visible, pull down the two fuser latches and pull the fuser unit toward you, (see red in right-hand image). Caution! The inside of the printer/MFP may be hot. Allow it to cool before continuing. | 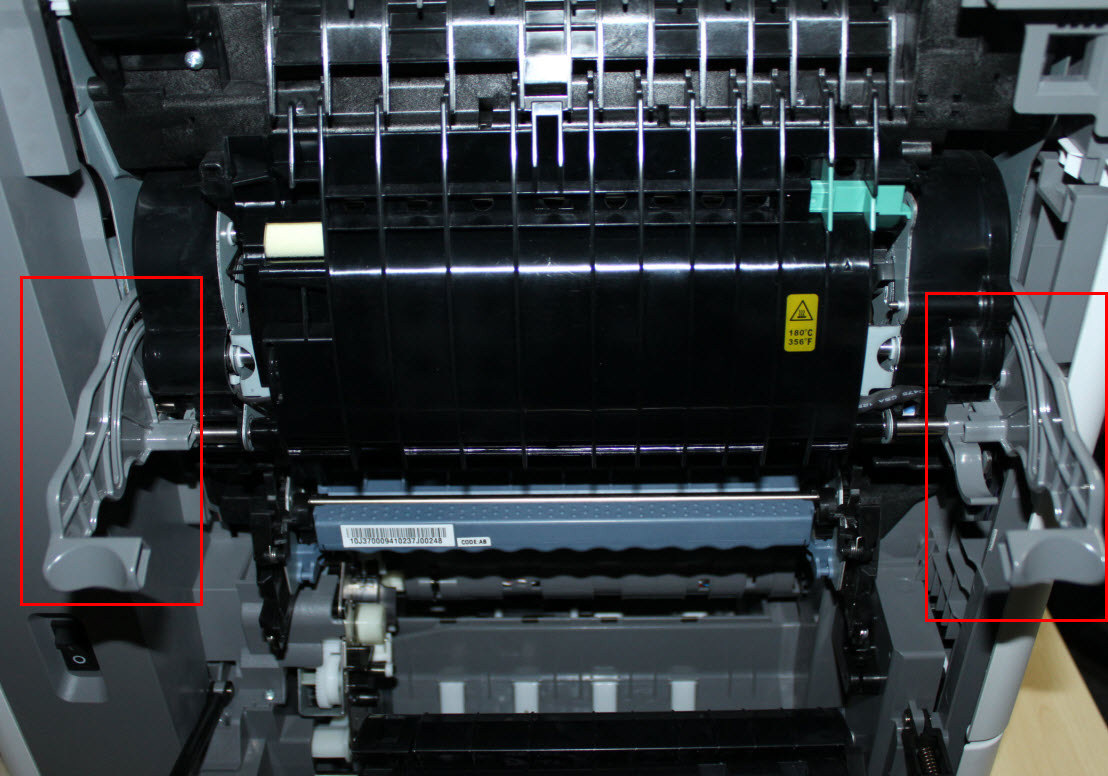  |
4 | Firmly grasp the jammed paper on each side, and then gently pull it out to prevent tearing. Ensure all paper fragments are removed. Note: To prevent any possible damage to the fuser, please do not use sharp objects (i.e., screwdrivers) when removing the jammed paper. | No Image |
5 | Check for any broken or loose parts on the fuser assembly. If damage exists, a service call will likely be required to resolve the issue. | No Image |
6 | Install the fuser back to the printer. Close all doors and covers completely. Note: After inserting the fuser assembly, push up the handles (1) and then push up the tab under the right handle (2) as illustrated in the right-hand image. | 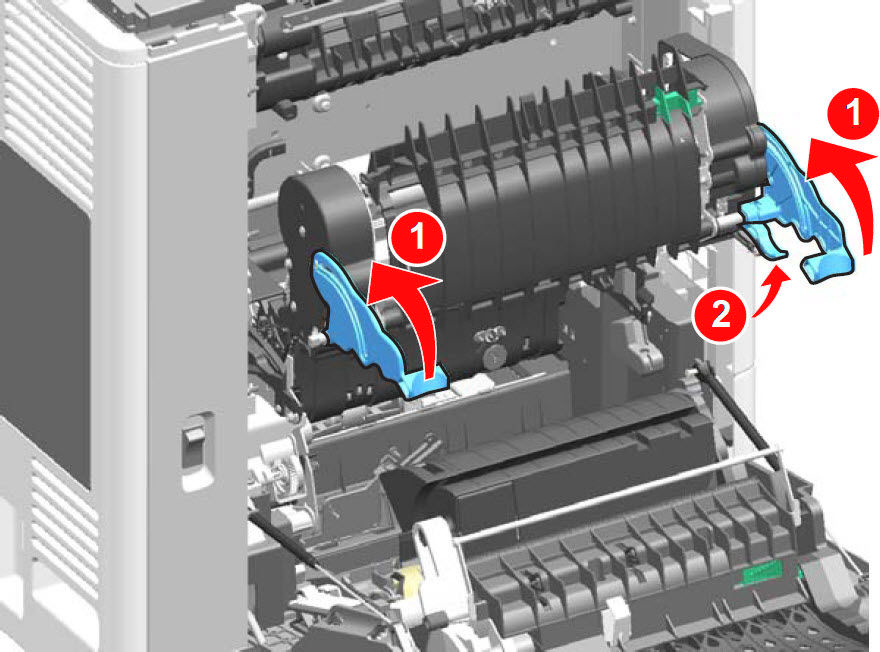  |
7 | Power on the printer/MFP and try printing again. If the page prints, the printer is functioning correctly. If the issue returns, please contact Lexmark Technical Support or a local authorized service provider for additional assistance. | No Image |
Still Need Help?
Please contact Lexmark Technical Support if you need additional assistance.
Please call from near the printer in case the technician on the phone asks you to perform a task involving the printer.
LEGACY ID:SO6330
Rate this article
We appreciate your feedback. We use it to identify content which needs to be updated for accuracy or usefulness.
Thank you for your feedback!