Support article for Lexmark MX711
Maintenance kit replacement procedure
Overview
The maintenance kit is composed of four parts; fuser, transfer roller, picks roller assembly and separator roller assembly.
This document outlines the proper replacement procedure for each of the parts.
Fuser

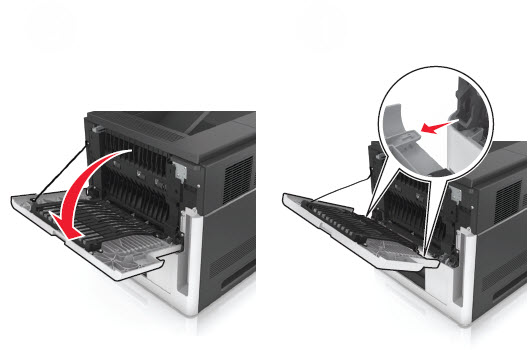
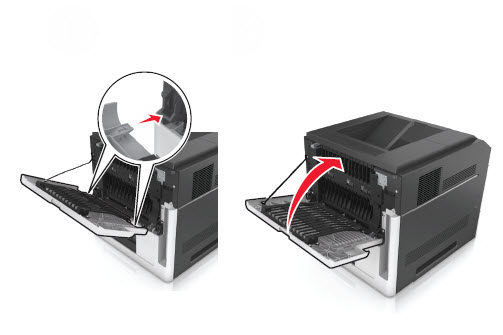
Open the rear door and slide it away from the machine to remove it.
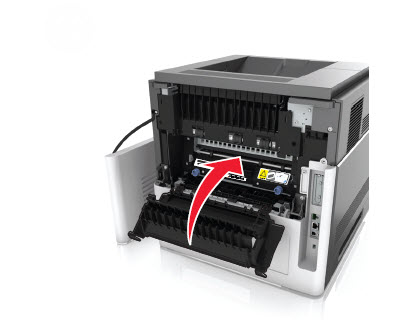
Press the two side latches to open the fuser access door.
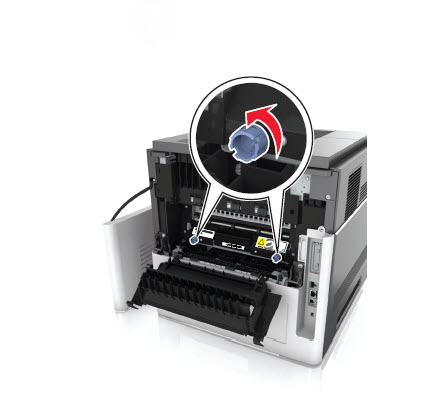
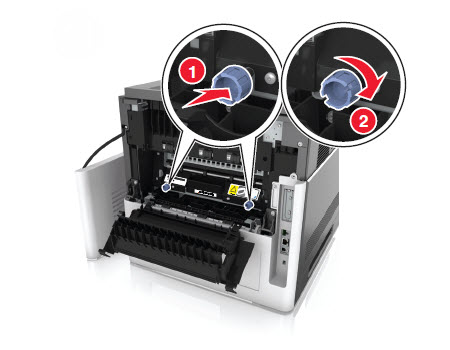
Loosen the two fuser thumb screws.
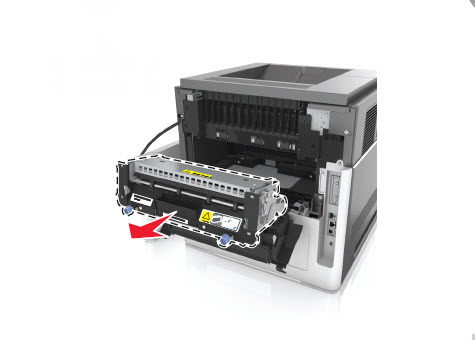
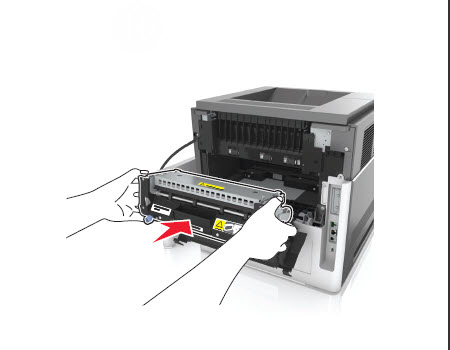
Gently pull the fuser and remove it from the machine.
Insert the new fuser kit and tighten the two fuser thumb screws.
Close the fuser access door.
Fasten and close the rear door.
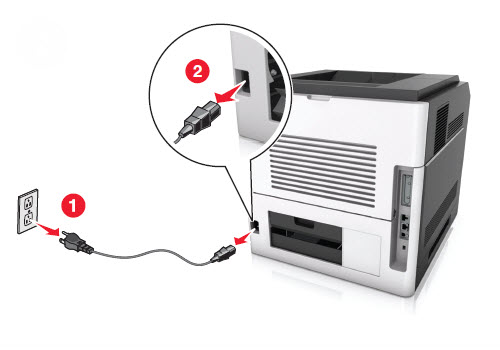
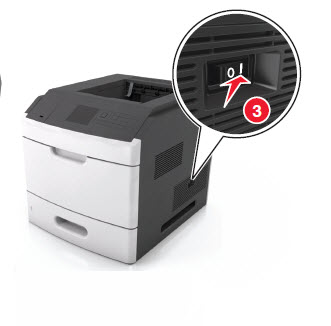
Connect the power cable and power on the printer to test it.
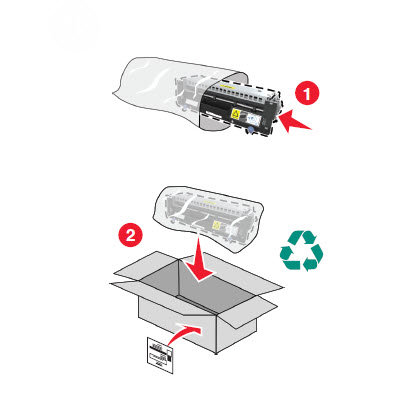
Send the old fuser kit back to Lexmark for recycling purposes. You can use the packaging materials that came with the new fuser kit to do so.
Note:
Click the link to watch the tutorial video on How to replace the fuser kit.
Transfer roller
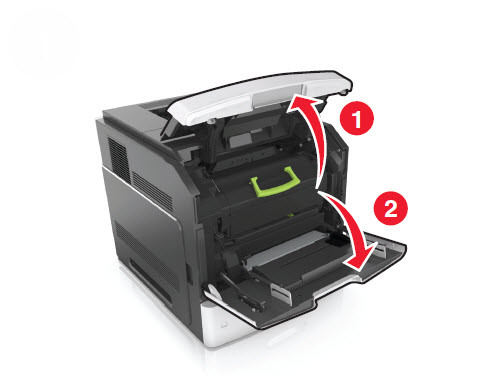
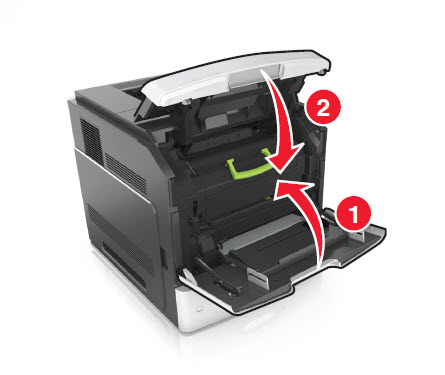
Open the printer control panel cover and front door.
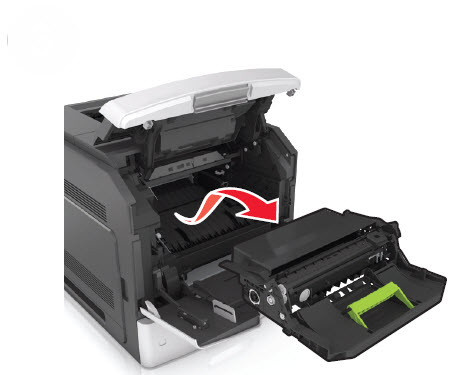
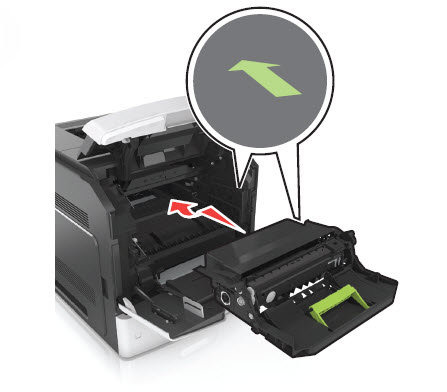
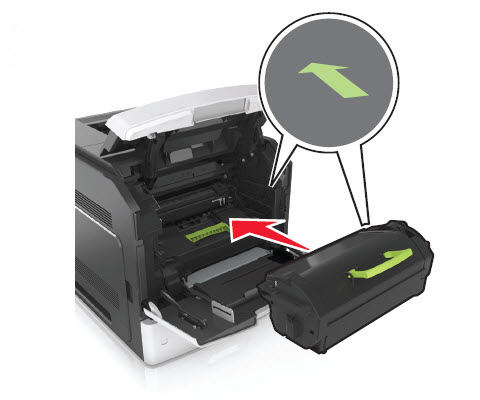
Remove the toner cartridge bottle and imaging unit.
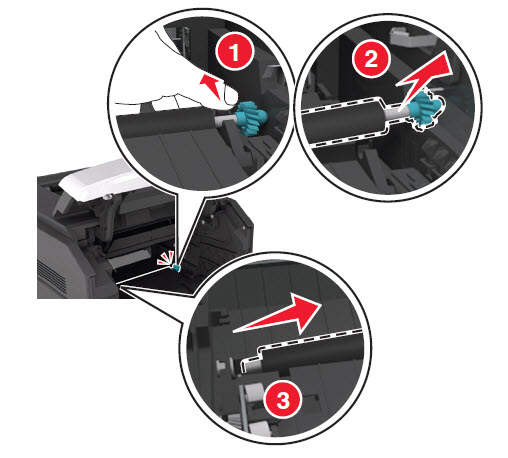
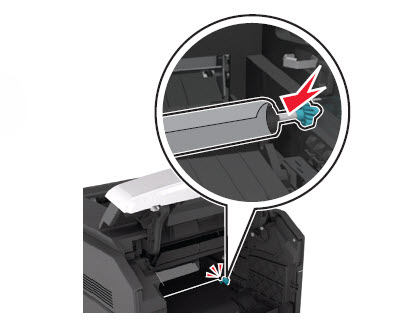
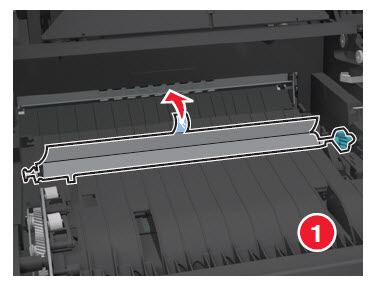
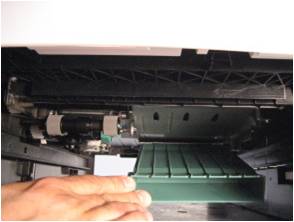
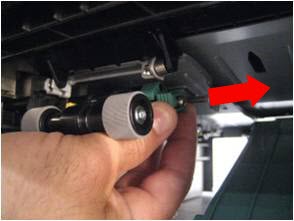
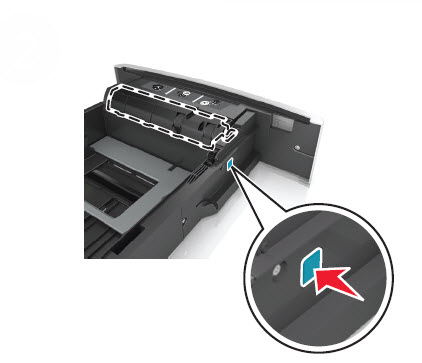
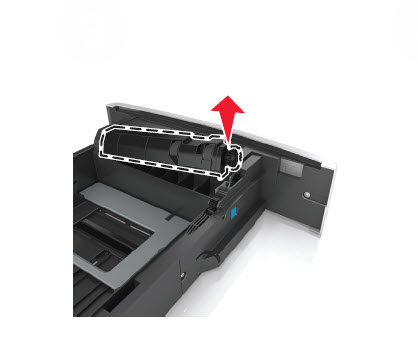
Using the drive gear, gently pull the right-hand side of the transfer roller to slightly detach it from the machine.
- Gently move the transfer roller rightward to disengage it from the left transfer roller arm.
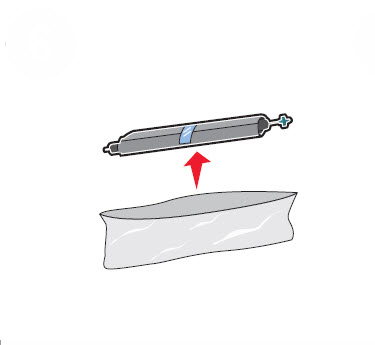
Unpack the new transfer roller kit from the package but do not remove the protective plastic covering the foam surface.
Note: When installing the new transfer roller, avoid all contact with the foam surface, or print quality issues could result.
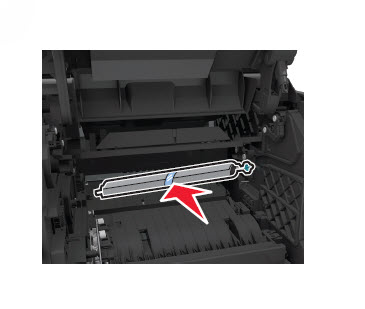
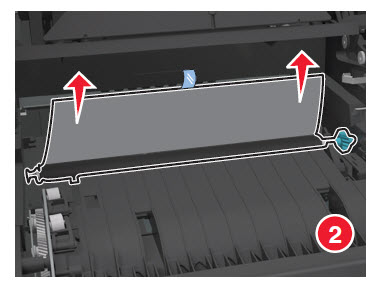
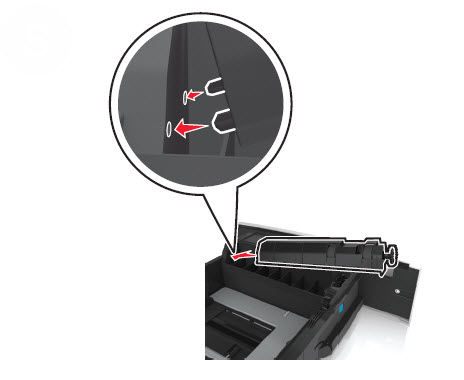
Insert the transfer roller starting on the left side and then on the right. A clicking sound indicates that the transfer roller has been locked in place.
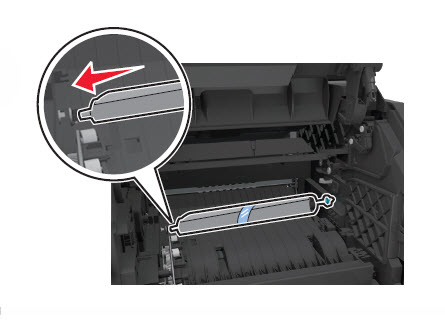
Slowly pull to remove the protective plastic.
Insert the imaging unit and then the toner cartridge.
Close the control panel cover and front door.
Pick roller assembly
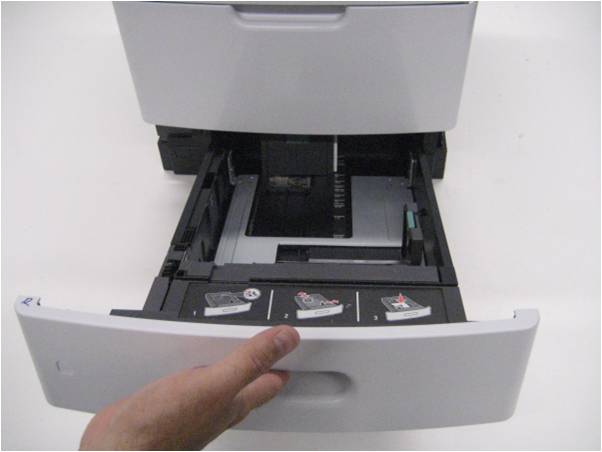
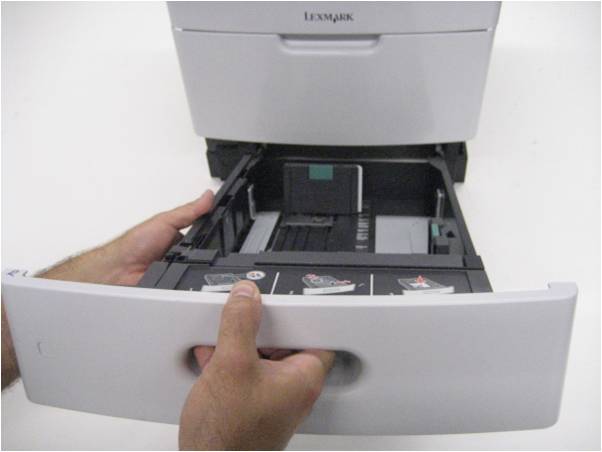
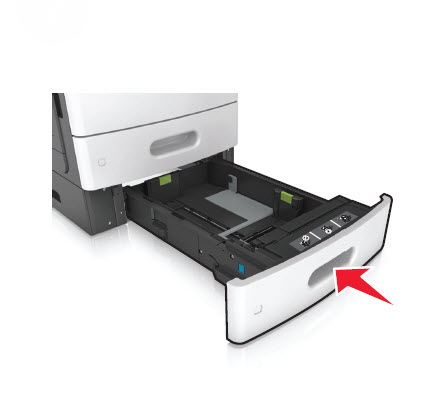
Pull the media tray out from the printer until you meet resistance.
Lift the tray and remove it from the printer.
Lower the front duplex flap to gain access to the pick roller assembly.
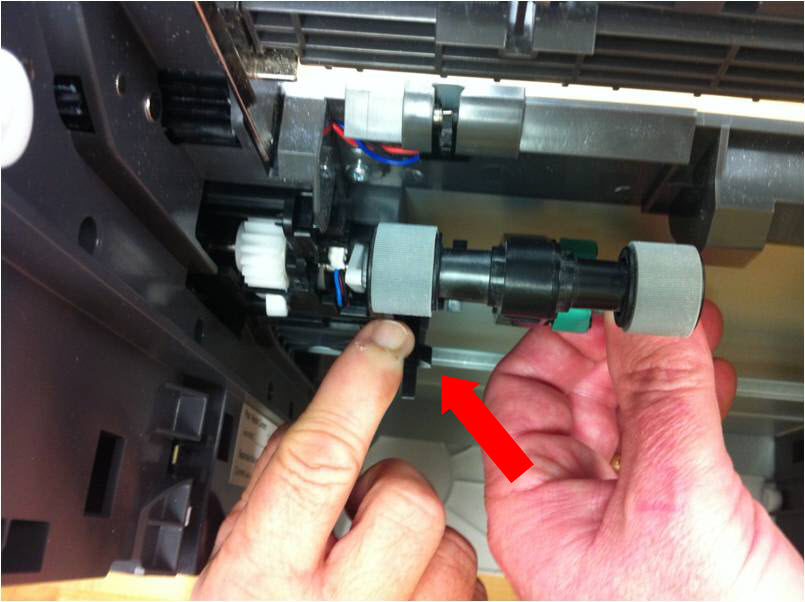
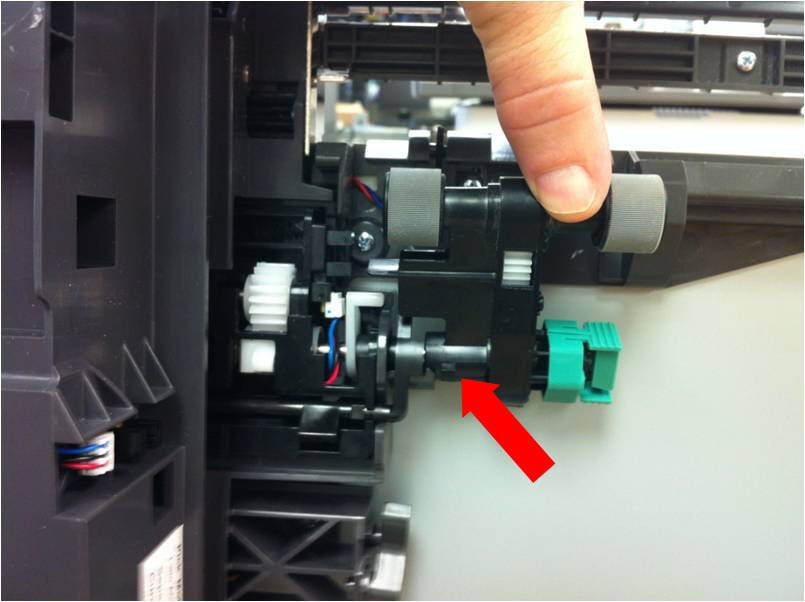
Squeeze both sides of the pick roller latch, and move the pick roller assembly rightward to remove it.
To install the pick roller assembly and the paper flag down out of the way. This is especially important on input options because less room exists in this area.
Notes:
- When installing the pick roller assembly, avoid all contact with the roller surfaces, or paper jams could result.
- Failure to keep the flag out of the way while installing could result in the flag being broken off or trapped under the pick assembly, and the printer will not pick paper properly.
- If you are having difficulties doing the replacement, please contact Lexmark Technical Support.
Separator roller assembly
Remove the media tray from the machine.
Press the button to release the separator roller from the tray.
Remove the separator roller assembly.
Install the separator roller assembly by inserting first the right-hand side (if you are facing front of the tray), and then insert the left side. A clicking sound indicates that the roller has been locked in place.
Insert the media tray back to the machine.
LEGACY ID: HO3894
Rate this article
We appreciate your feedback. We use it to identify content which needs to be updated for accuracy or usefulness.
Thank you for your feedback!