Support article for Lexmark C734N
Photoconductor replacement instructions
Issue description
This article outlines the proper handling and replacement procedure of the Photoconductor Unit (PCU) for a Lexmark C73x and X73x printer/MFP.
Solution
To avoid overexposing the Photoconductors, do not leave the door open for more than ten minutes.
To access the Photoconductor follow the steps below:
- For a Lexmark C73x
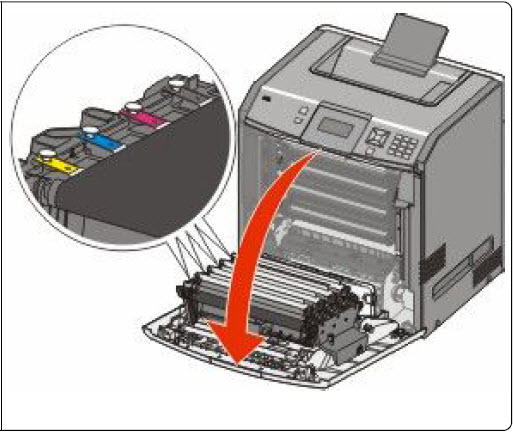
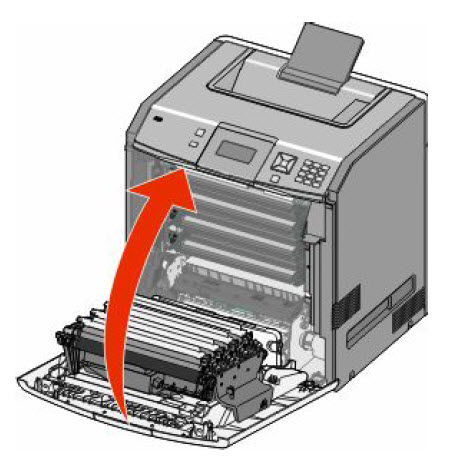
- Power off the printer and open the front door by pulling it down.
- For a Lexmark X73x
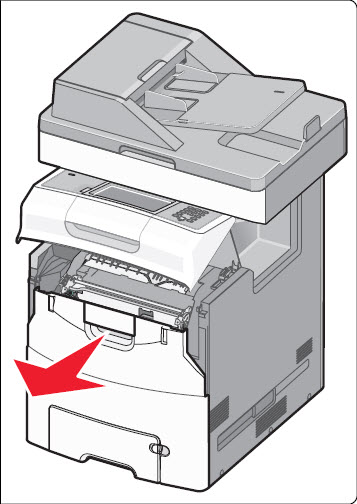
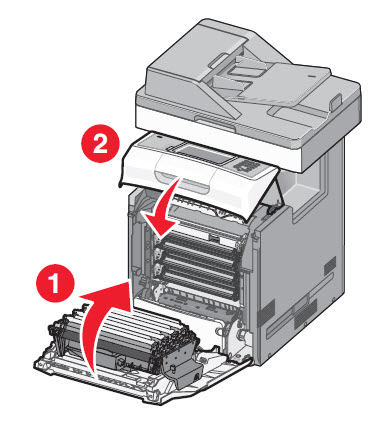
- Power off the MFP. Open the upper-front door and then pull down the lower-front door.
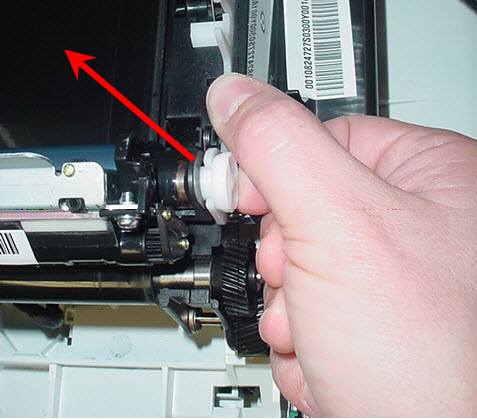
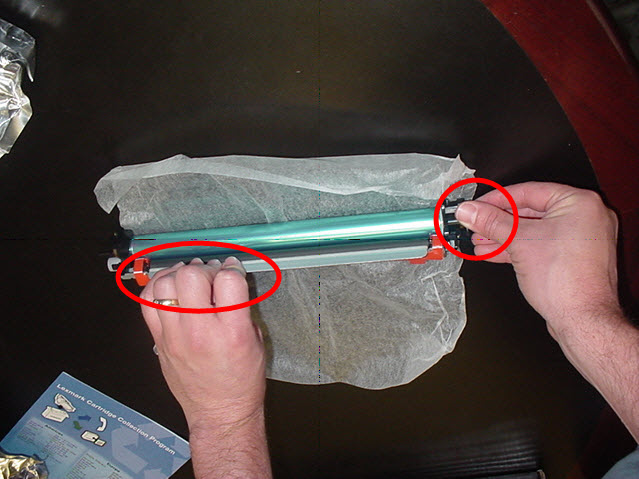
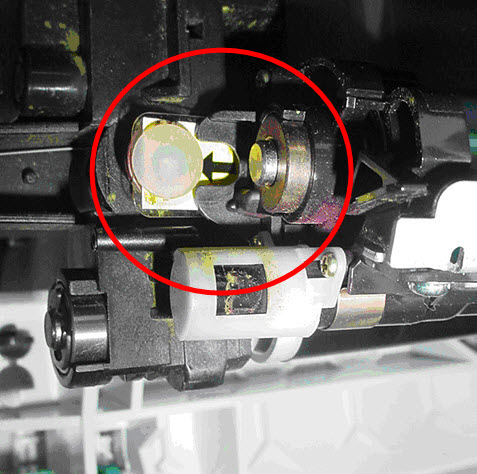
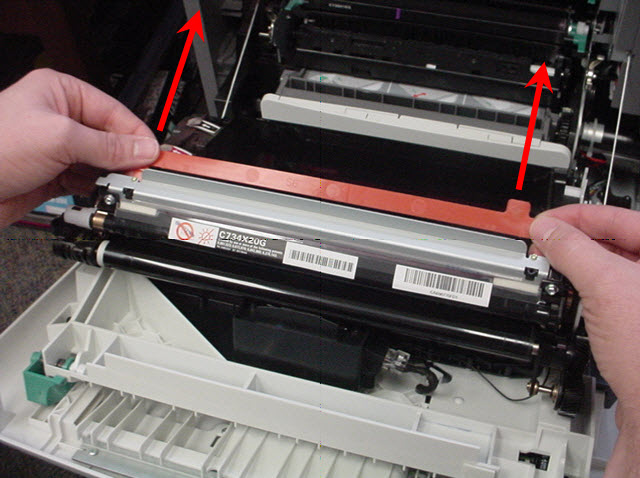
Remove the exhausted Photoconductor (PCU) by unsnapping and pulling up the white coupler from the right side of the printer. You may handle the PCU on the portion encircled in red as shown in the right-hand image.
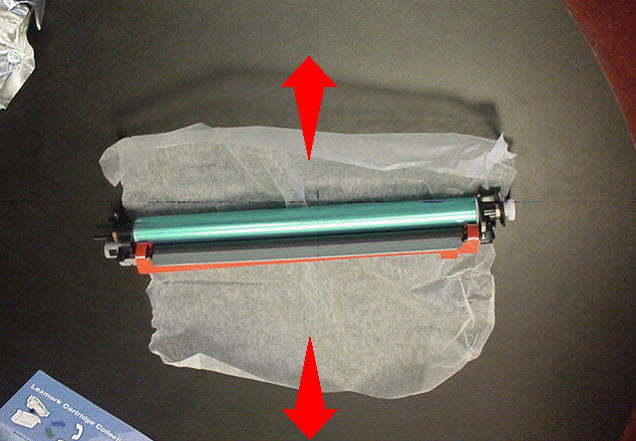
Lift up on the right side of the PCU and then slide it to the right in order to remove it from the printer.
Remove the replacement PCU from the packaging.
Note: Do not use a sharp object to cut the label because it may damage the PCU.
Pick up the PCU without touching the blue, shiny drum. You may handle the PCU on the portion encircled in red as shown in the right-hand image.
Note: In order to avoid contamination, do not touch the surface of the drum.
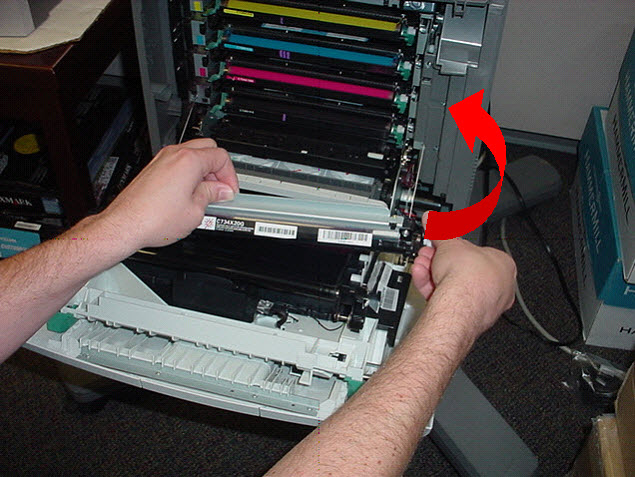
Align and insert the left end of the PCU under the opaque plastic pin on the Transfer Belt Module.
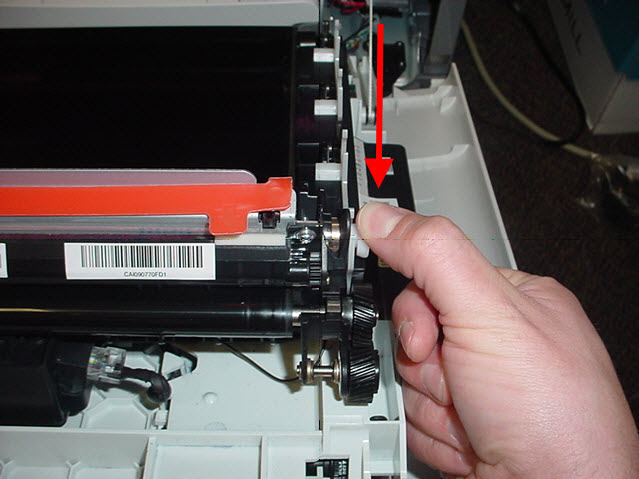
Snap the white coupler on the right-hand end of the PCU into place. Then remove the red packaging strip from the top of the PCU by rotating it over the metal bracket and pulling it straight out.
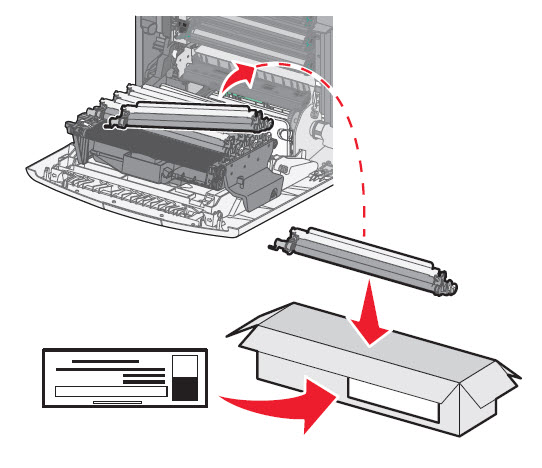
Place the old PCU and return the label into the replacement PCU box to ship to Lexmark for recycling. You should find the shipping instructions and return label inside the package of the new PCU.
- For Lexmark X73x, close the lower-front door first before closing the upper-front door.
Note: For optimum print quality and reliability, Lexmark recommends always replacing photoconductor units in complete sets.
Note
After all of the exhausted PCU’s are physically replaced, please complete this last step even if you did not get an error message. Failure to do so could result in degraded print quality.
- If you did not get any error message after you have replaced a photoconductor, or if you see Ready on the printer display screen, click the appropriate printer below to see steps on How to Reset the Photoconductor Count of a/an:
- If you see any of these error messages on the printer's control panel:
- ‑84 Replace <color> Photoconductor
- ‑84 <color> Photoconductor nearly low
- ‑84 <color> Photoconductor low
- Click the appropriate printer below for the steps to clear the error:
- Be sure to reset the photoconductor life counter for each photoconductor replaced.
Resetting the Photoconductor count of a Lexmark C73x
To specify the replaced photoconductor, press the
 button. A
  will display next to Supplies Menu
Press the
 button. A appears next to the Replace Supply.
Press the
button.Press
 until the appears next to the color of the Photoconductor that you just replaced. Select All if you want to replace all four colors.
Press the
<color> Photoconductor replaced appears, then the Yes appears.Press
. If more than one photoconductor is replaced, you may need to repeat Steps 1 to 6Press the
 button until Ready appears.
Resetting the Photoconductor count of a Lexmark X73x
On the home screen, touch the
.
Press the
 next to Supplies Menu.
Press the
next to Replace Supplies.Press
next to the supply item you replaced; i.e,- All
- Cyn Photoconductor
- Magenta Photoconductor
- Yellow Photoconductor
- Black Photoconductor
When <> Photoconductor Replaced appears, touch Yes. If more than one photoconductor is replaced, you may need to repeat Steps 1 to 5.
Press the
 button at the bottom right-hand side of the touch screen in order to return the printer to the Ready state.
To clear the 84 Replace Photoconductor message on a Lexmark C73x
Press down the arrow button until a
appears next to Supply Replaced, and then press the .Replaced <color> Photoconductor will display.
- Yes displays.
Press the
to clear the message. If more than one photoconductor is replaced, you may need to repeat Steps 1 to 4.
To clear the 84 Replace Photoconductor message on a Lexmark X73x
On the home screen, touch the Status/Supplies at the bottom left-hand side of the touch screen.
The printer operator panel will display which color photoconductor needs to be replaced. Press the Supply Replaced button on the touch screen.
Replaced <color> photoconductor will appear on the operator panel. Press the Yes button on the touch screen. If more than one photoconductor is replaced, you may need to repeat Steps1 to 3.
LEGACY ID:SO5271
Rate this article
We appreciate your feedback. We use it to identify content which needs to be updated for accuracy or usefulness.
Thank you for your feedback!