Support article for Lexmark X463
Setting up a password-protected file share for the Scan to Network Folder
Issue description
This article provides instructions on how to share a folder for Scan to Network Folder (SNF) app in a Windows and/or Mac OS X environment.
Note: This procedure requires administrator's or power user rights or permissions. Group policies may restrict the ability to properly share a folder and prevent proper use of this folder.
Index
Pre‑requisites
The following prerequisites are critical to creating a successful share:
You have administrator's privileges enabling you to share folders.
You have user privileges allowing Full Read & Write, Change, or Read access control to a shared folder.
A working network connection for local and remote computers.
Windows 7 folder creation & sharing example
Other Microsoft operating systems will follow similar procedures, but nomenclature and setting locations differ by operating system. Please reference Microsoft's technical resources or seek additional assistance from your network administrator if necessary.
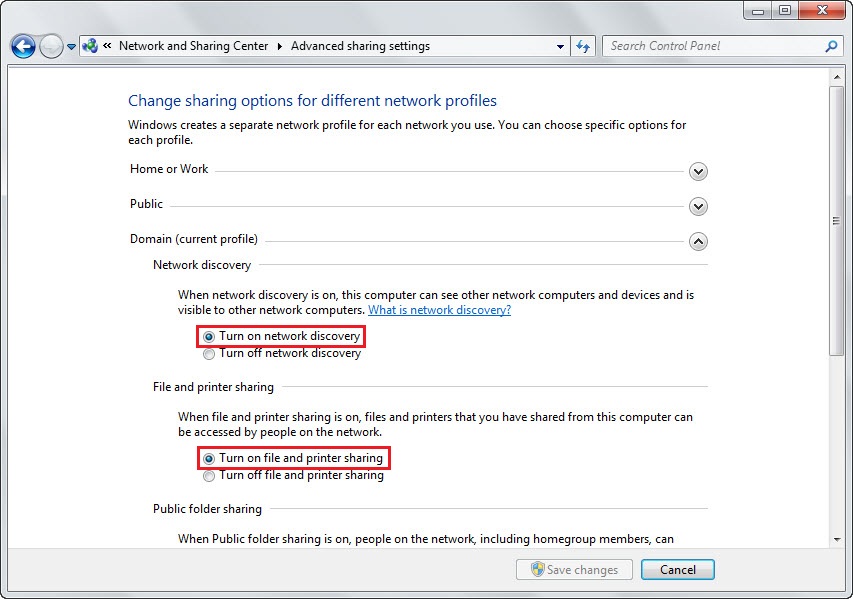
Make sure File and Printer Sharing is enabled.
Note: Navigate to Start > Control Panel > Network and Sharing Center > Change advanced sharing settings link > Turn on both Network discovery and File and printer sharing.
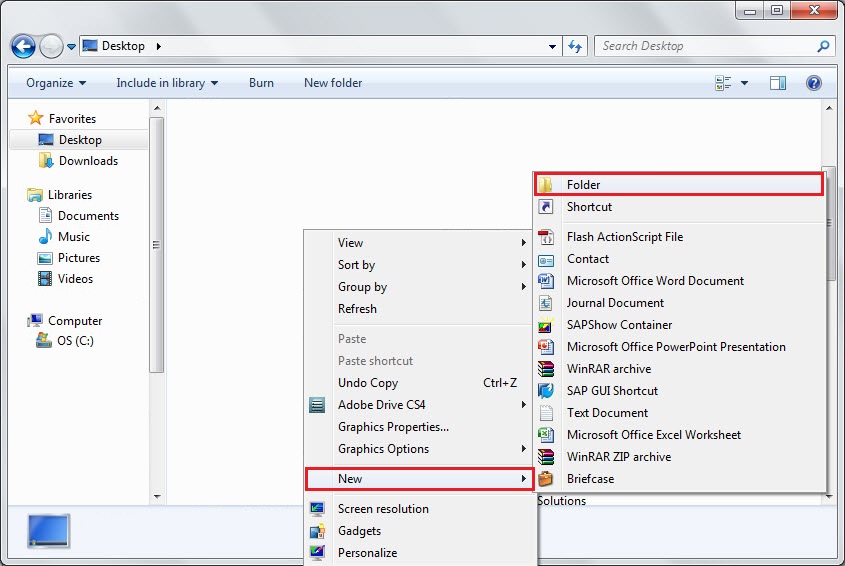
Choose a scan destination directory on your computer. If there is no folder yet, create one by performing the following:
- Right-click in an open area of the window or preferred folder location.
- From the drop-down menu, select New, and then Folder. Enter a Name for the folder.
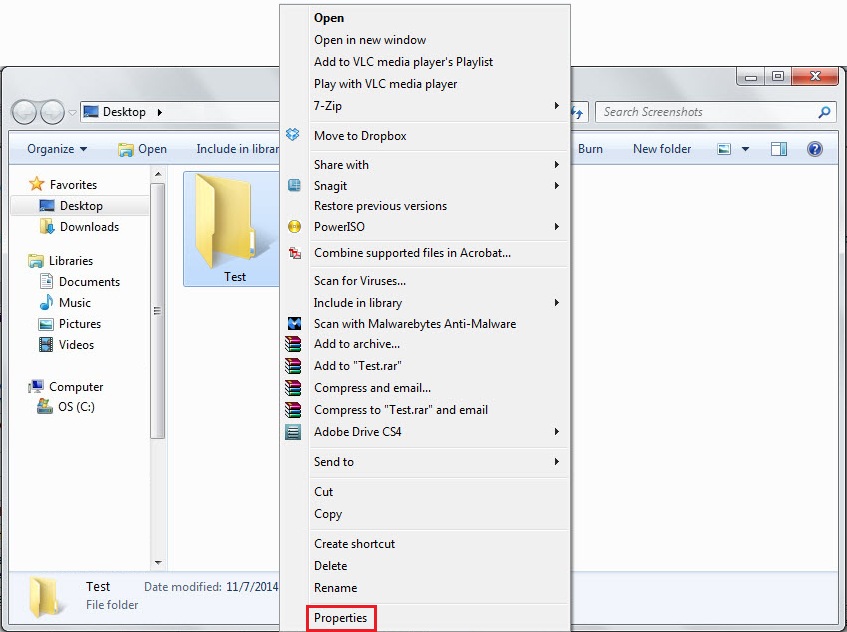
Right-click on the newly created folder, and select Properties from the drop-down menu.
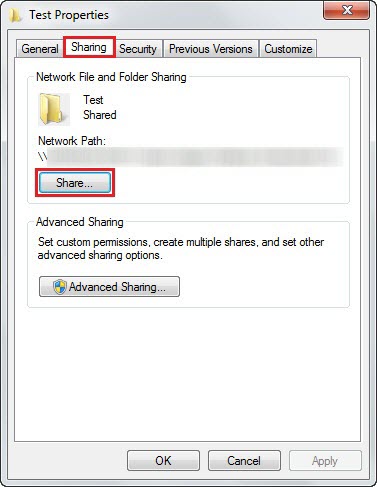
Click the Sharing tab, and then select Share...
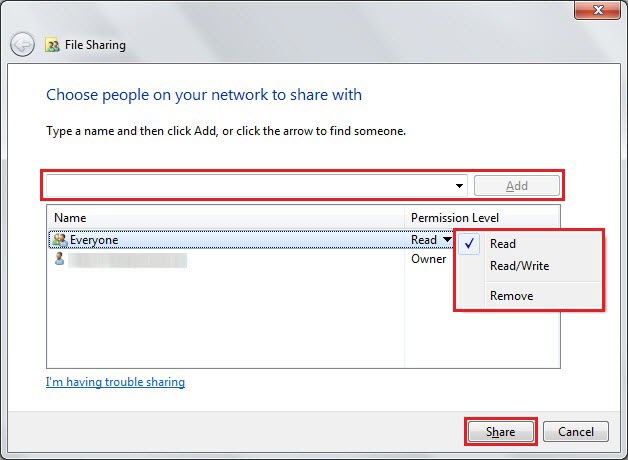
A new window with a list of all the users that currently have access to the folder will display. You may add users to the list by selecting Everyone or specific users, set specific permissions for the folder, and then click Share.
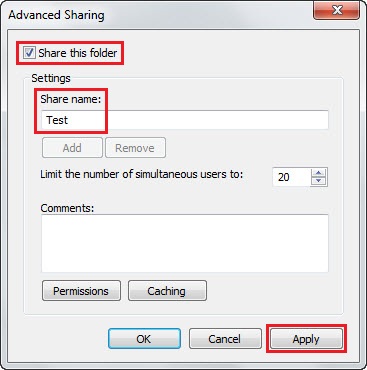
Click on Advanced Sharing..., place a check on Share this folder, enter a Share name, and then click Apply.
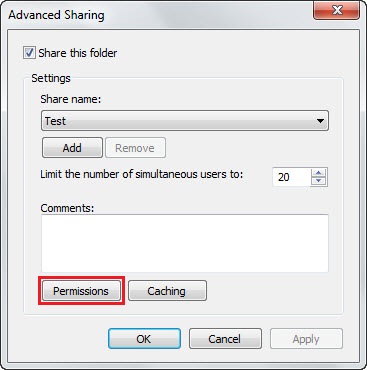
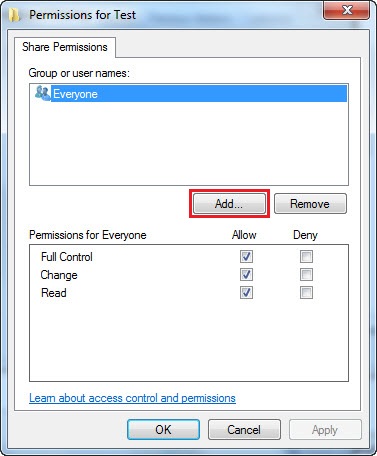
Click on the Permissions button.
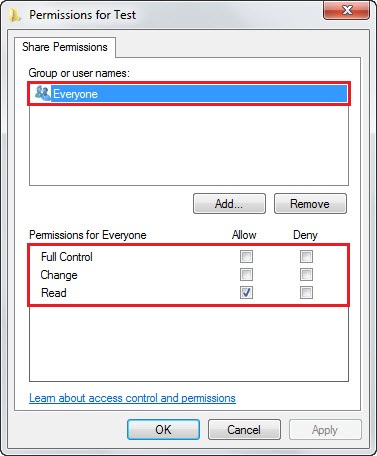
You may see Everyone listed with Read access only.
Note: You may add permission/s (e.g., Full Control and/or Change) or remove this entry depending on your network infrastructure.
Click Add... to give other users access to this folder.
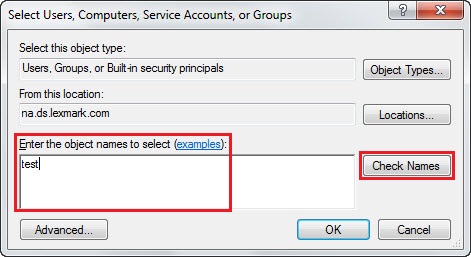
Type each user name into the "Enter the object names to select" dialog, and then click Check Namesto find users.
Note: This value is often the network login name within a given domain; however, this is not always true. Where it says, "examples" click to show you additional value possibilities.
Once you have verified the correct users are listed, click OK.
Highlight each user's account entry under the Permissions window, select required rights-per-user, click Apply and then OK.
- Full Control allows the user to modify, read, add, and delete files in the folder. This person will also be able to adjust these permissions, or take full ownership of the folder.
- Change allows the user to modify, add, or delete files in the folder.
- Read allows the user to read the files in the folder.
Lastly, the next steps may need to be performed (based on your network topology).
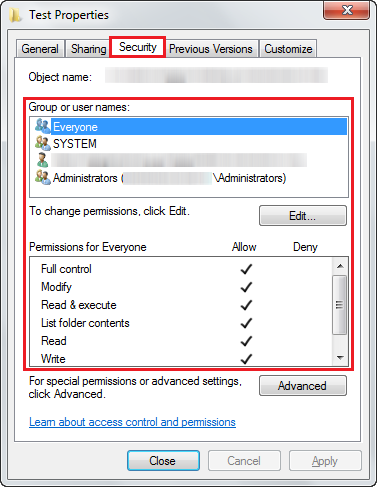
- Click on the Security tab and then click Edit...
- Add all the user accounts that you have added in the Permissions window in Step 9-10.
- Click OK when you are done.
- Click Apply and then OK.
Note: To add multiple user accounts, type a semicolon as shwon here, user1; user2; and type a space after the first account name, and then repeat as necessary for each user.
Note: Users within a the Domain or Workgroup with correct permissions will now be able to access the files within that shared folder. However, this still doesn't validate access to the share across the LAN.
Back to Index
Test access to the shared folder via mapping
Absence of errors should indicate success. Exceptions may apply, so consult with your network administrator to identify any problems encountered when mapping the drive to a share on your network.
Right-click on My Computer, and thenclick Properties.
Locate the Computer name, domain, and workgroup settings section.
Write down the first part of the Computer name. Also, take note of the Domain or Workgroup name.
Open Explorer, and then select Map network drive.
Select a free and available Drive Letter from the drop-down menu.
Enter the folder path in a UNC* structured format. For example, \\thecomputername\sharename.
Note: These names were established in Step 3 of this current procedure and Step 6 of the above procedure.
If you are logged in as administrator on a workstation configuring for a user, or if this is a remote computer that contains the shared folder requiring a different log-in username and password, click on Connect using a different user name.
Enter that user's security user name and password credentials.
Click the Reconnect at login checkbox if this network drive should be mapped permanently. Otherwise, this drive will un-map when the user logs out of this computer.
Click OK.
Click Finish. Absence of errors should indicate success.
Note: You should now see the newly mapped drive letter pointing to the share. *Uniform or Universal Naming Convention structure: ( \\ ) [servername or computername(hostname) or IP address] ( \ ) [sharename or folder share]. This excludes the parenthesis and brackets.
Other drive mapping notes:
Microsoft Vista users: Open Computer and click on Map a drive.Microsoft Windows 7 Explorer users: The file menu bar is no longer visible.
To display the file menu bar, press F10 orAlt key.
Back to Index
Mac OS X folder creation & sharing
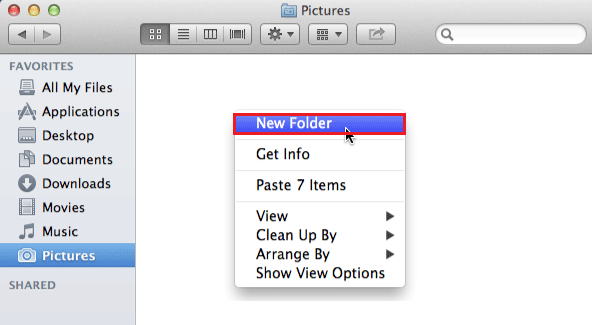
Choose a scan destination directory on your computer.
- If a folder has not been created, proceed to the following steps:
- Right-click (i.e., hold down the ctrl key then click your mouse button) in an open area of the window or preferred folder location.
- From the drop-down menu, select New Folder. Enter a Name for the folder.
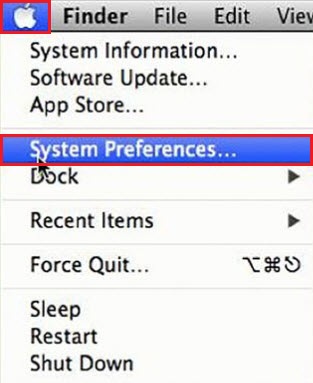
Click on the Apple icon in the menu bar, and select System Preferences.
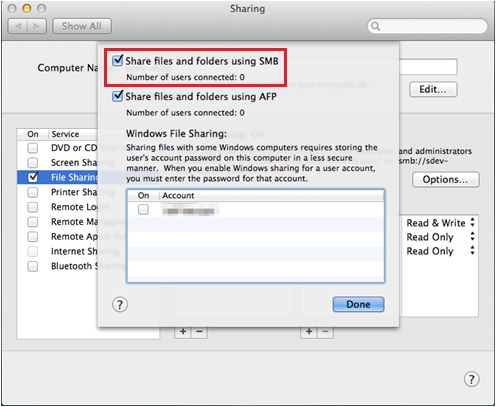
Select Sharing.
Check File Sharing to turn on the service.
Check Share files and folders using SMB.
Note: SMB protocol must be enabled to work with SNF.
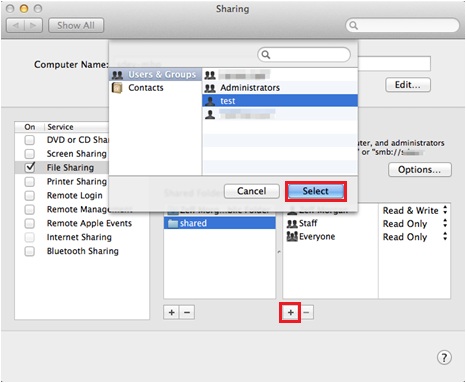
Click the (+) button under the Shared Folders box.
Navigate to the created share folder in Step 1, and then click Add.
Click the (+) or (-) buttons to add or remove users from the list of allowed users.
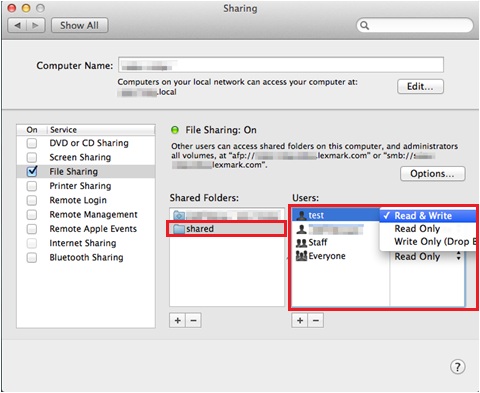
Select an appropriate level of authority or permissions to the user.
Note: Make sure you have the correct folder and user highlighted when making these changes. Perform the following on the printer's SNF setting via the embedded web server (EWS) > Settings > Embedded Solutions or Device Solutions - Solutions (eSF) or Apps - Apps Management.
Select either of the highlighted Authentication Options when adding a new destination in SNF.
Note: Use the user account and password in OS X that has access to the shared folder.
LEGACY ID: HO3633
Rate this article
We appreciate your feedback. We use it to identify content which needs to be updated for accuracy or usefulness.
Thank you for your feedback!