Creating a Z-fold and Z-fold half sheet using the control panel
Learn how to create a Z-fold and Z-fold half sheet using the control panel.
For more information on the finisher configurations for booklet jobs, see Finisher configurations and supported finishing jobs.
Before creating a fold, make sure that:
- The paper is loaded with the short edge toward the right side of the tray.
- The paper size or paper type is supported by the finisher configuration. For more information, see Paper sizes supported for fold jobs or Supported paper types.
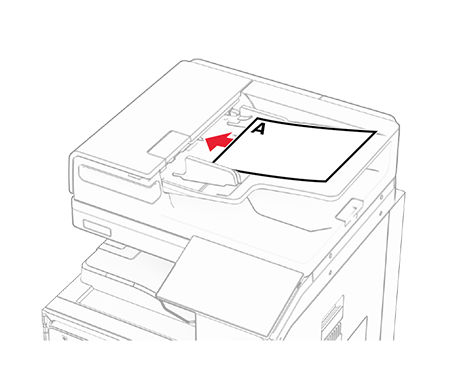
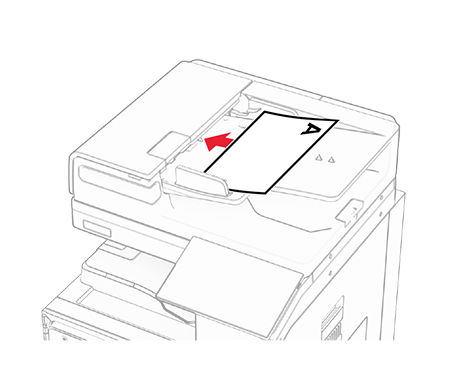
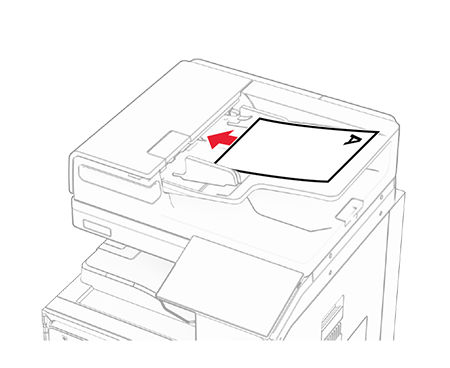
- Load an original document into the ADF tray faceup.For a document in landscape orientation, do either of the following:
- If loading short-edge first, then place the top of the page toward rear of the printer.
- If loading long-edge first, then place the top of the page toward the right side of the printer.
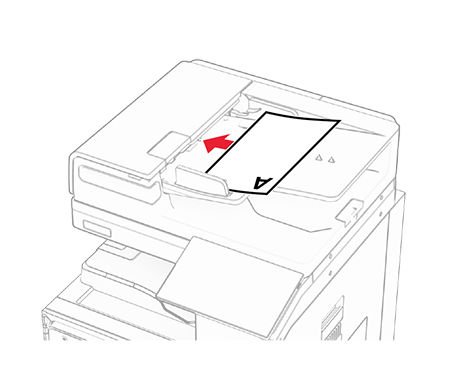
For a document in portrait orientation, do either of the following:- If loading short-edge first, then place the top of the page toward the right side of the printer.
- If loading long-edge first, then place the top of the page toward the front of the printer.
To avoid a resized image, make sure that the original document and tray have the same paper size. - From the control panel, selectCopy.To avoid a cropped image, make sure thatCopy FromandCopy Tohave the same paper size setting.
- SelectMore Settings, and then selectFinishing Options.
- SelectFold, and then select either of the following:
- Z-Fold—Folds each page separately.
- Z-Fold Multiple—Folds all pages together.
- Z-Fold Half Sheet—Folds each page separately.
To return to theCopymenu, selectFinishing Optionsagain. - SelectCopy.