Mounting the device on a wall
Learn how to mount the Optra device on a wall for easy access.
These instructions apply only to Optra Compute CX1000/CX2000 and Optra VZ1000/VZ5000/VZ5100/VZ6100.
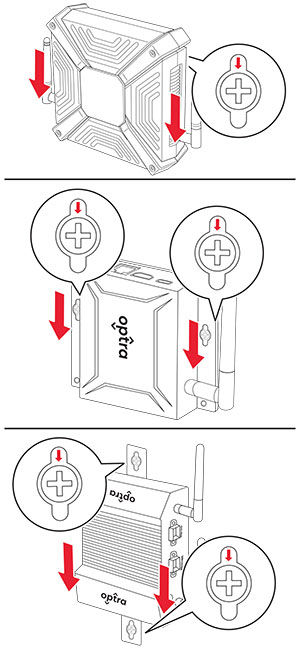
- Select a location on a wall inside a building on which to mount the device.Make sure that there is adequate clearance around the device.For Optra VZ5100/VZ6100, install the mounting bracket to the device.
- Using a T‑10 Torx screwdriver, remove the two center screws at the bottom of the device.Align the slots on the mounting bracket with the holes on the device, and then install the screws.
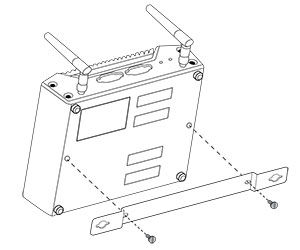 The bracket must be oriented correctly to allow clearance for rubber pads on the bottom of the device.
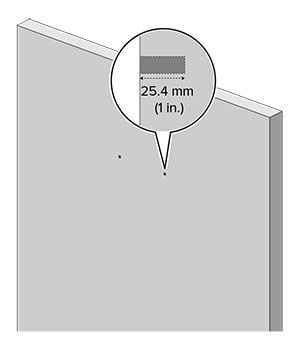
 - Hold the device against the wall temporarily, and then mark two holes on the wall corresponding to the holes on the device.For Optra Compute CX2000, you can also mount the device using the four corner holes. These holes require #4 or M4 screws.Drill holes about an inch deep into the markings on the wall.
 Install 1.5‑inch‑long #6 standard wood screws into the holes, leaving about half an inch of the screws protruding. For Optra Compute CX2000, use #4 standard wood screws.
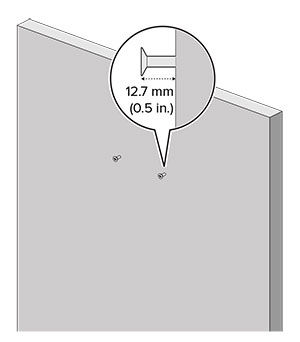 Align the holes at the base of the device with the screw heads. Push the device until the rubber pads touch the wall.
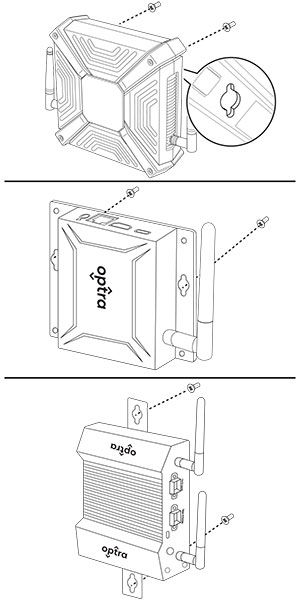 Slide the device down until the screws are secured in the vertical slots.