Print Quality issues caused by supplies
Print Quality Issues Caused by Supplies on the Lexmark T64x/X64x and T65x/X65x Series Printers
Issue description
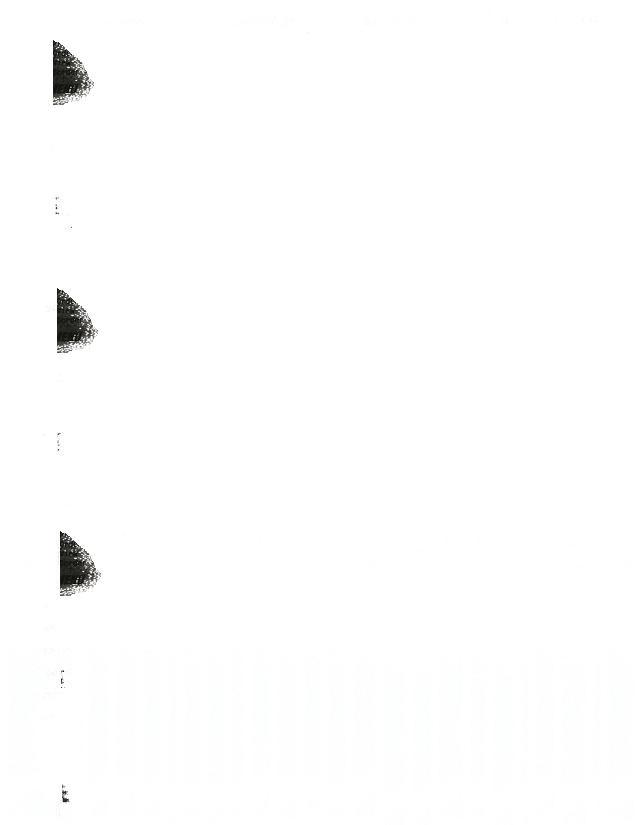
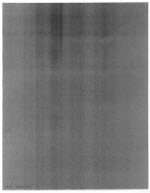
A leaking toner cartridge or a damaged photoconductor drum on the cartridge generally cause print quality issues. These issues may appear on the page front or on both sides, especially if toner has contaminated parts inside the printer.
The images below illustrate typical print quality issues that a leaking or damaged toner cartridge can cause.
 |  |  |
Solution
Step | Action |
|---|---|
1 | Power off the printer and remove the toner cartridge. Click here to see Instructions in Removing the Cartridge . Inspect the printer for toner build-up from a potentially leaking toner cartridge.The images below illustrate typical issues that a leaking toner cartridge can cause. Click on images below to enlarge. 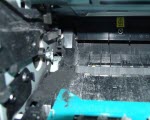 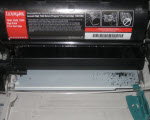 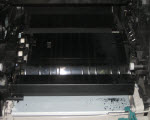 |
2 | Use one of the methods detailed below to install another toner cartridge. If the surface inside the printer is dirty, take a clean dry cloth and clean off any toner and dust before installing another cartridge.
|
3 | Power on the printer again. Print 20 to 30 test pages to give the spots/streaks a chance to clear up. Did a different toner cartridge correct the issue? Yes: Inspect the first cartridge for signs of damage or defects and continue in contacting Lexmark Technical Support to inquire about the eligibility of replacing the cartridge.No: Continue with the steps below. |
4 | If the test pages still have unwanted toner marks, select an appropriate scenario below:
|
Check the charge roll assembly
Step
| Action
| Click Image to Enlarge
|
1
| Power off the printer and remove the toner cartridge. | 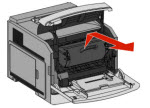 |
2
| Look for the charge roller
assembly . This is the twin set of small gray rollers located in the upper area of the printer where the cartridge had been seated.
NOTE: Please see the encircled portion of the right-hand image. | 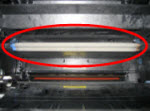 |
3
| If the roller surface appears dirty, take a clean, dry cloth and remove any toner on the surface. CAUTION! Try not to touch the charge rollers with your bare hands. The surface is susceptible to contamination, and a permanent mark could remain on the rollers. | No Image
|
4
| Inspect the charge rollers for any signs of damage. If any part is damaged, or if you are unable to remove the surface toner, continue to contacting Lexmark Technical Support . | No Image
|
Check the Transfer roll assembly
Step
| Action
| Click Image to Enlarge
|
1
| Power off the printer and remove the toner cartridge. | |
2
| Look for the transfer roller . This is the black, spongy roller located at the base inside the printer where the cartridge had previously been seated.
NOTE: Please see the encircled portion of the right-hand image. | |
3
| Check the transfer roller for any signs of damage or defects. Also, using a clean, dry cloth, wipe the surface of the transfer roller. See if the cloth will accumulate toner. If the cloth accumulates toner, then the transfer roller is contaminated and needs to be replaced. Continue to contacting Lexmark Technical Support . | No Image
|
Check the type of paper
Before calling Technical Support, confirm that you are printing on plain, white copy paper.
If not, try printing on such paper before seeking service to the printer. Please try this even if the specialty media you are using has worked in the past. This tests will eliminate specialty media as partial cause of the issue. Specialty papers (i.e., letterhead stock, textured paper, label stock, and card stock) can lead to print quality issues such as this.
For more information on recommended print media, see the chapter entitled
'Understanding paper and specialty media guidelines'
in the printer's User's Guide
.Environmental Factors
If the printer is situated in a hot environment such as a Warehouse or Distribution center; its constant operation may cause overheating of the cartridge. This will cause the toner to leak.
For a printer working in the type of condition mentioned above, the solution is to reduce the speed of the printer. This can be done by setting the
Paper Type
into Vinyl label
. To do this:On a Lexmark T650/T652/T654
Step
| Action
|
1
| Press the Menu  |
2
| Select “ Paper Menu ” by pressing  |
3
| Press  Paper Size/Type ” then press |
4
| Select “ Tray 1 Size/Type ” by pressing |
5
| The screen should show the current Tray 1 Size , press Tray 1 Type . |
6
| Use the Vinyl Labels ”, and then press |
7
| Press back
 button 3 times to set the printer back to Ready mode. |
On a Lexmark T656/X65x
Step
| Action
|
1
| Press  Menu . |
2
| Press the  Paper Menu ” |
3
| Press the Paper Size/Type ” |
4
| For Tray 1 Type , press  Vinyl Labels ” |
5
| Press  |
6
| Press the Home  Ready mode. |
Service action
Diagnosis tips
- Confirm that this issue happens with more than one toner cartridge before replacing any parts on the printer. Most print quality issues are caused by the toner cartridge.
- Try printing on plain, white copy paper, if not already doing so. This will eliminate any specialty print media as (partial) cause of the problem.
- If the spots/streaks on the page appear to repeat at regular intervals, print out thePrint Defects Guide. This page displays the distances that correspond to the circumferences of various rollers within the printer. To find the Print Defects page, go into the menus on the printer. Select theHelpmenu, then find and selectPrint Defects. Click here to download a copy of this page.
- If the printer appears to be the cause of the issue, see the instructions below to run a Developed Image Test to narrow the source of the problem further. Your objective in this test is to stop the printer abruptly while it is in the middle of the printing process, resulting in a partially printed sample not yet fused to the paper. See the instructions below.
- Identify the location of the printer and how it is being utilized. If the printer is being used in continuous operation such as manufacturing, courier or label printing, and the environment is slightly hot (e.g. Warehouse or Distribution centers); this can cause overheating of the cartridge resulting in toner leakage. To reduce Thermal Impact on the cartridge, try setting the “Paper Type” to “Vinyl Label”. (See customer-level section:Environmental Factors). If the customer already tried this option, access the printersDiagnostic Menuand adjust theEngine Settings 4to a value corresponding to theTray numberbeing used. See the list below:
- IfTray 1is being used, set theEngine Settings to 20.
- IfTray 2is being used, set theEngine Settings to 36.
- IfTray 3is being used, set theEngine Settings to 52.
NOTE:
The Engine Setting
values listed above will slow down the printer to 35ppm
. However, this should not impact the throughput required by the customer.How to do a Developed Image Test
Step
| Action
|
1
| Print the Menu Settings Page or any test print job with multiple pages. |
2
| As soon as the first page begins to exit the printer, either open the upper-front cover or power off the printer. This will stop the printer in mid-print. |
3
| Remove the toner cartridge. You should still see the second page in the printer underneath where the toner cartridge had been. The print on this area of the page has passed under the toner cartridge, but not yet through the fuser unit. Click here to see an example. |
4
| Examine the back of the first and second page. See if you can find any spots or streaks. CAUTION! Exercise care as the toner on the front of the page will easily rub off. Fuser unit is the probable cause of the issue.Transfer roller or the Toner cartridge . |
5
| Once you have completed this test, remove all paper jammed in the printer. Again, use caution when removing the pages that did not feed through the fuser unit because the toner will come off. |
LEGACY ID:
SO5265