202.17 fuser paper jam
202.17 Fuser Paper Jam on a Lexmark C746, C748, X746, and X748 Color Laser Printer
Overview
A '
202.17
' Fuser Paper Jam
error message means that the fuser exit sensor is broken or stuck, or else it is merely covered up by paper from a previous paper jam. In certain cases, you will need to remove the fuser, especially if the page was not
removed from a previous jam, or when a jammed paper can't be removed from the top or bottom of the fuser because it is trapped under the fuser guides. See an example in the image below.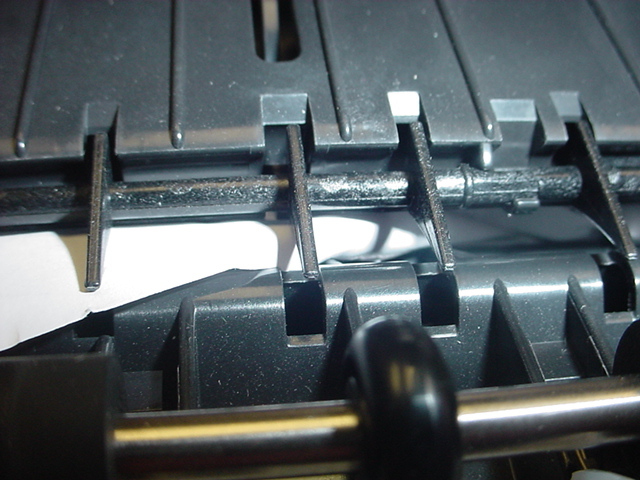
Troubleshooting
If the printer/MFP is displaying a
202.17 Fuser Paper Jam
and no
paper can be located in the path or accordion jams occurs in the fuser, follow the steps below to determine whether paper is caught between the fuser belt and the exit rollers.NOTE:
If you do not
feel comfortable performing the steps below, please continue to Contacting Lexmark
.Steps | Actions |
1 | For the Lexmark C74x Color Laser Printer:
For the Lexmark X74x Color Laser Multi Function Printer:
Warning—Potential Damage: To avoid overexposing the photoconductor units, do not leave the front door open for more than ten minutes . |
2 | For the Lexmark C74x Color Laser Printer:
For the Lexmark X74x Color Laser Multi Function Printer:
CAUTION—HOT SURFACE! The inside of the printer/MFP might be hot. To reduce the risk of injury from a hot component, allow the surface to cool before touching it. |
3 | Check for any piece of paper or other obstruction that is stuck in the Fuser Assembly . Note: If you find any piece of paper or other obstruction, gently remove it. Ensure all paper fragments are removed. If you suspect a fragment exists but it is not visible, remove the fuser unit. |
4 | To remove the Fuser Assembly , turn the blue thumb screws on the fuser counterclockwise to loosen them.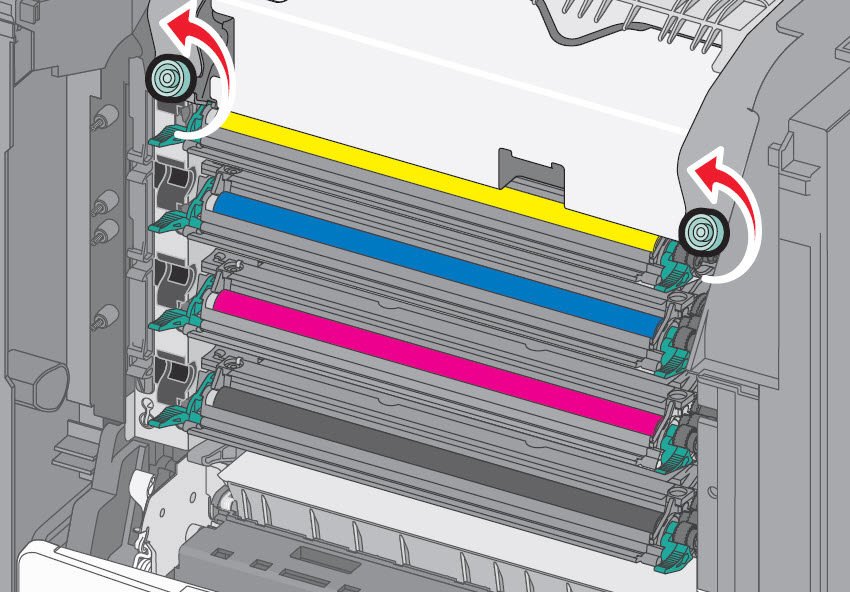 CAUTION—HOT SURFACE! The fuser is very hot. Be sure the fuser assembly has cooled down by allowing the printer to cool for 15 minutes before removing the fuser.Warning—Potential Damage: Do not touch the roller at the center of the fuser unit. Doing so may damage the fuser. |
5 | Using the handholds on each side, lift and pull the fuser assembly out of the printer/MFP. 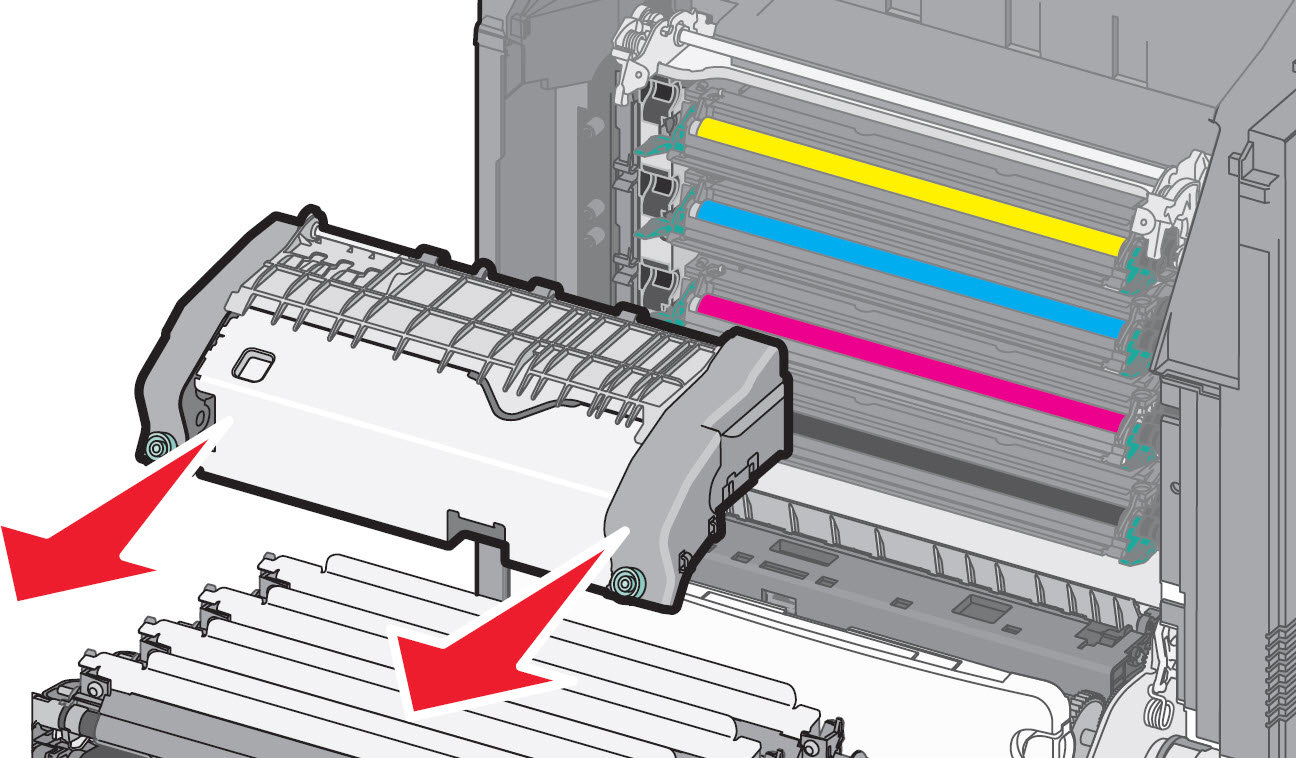 |
6 | Place the fuser assembly on a flat surface with the blue thumb screws facing you.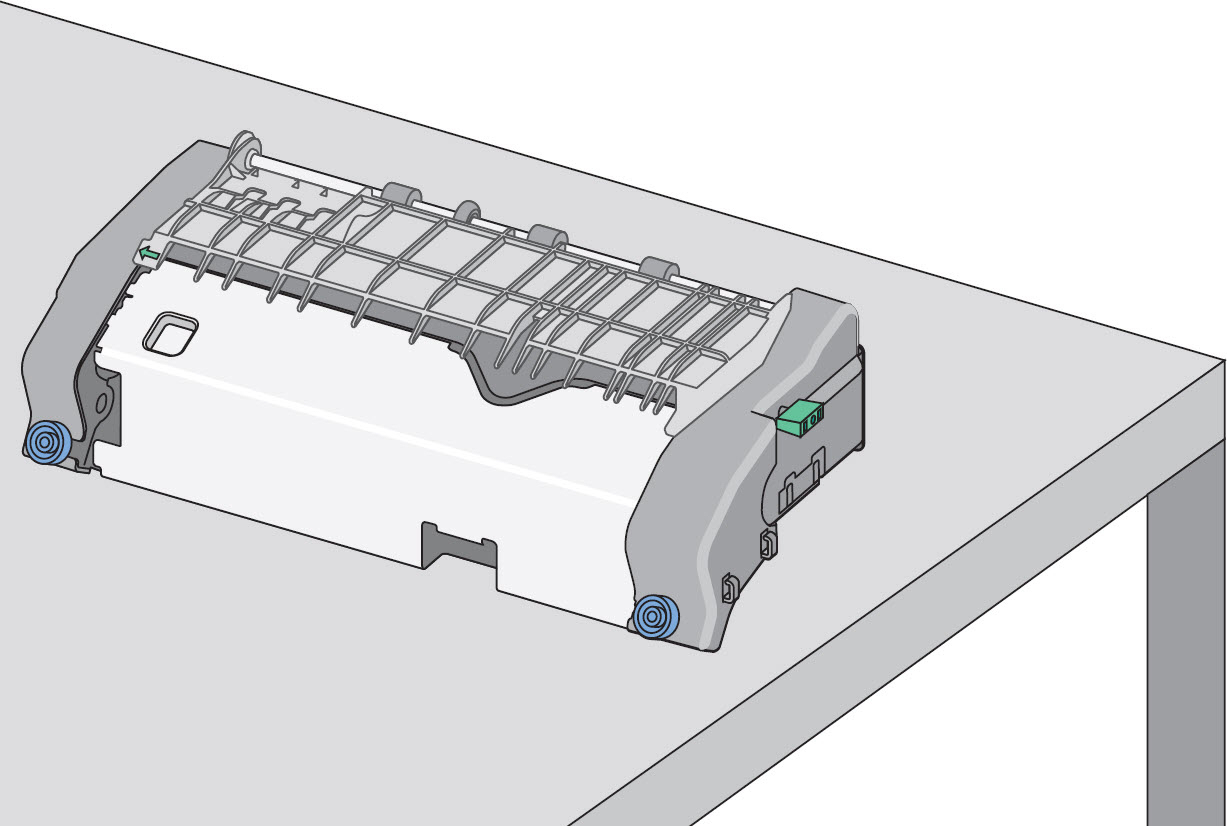  |
7 | Check for any broken or loose parts on the fuser assembly. If damage exists, a service call will likely be required to resolve the issue. |
8 | Pull and then rotate the green rectangular knob clockwise (rotate 90 degrees , and release) on the right-hand side of the fuser to unlock the Upper Duplex Guide .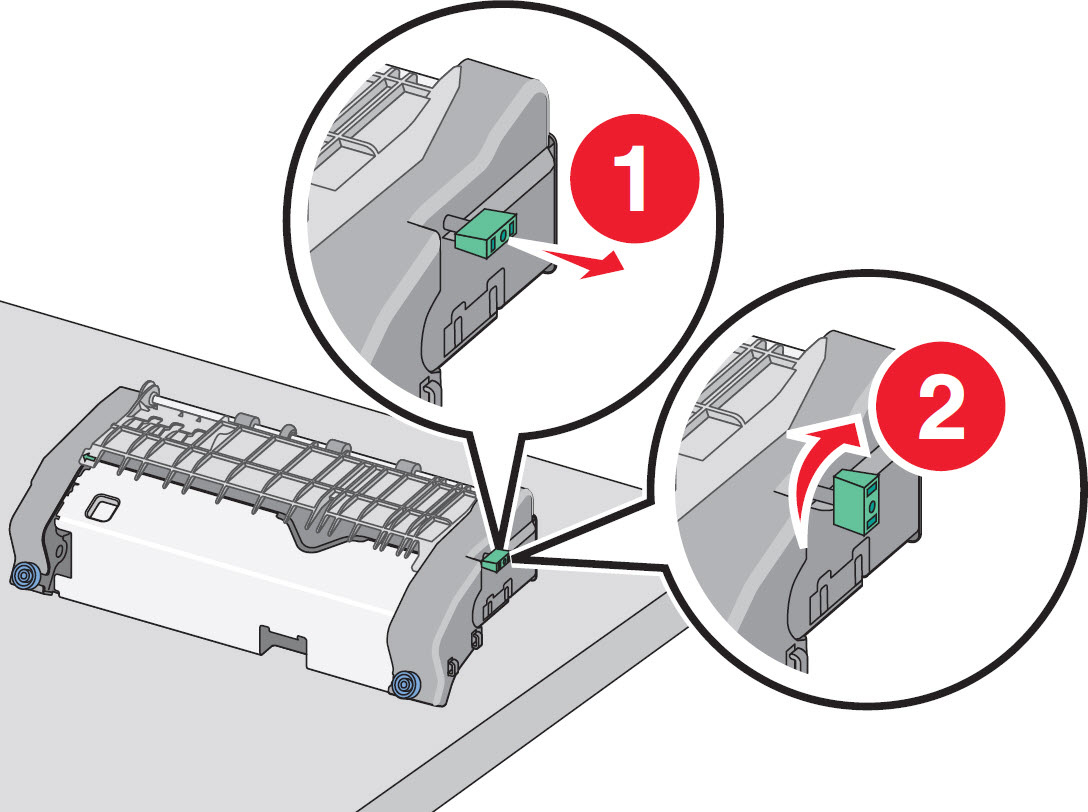  |
9 | Press the green arrow tab to the left, and then lift the Upper Duplex Guide . Rotate it up to allow for jam access.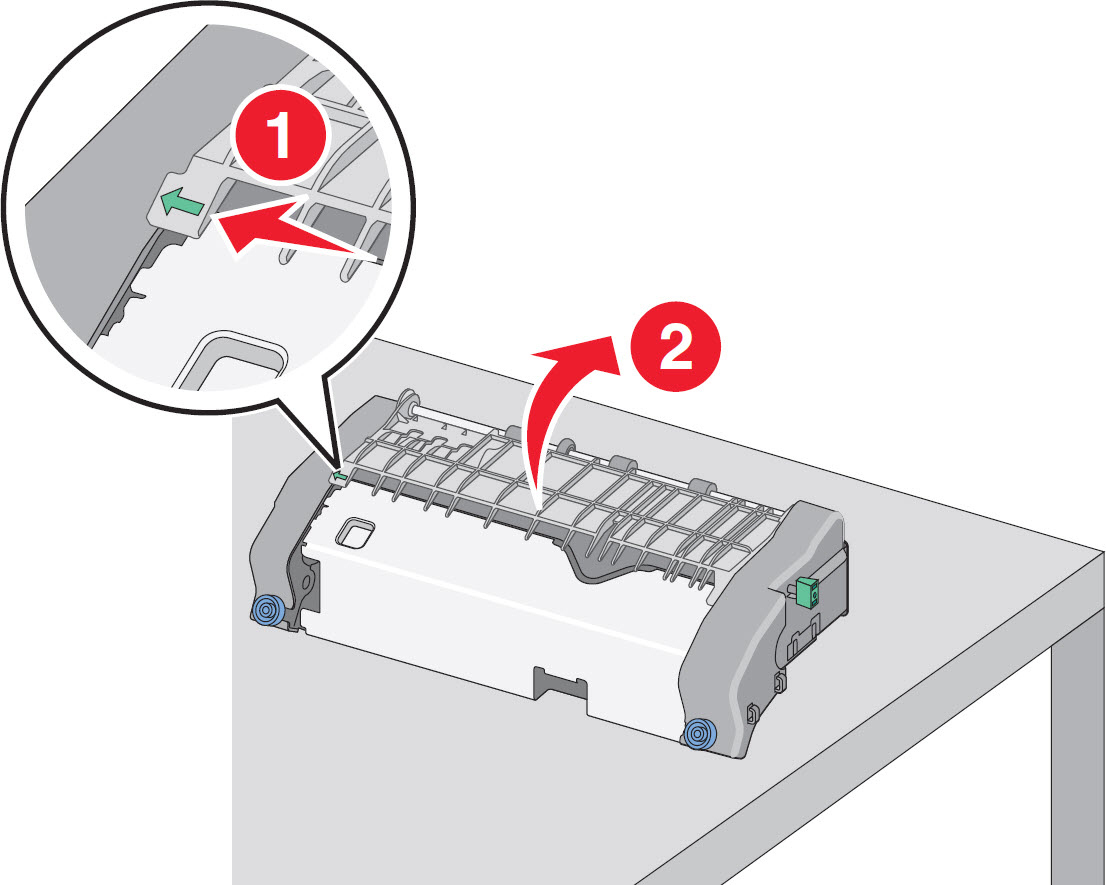 |
10 | Again check for any broken or loose parts inside the fuser assembly. If damage exists, a service call will likely be required to resolve the issue. Note: If no damage is found, proceed with the steps below |
11 | Rotate the Lower Duplex Guide up to fully access the paper jam; this should allow you to see any jammed paper.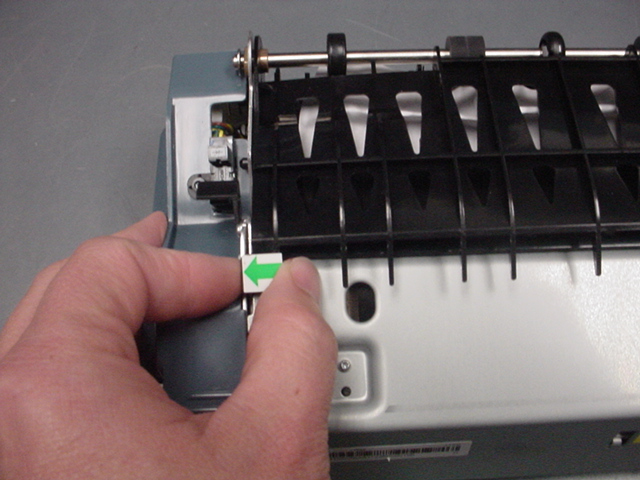 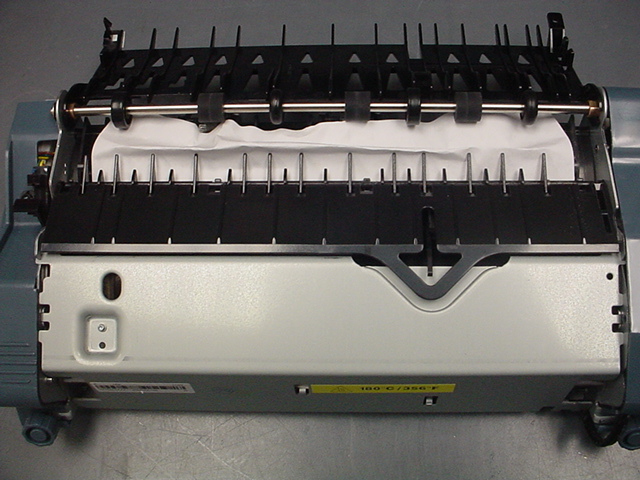 |
12 | You should be able to remove the paper jam. While clearing the jam, be sure to remove all debris and paper fragments. |
13 | Close the top paper guide by rotating the Lower and Upper-Duplex Guides back into position. Be sure both sides of the paper guide are firmly seated. |
14 | Pull and then rotate the green rectangular knob counterclockwise (rotate 90 degrees , and release) to firmly secure the Upper-Duplex Guide .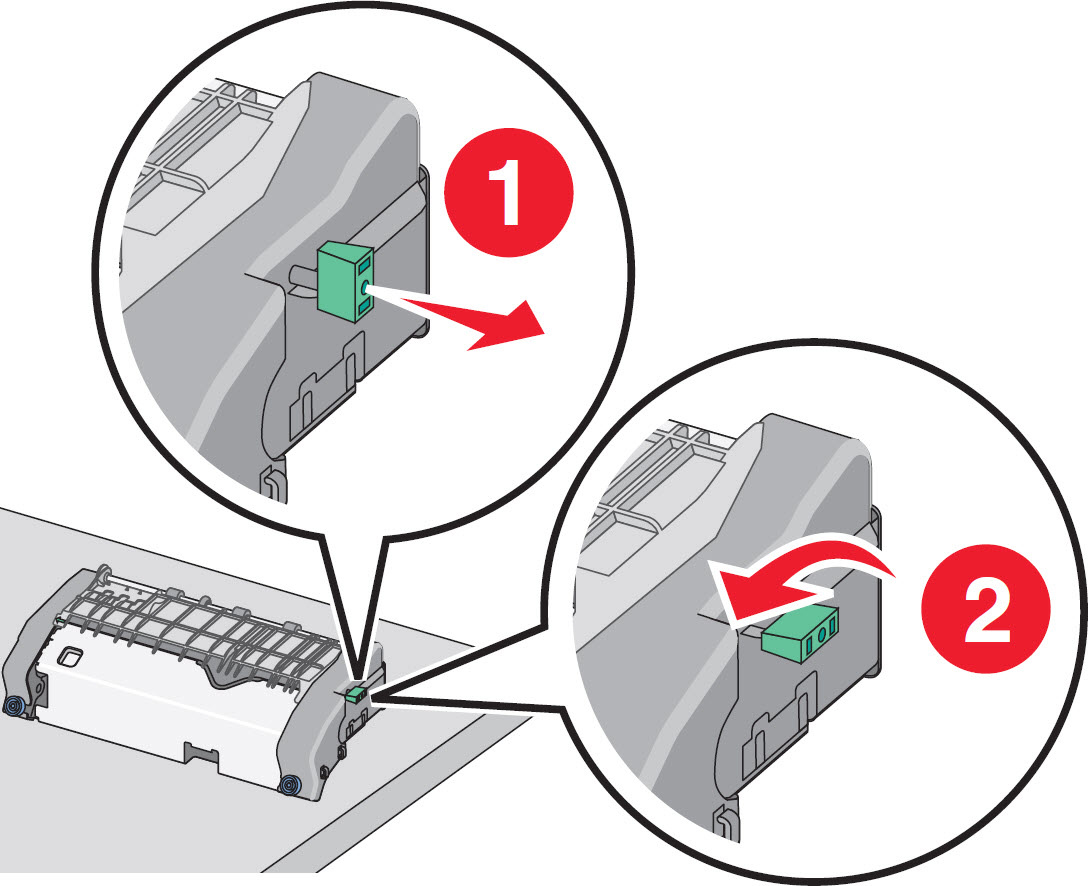 |
15 | Reinstall the fuser unit, align the fuser unit using the handholds on each side, and then insert it back into the printer. 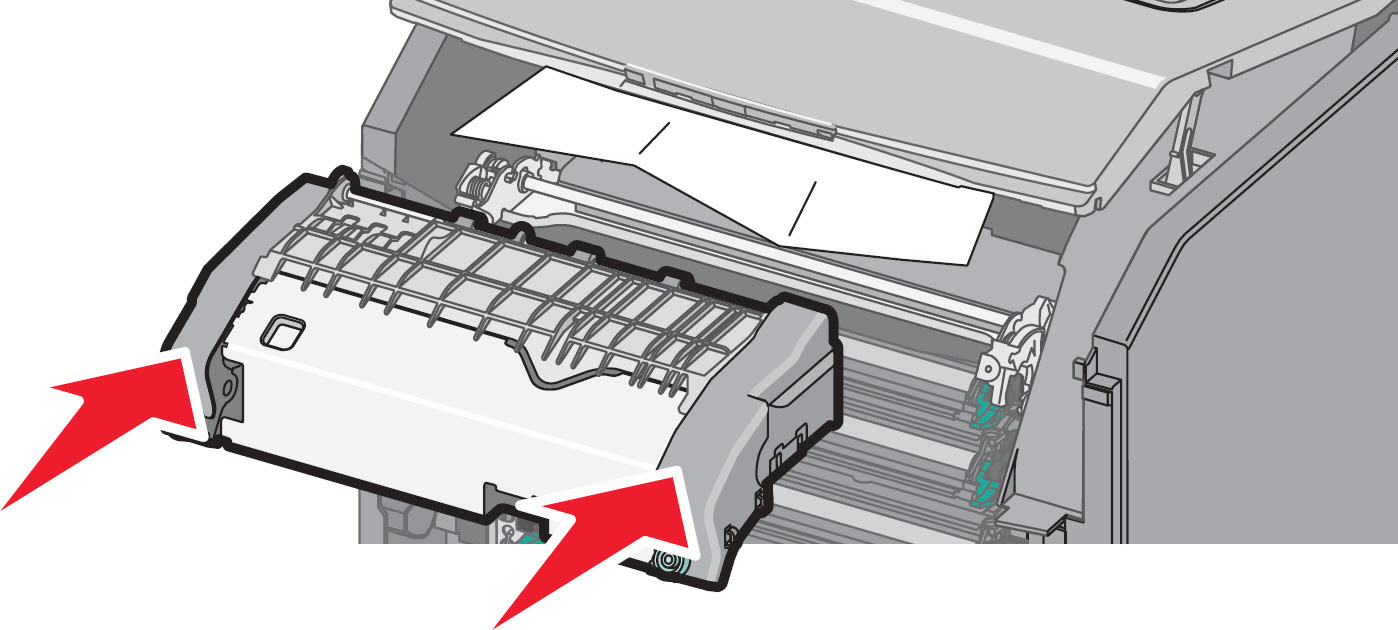 |
16 | Turn the blue thumb screws clockwise to fasten the fuser securely. Be sure no obstructions remain inside the printer/MFP that would prevent the fuser from seating securely.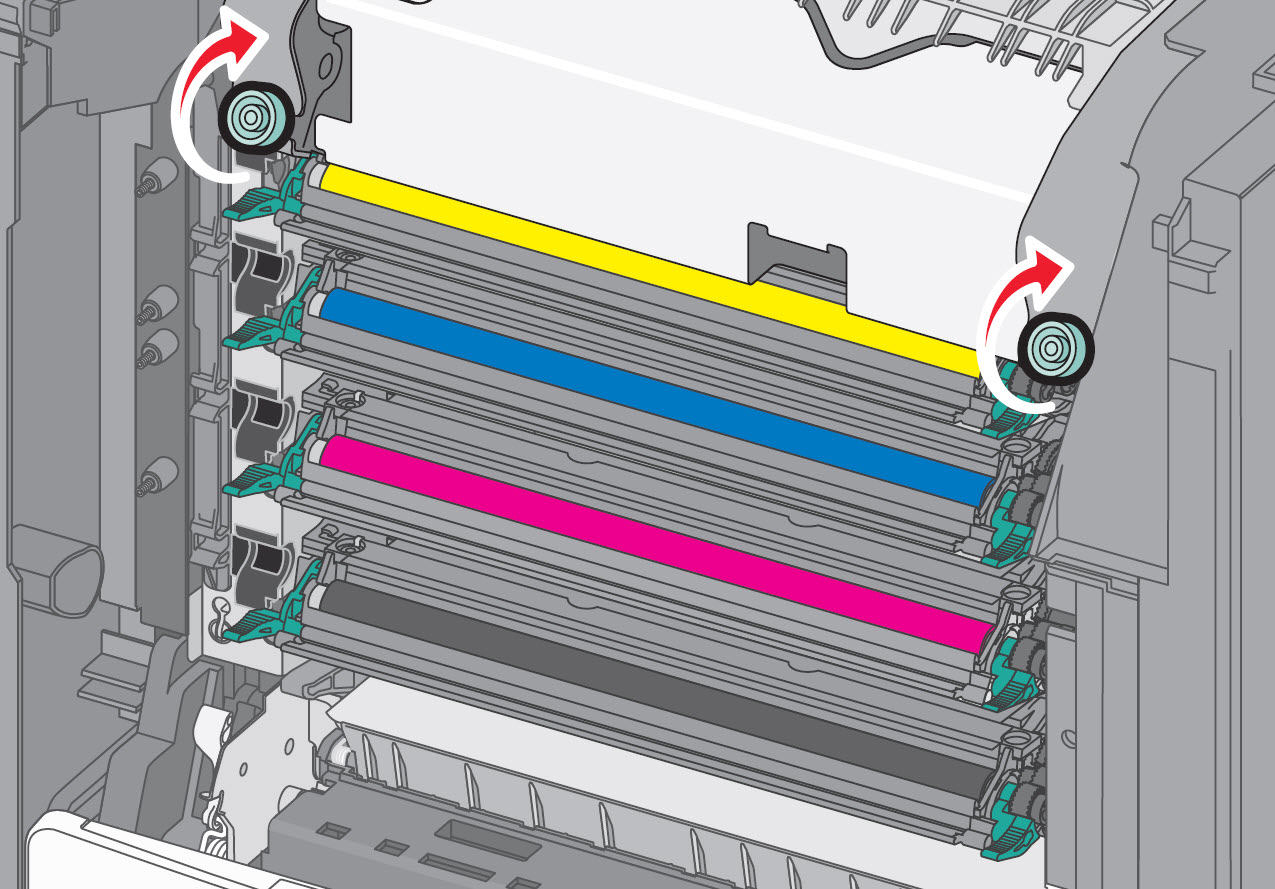 |
17 | Close all doors and covers completely. Then try printing a single-sided job. |
If none of the above suggestions resolve the issue, or if you have found the source of the issue and need help arranging service, please contact
Lexmark Technical Support
or a local authorized service provider for additional assistance.Contacting Lexmark
Please contact
Lexmark Technical Support
if you need additional assistance.NOTE:
When calling for support, you will be asked for your machine/model type
and serial number
(SN
).Please call from near the printer in case the technician on the phone asks you to perform a task involving the printer.
LEGACY ID:
TE463
Technical Service Bulletin | Problem Description | |
Machine Type/Model | Lexmark Models: C746 5026-3xx C748 5026-5xx X746 7526-xxx X748 7526-xxx | The printer/MFP is repeatedly displaying a ' 202.17 Fuser Paper Jam ’ message on aLexmark C74x Color Laser Printers and Lexmark X74x Series MFPs .Solution ' 202.17 Fuser Paper Jam ’ messages are caused by the paper not correctly exiting the fuser. It has been determined that this is caused by the fuser and the paper needs to be removed from the fuser. |
Date Created | 05/24/2012 | |
Last Updated | 05/24/2012 | |
Safety Issue? | No | |
Code Update? | No | |
Engineering Change? | No | |
New Parts? | No | |
Old Parts Status | n/a | |
Voltage: 120/240 | All | |
Serial No. Range | All |