120.07 Service fuser error message
120.07 Service Fuser Error Message on a Lexmark C746, C748, X746, or X748 Color Laser Printer
What you will see
The printer’s operator panel displays a '
120.07
' Service Fuser error.Troubleshooting
NOTE:
If you do not
feel comfortable performing the steps below, please continue to Contacting Lexmark
.- Power off the printer.
- For the Lexmark C74x Color Laser Printer:
- Open the printerFront Door Assembly.
For the Lexmark X74x Color Laser Multi Function Printer:- Open the MFPTop Access Cover.
Warning—Potential Damage:To avoid overexposing the photoconductor units, donotleave the front door open for more thanten minutes. - For the Lexmark C74x Color Laser Printer:
- Open the printerTop Access Cover.
For the Lexmark X74x Color Laser Multi Function Printer:- Open the MFPFront Door Assembly.
CAUTION—HOT SURFACE!The inside of the printer/MFP might be hot. To reduce the risk of injury from a hot component, allow the surface to cool before touching it. - To remove theFuser Assembly, turn theblue thumb screwson the fuser counterclockwise to loosen them.
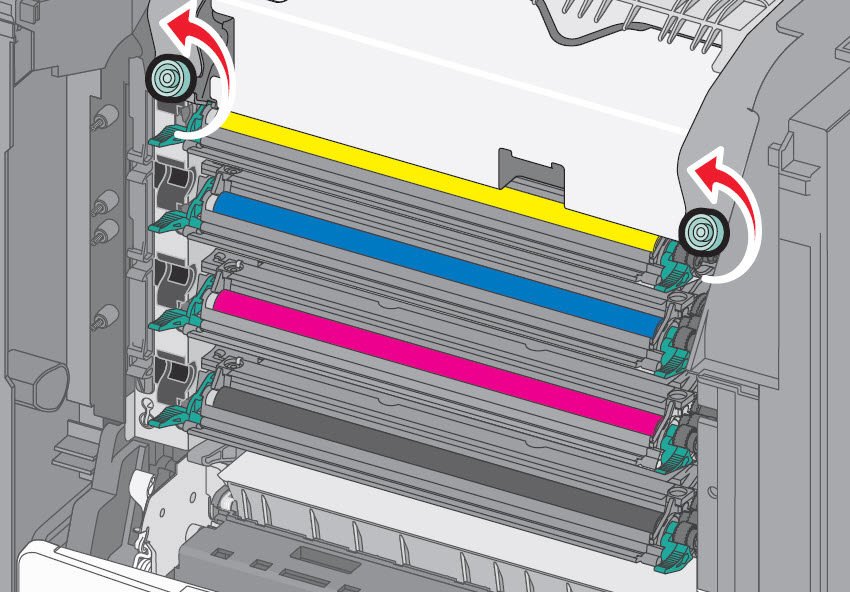 CAUTION—HOT SURFACE!The fuser is very hot. Be sure that the fuser assembly has cooled down by allowing the printer to cool for 15 minutes before removing the fuser.Warning—Potential Damage:Donottouch the roller at the center of the fuser unit. Doing so may damage the fuser.
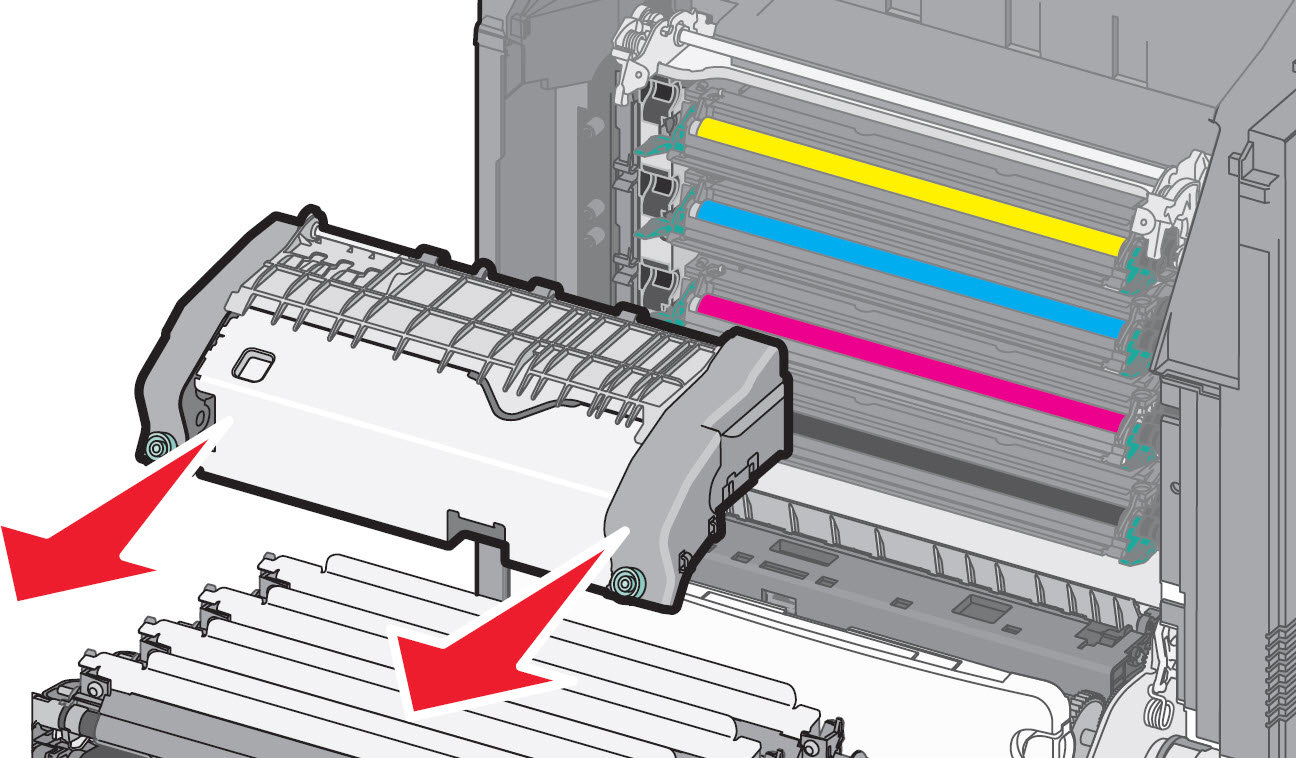
 - Using the handholds on each side, lift and pulling the fuser assembly out of the printer/MFP.
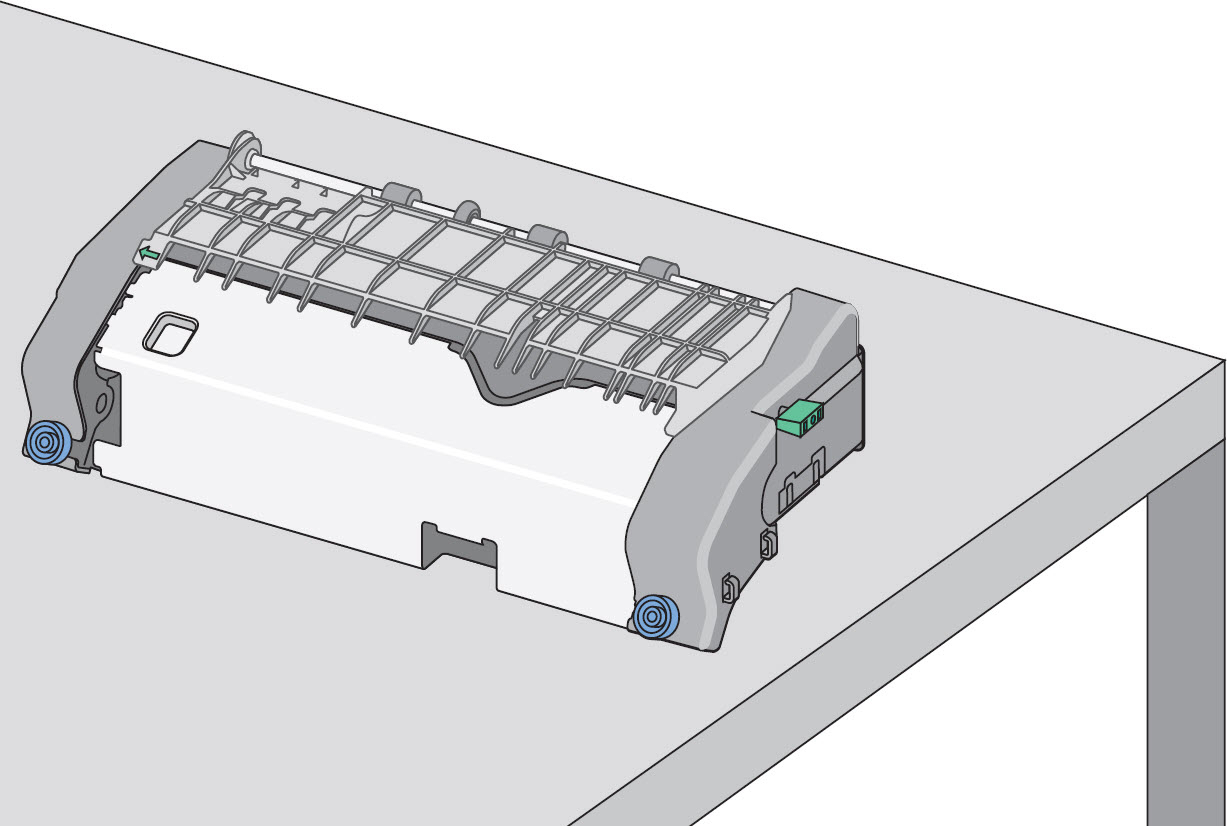 Note:Place the fuser assembly on a flat surface with theblue thumb screwsfacing you. (See second image above.) Also check for any broken or loose parts on the fuser assembly. If damage exists, a service call will likely be required to resolve the issue.
 - Reinstall the fuser unit. Align the fuser unit using the handholds on each side and then insert it back into the printer.
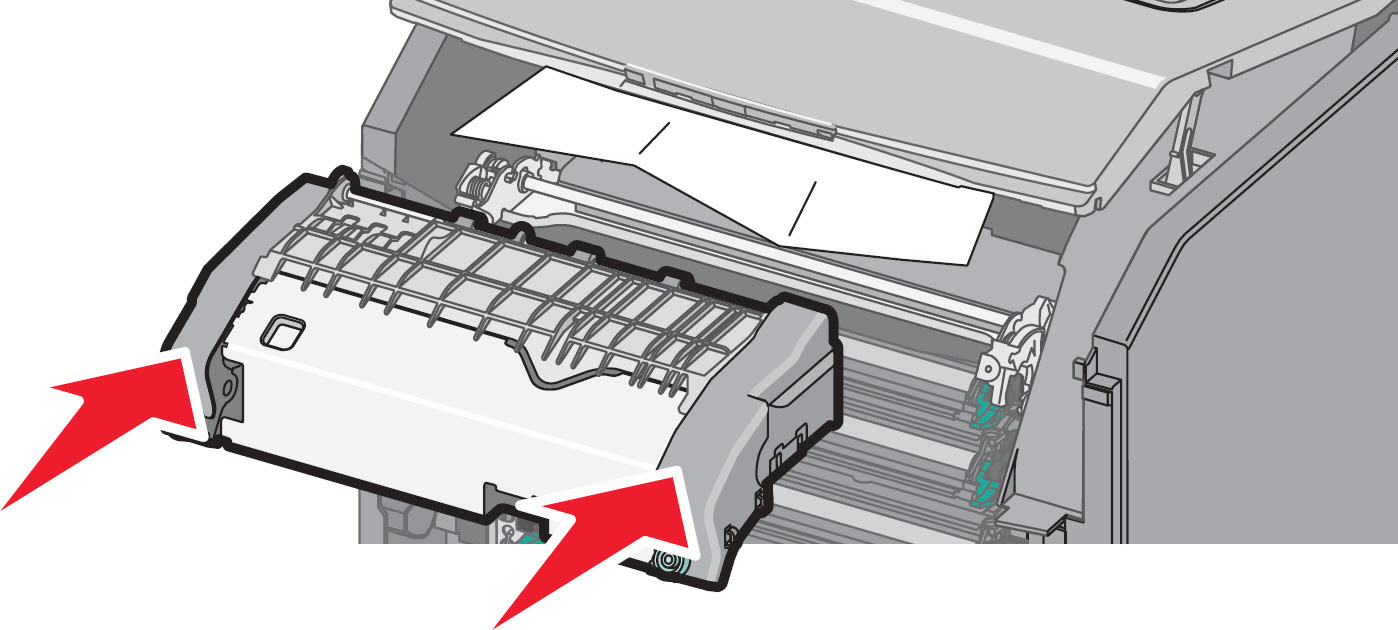
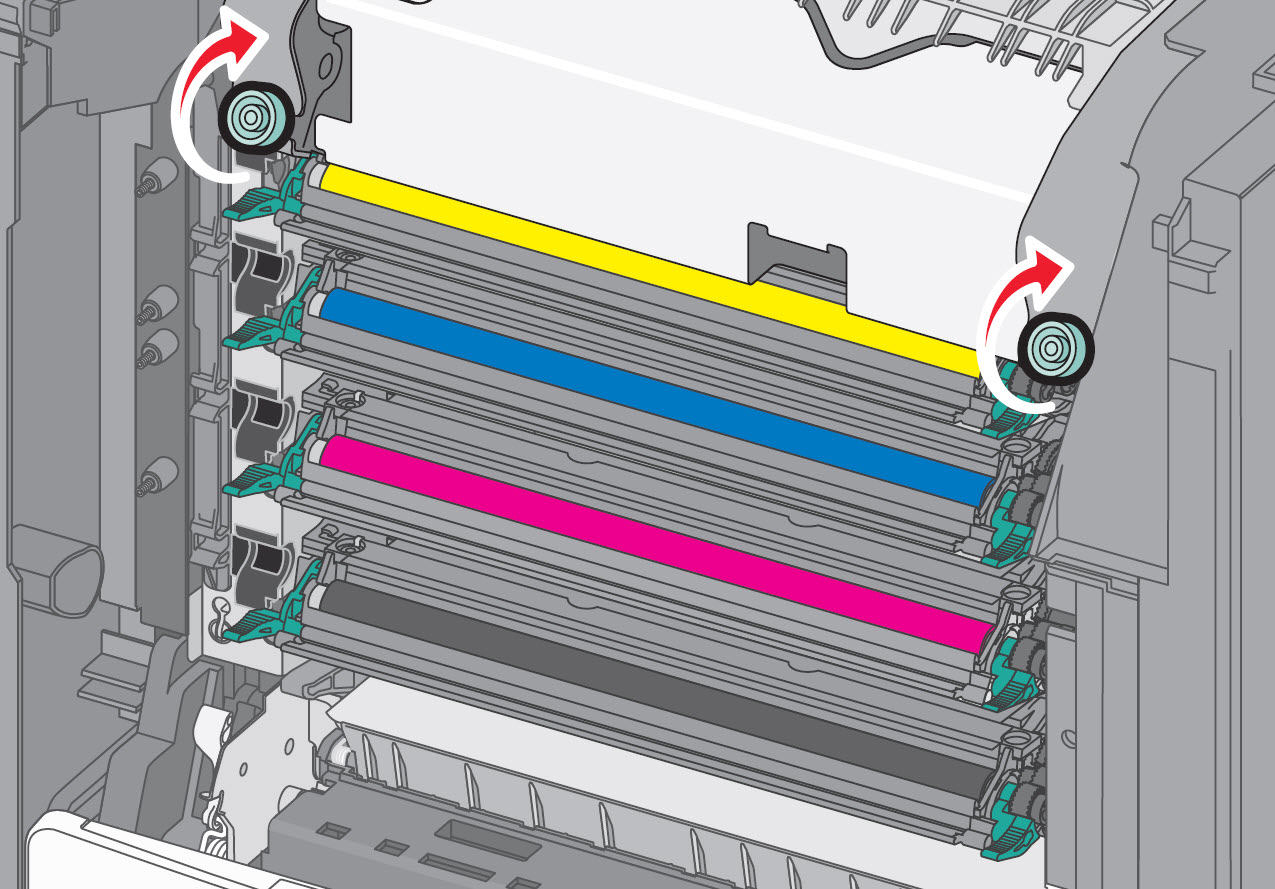 Note:Turn theblue thumb screwsclockwise to fasten the fuser securely. (See second image above.) Be sure that no obstructions remain inside the printer/MFP that would prevent the fuser from seating securely.
 - Close all doors and covers completely. Power the printer back on and observe the operation.Did the error message return?Yes:A service call may be required. Please contactLexmark Technical Supportor a local authorized service center in your area for additional assistance. No:If the '120.07' Service Fuser error doesnotappear on the printer display, then try printing a single-sided job. Should it print correctly, continue normal use. Pay close attention to the printer over the next few days, however, to see whether the issue returns.
Contacting Lexmark
Please contact
Lexmark Technical Support
if you need additional assistance. NOTE:
When calling for support, you will be asked for your machine/model type
and serial number
(SN
). Please call from near the printer in case the technician on the phone asks you to perform a task involving the printer.
LEGACY ID:
TE568