Unusual buzzing or humming noise
An Unusual Buzzing or Humming Noise Can Be Heard on a Lexmark C746, C748, X746, and X748 Color Laser Printer
What you will hear
The printer makes a sound that can be best described as a buzzing or humming noise. The noise can occur every time you perform a certain action, such as powering on the printer or printing, or it can occur intermittently. But printing duplex (i.e., printing on both sides), the noise discontinues because the exit roller mechanism is reversed in order to print duplex.
Possible causes
This noise can be due to any one of the following:
- A piece of paper, or other obstruction, is stuck in the fuser.
- The fuser unit may be installed incorrectly or may be damaged.
- Improper installation of the fuser assembly
Recommended actions
- Power off the printer/MFP completely and disconnect the power cable from its power supply.
- Open thefront door assembly.Warning—Potential Damage:To avoidoverexposingthephotoconductor units, donotleave thefront dooropen for more thanten minutes.Caution—Hot Surface!The inside of the printer/MFP might be hot. To reduce the risk of injury from a hot component, allow the surface to cool before touching it.
- Open the printer/MFPtop access cover.
- Check for any piece of paper or other obstruction that is stuck in thefuser assembly.Note:If you find any piece of paper or other obstruction, gently remove it. Ensure all paper fragments are removed. If you suspect a fragment is present butnotvisible, then remove the fuser unit.
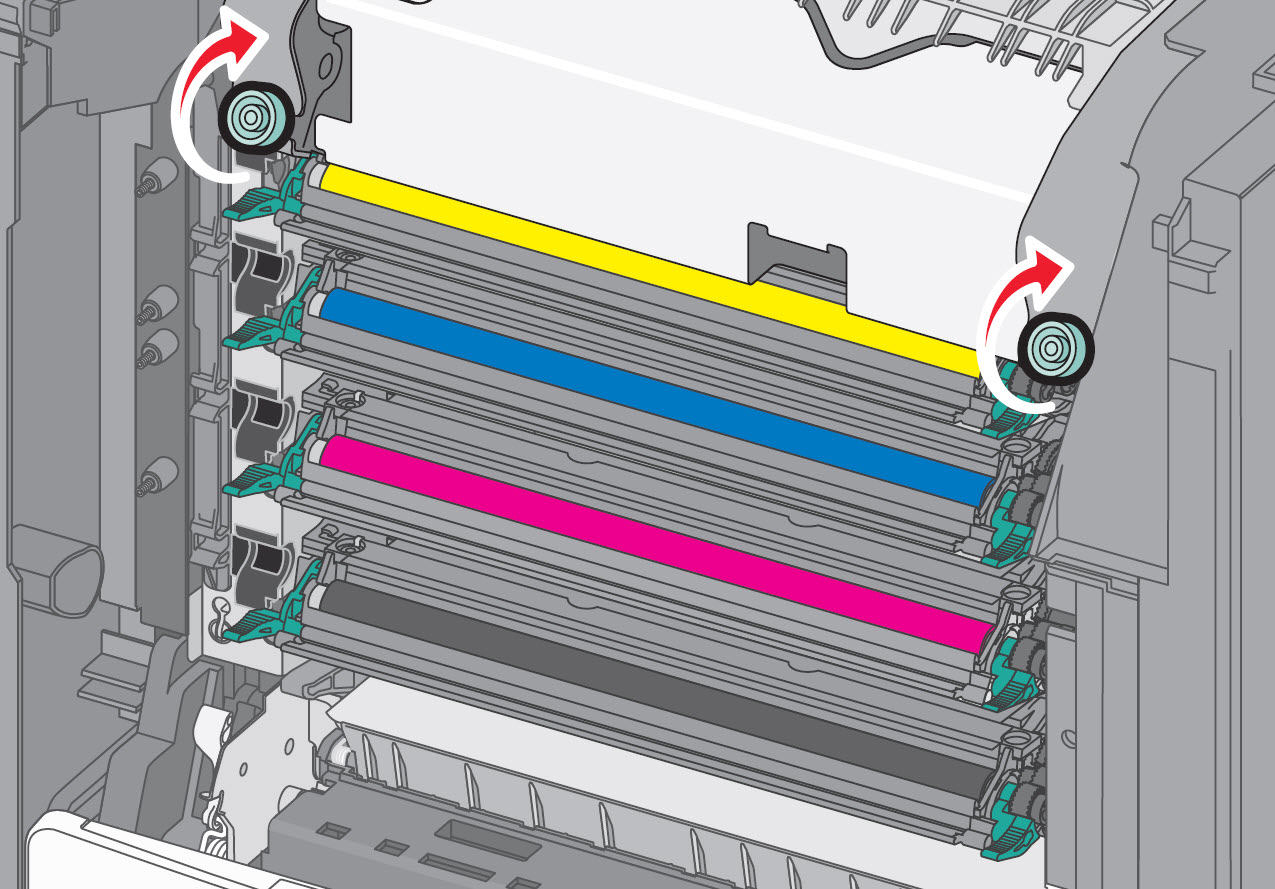
- To remove thefuser assembly, turn theblue thumb screwson the fuser counter-clockwise to loosen them.
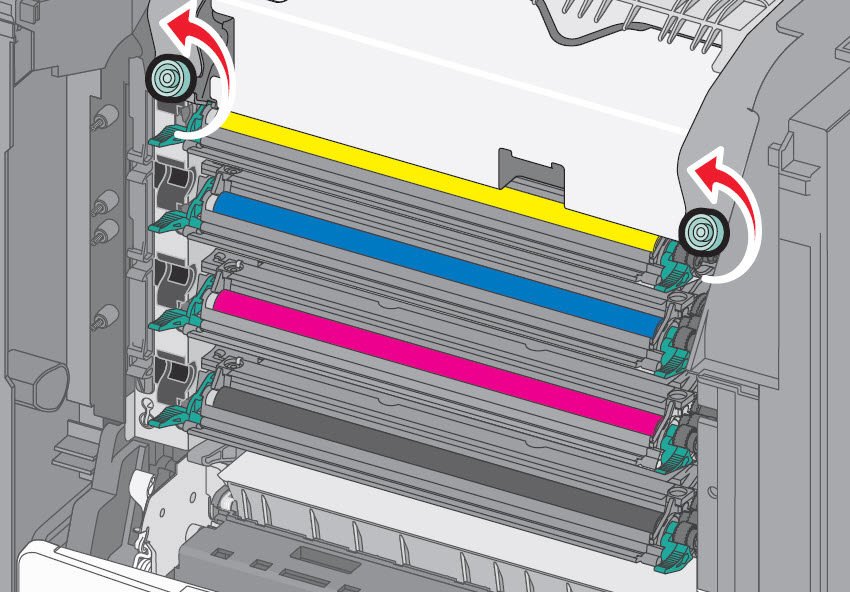 Caution—Hot Surface!The fuser is very hot. Be sure the fuser assembly has cooled down by allowing the printer to cool for 15 minutes before removing the fuser.Warning—Potential Damage:Donottouch the roller at the center of the fuser unit. Doing so may damage the fuser.
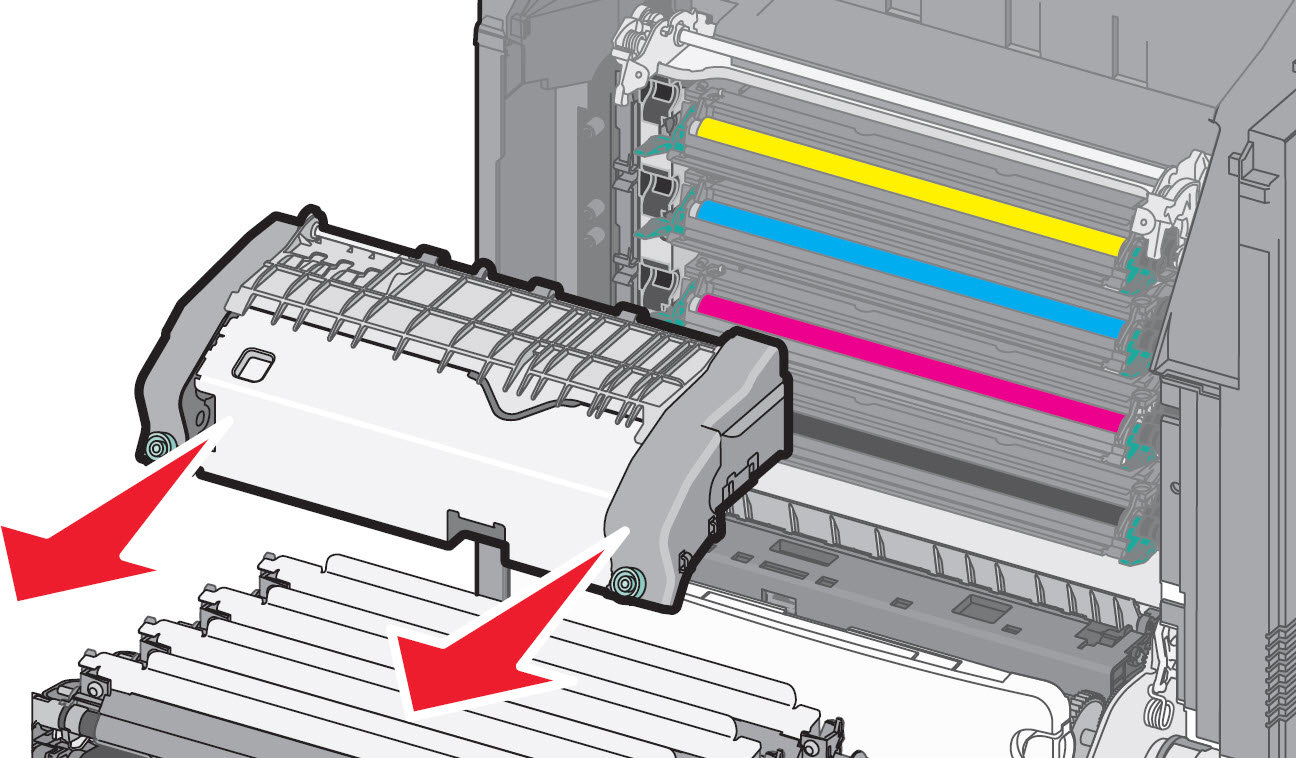
 - Using the handholds on each side, lift and pull thefuser assemblyout of the printer/MFP.
- Place thefuser assemblyon a flat surface with theblue thumb screwsfacing you.
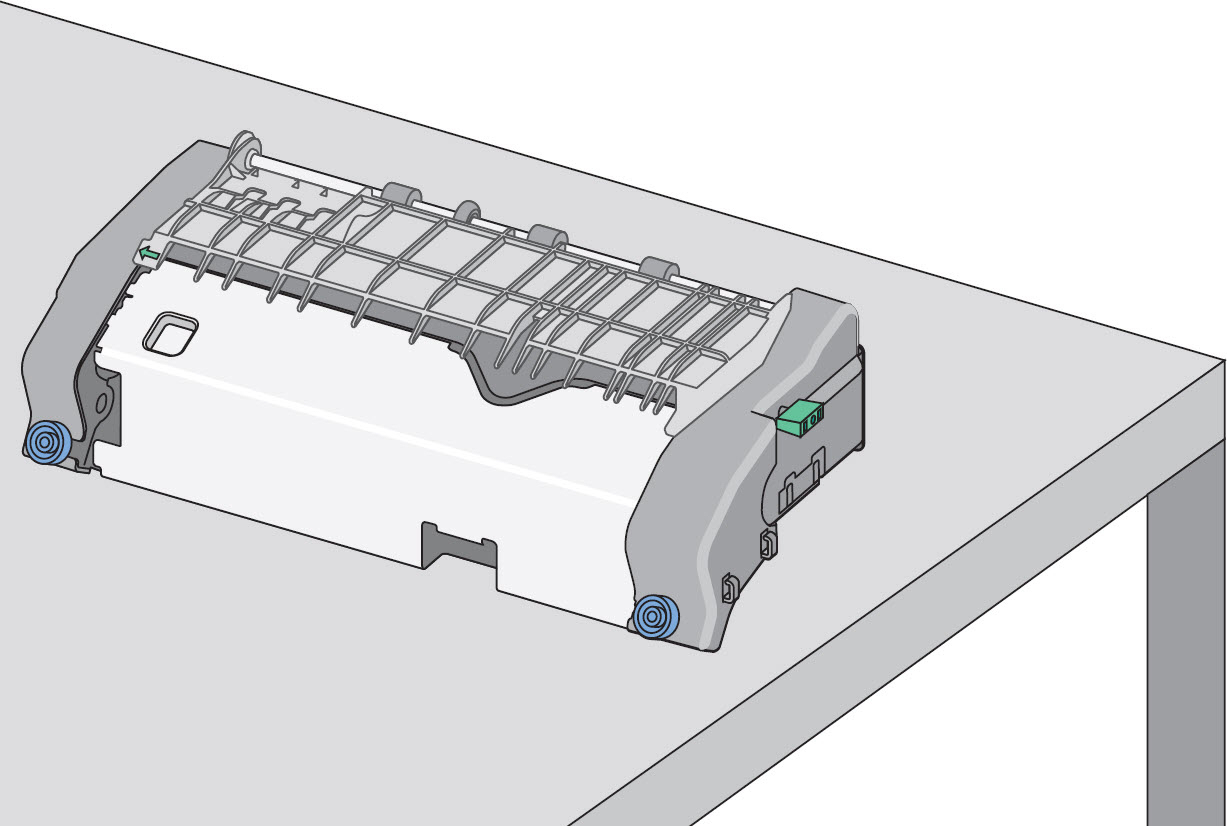
- Check for any broken or loose parts on thefuser assembly. If damage exists, a service call will likely be required to resolve the issue.
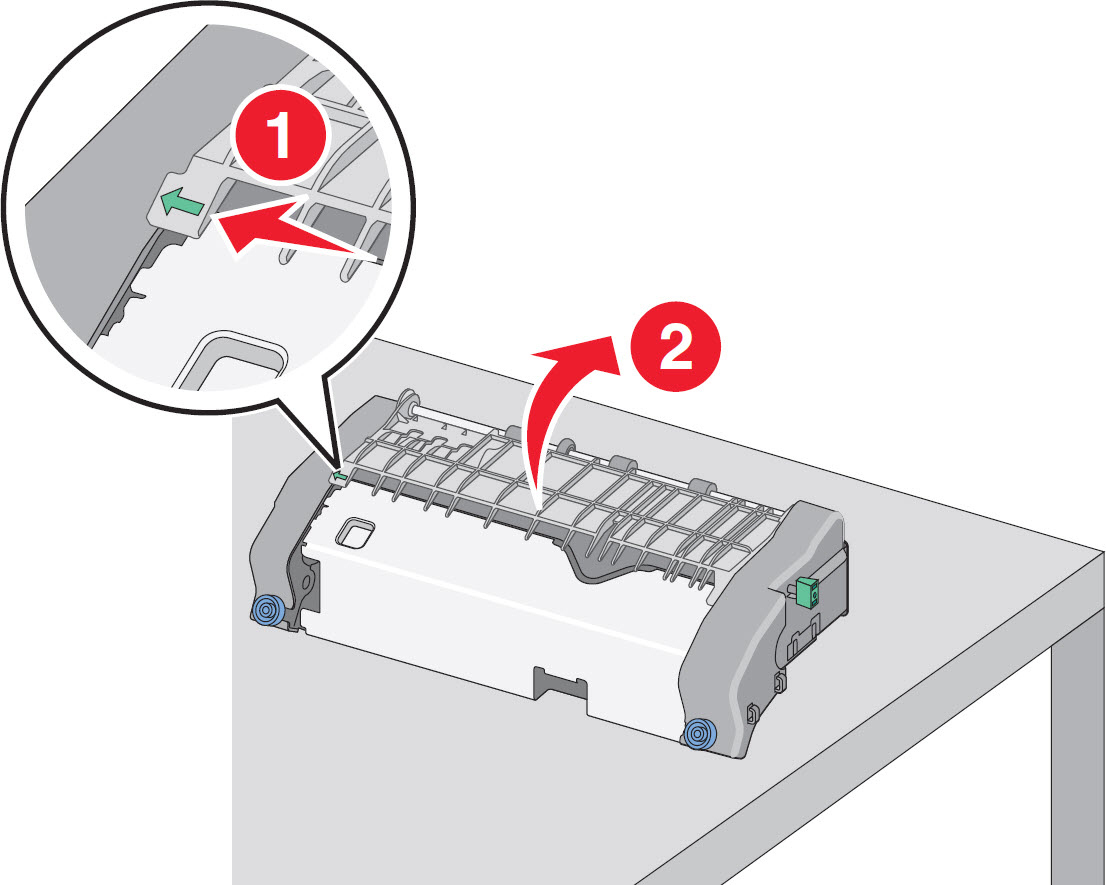
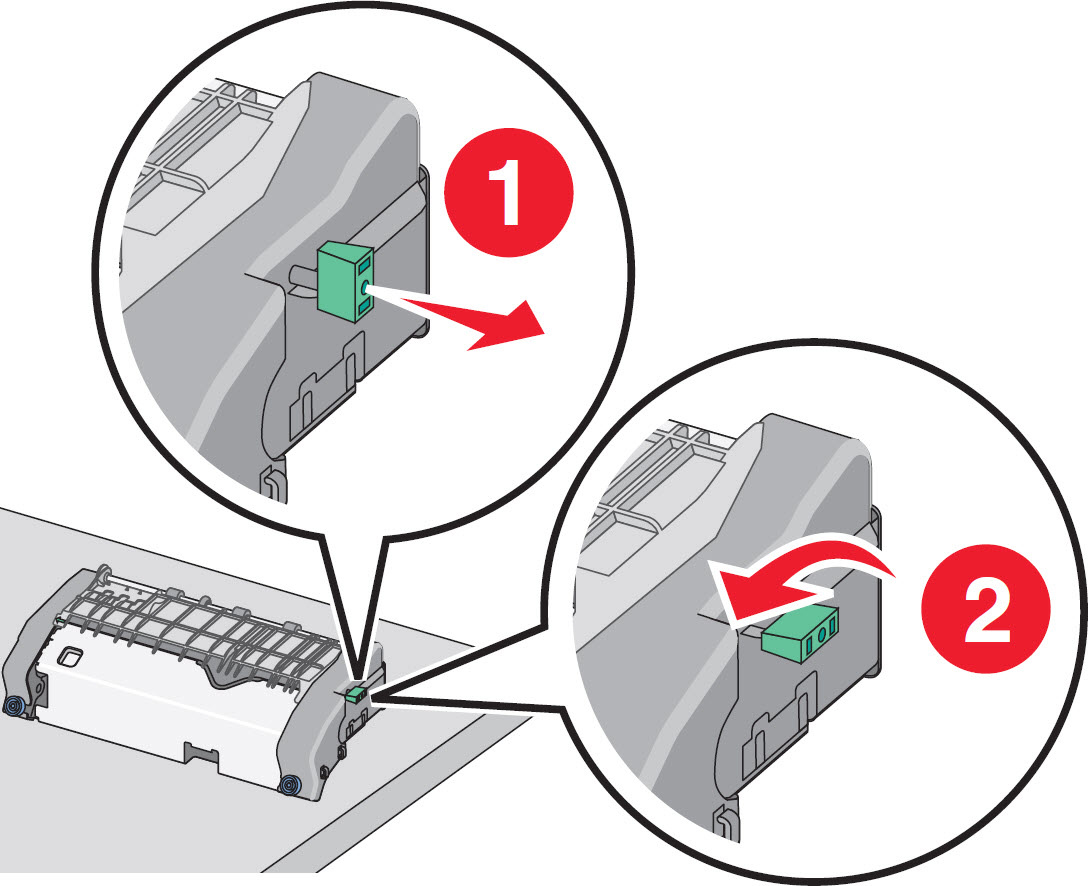
- Pull and then rotate thegreen rectangular knobclockwise to unlock thetop paper guide.
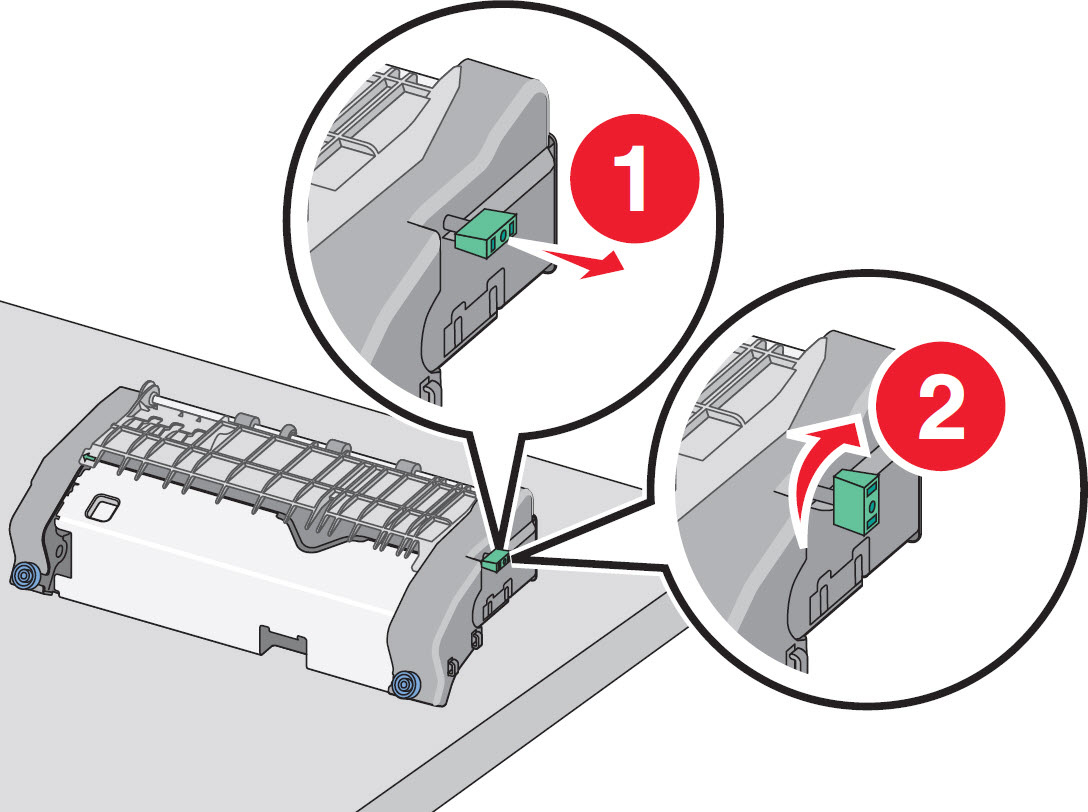
- Press thegreen arrow tabto the left, and then lift thetop paper guide.
- Again check for any broken or loose parts inside thefuser assembly. If damage exists, a service call will likely be required to resolve the issue.Note:Ifnodamage is found, proceed with the steps below.
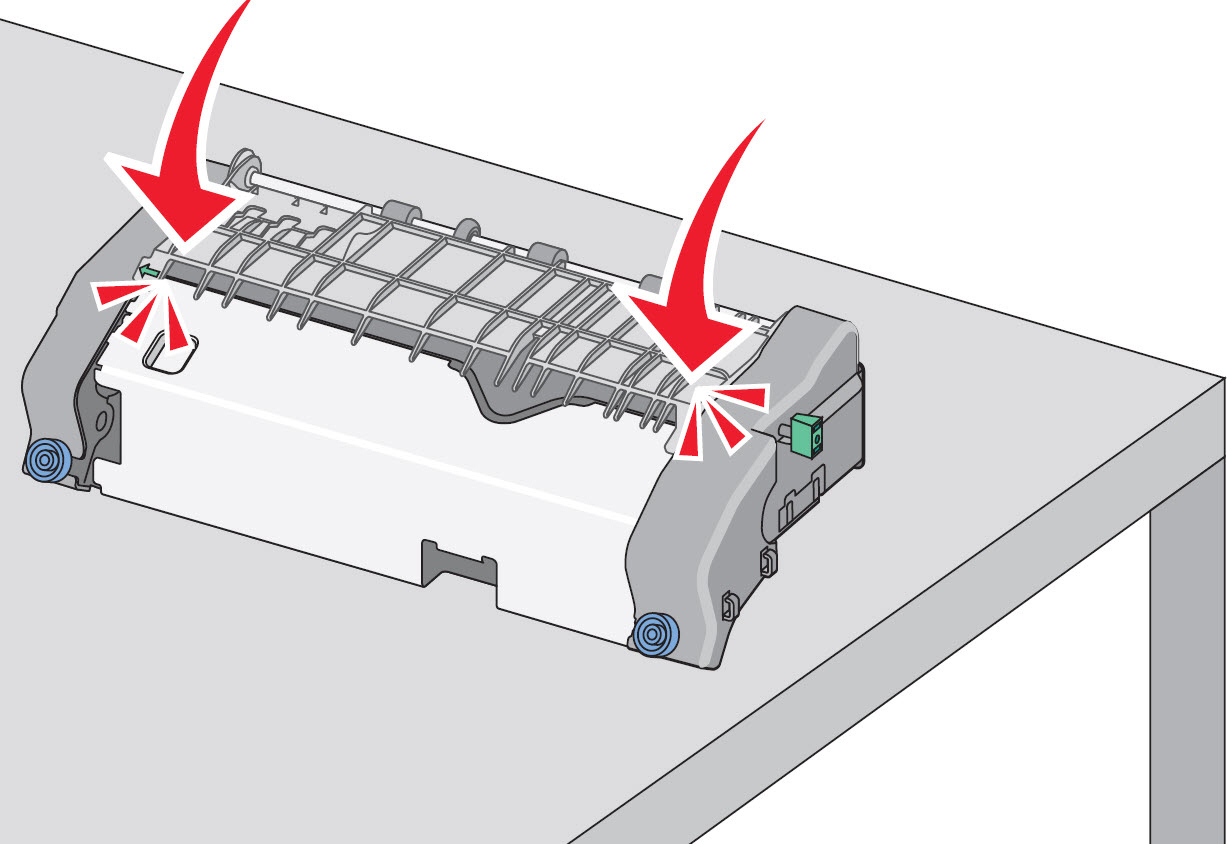
- Close thetop paper guide. Ensure both sides of the paper guide are firmly seated.
- Pull and then rotate thegreen rectangular knobcounter-clockwise to firmly secure the top paper guide.
- Reinstall thefuser assembly, align thefuser assemblyusing the handholds on each side, and then insert it back into the printer/MFP.
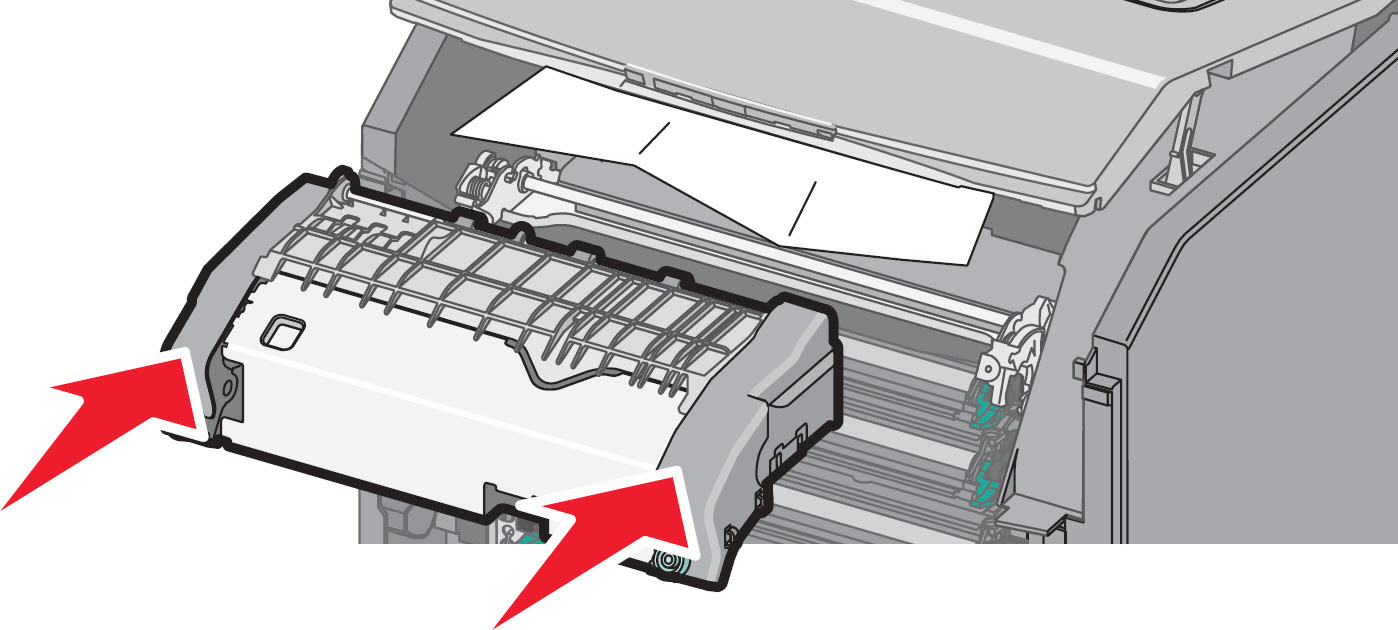
- Turn theblue thumb screwsclockwise to fasten the fuser securely. Ensurenoobstructions exist inside the printer/MFP that might prevent the fuser from seating securely.
- Close all doors and covers completely. Power on the printer and try printing a single-sided job.
If none of the above suggestions resolves the issue, or if you have found the source of the noise and need help arranging service, please contact
Lexmark Technical Support
or a local authorized service provider for additional assistance.Still Need Help?
Please contact
Lexmark Technical Support
if you need additional assistance. NOTE:
When calling for support, you will be asked for your machine/model type
and serial number
(SN
)Please call from near the printer in case the technician on the phone asks you to perform a task involving the printer.
LEGACY ID:
SO6955