202 or 280 Paper Jam message
Printer Displays a '202' or '280' Paper Jam Message on a Lexmark W840, W850 Series Printers or Lexmark X85xe, X86xe Series MFPs
Issue description
The printer/MFP stops printing and displays a
Paper Jam
message, and the numeric error code displayed is a 202
or a 280
type error message*
. Select Show areas
on the operator panel to view images that will help you locate where the jam is occurring.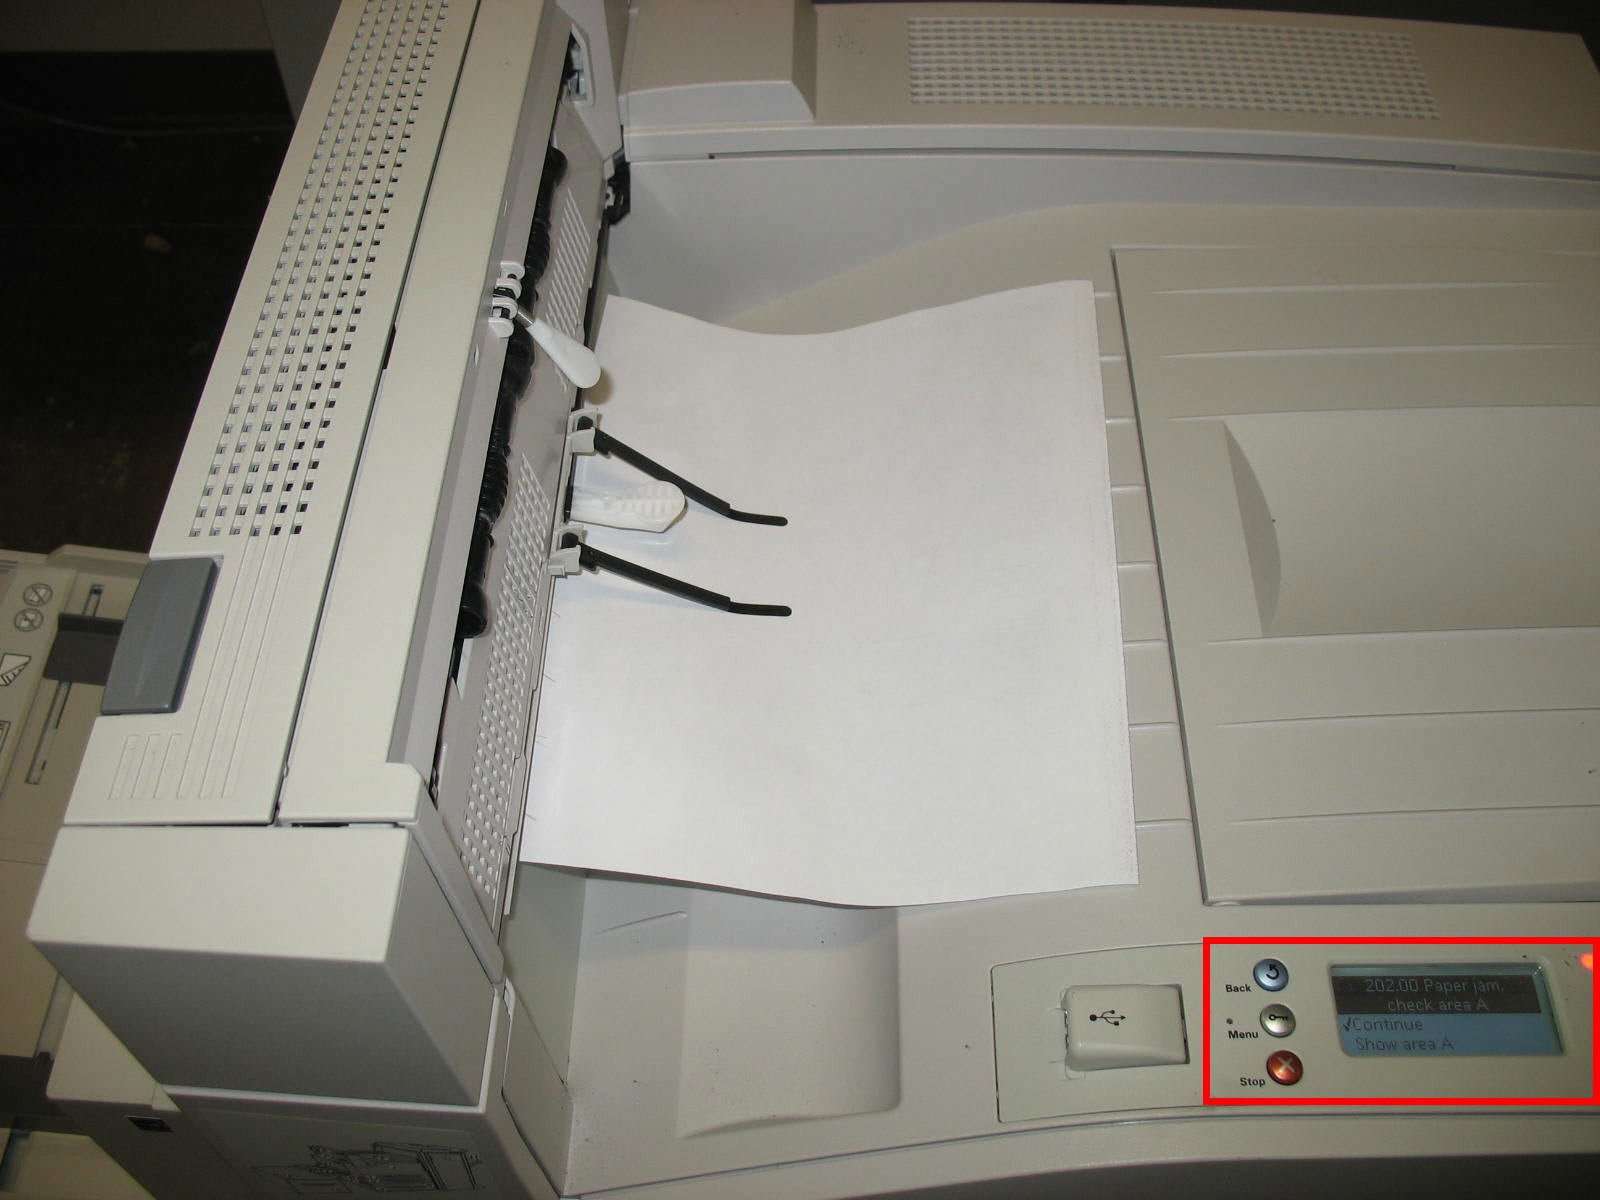
Understanding jam numbers and locations
- A202 Paper Jamerror code – jam location is inDoor A.
- A280 Paper Jamerror code with an installed finisher – jam location is either inDoor Aor inDoor F.
Two-digit suffix numbers accompany this error. Examples include
202.00
, 202.10
, 280.01
, 280.16
, etc.Affected Products
- LexmarkW840Series Printers
- LexmarkX85xeSeries MFPs
- LexmarkW850Series Printers
- LexmarkX86xeSeries MFPs
An
x
denotes any number within a product series.Solution
Clearing the paper jam
To resolve the jam, you must first clear the entire paper path and then press the
Select
or Check
button or select Continue
to clear the message and resume printing. See procedure below.The images in the following table show the
Lexmark W850
models. However, these directions also apply to the Lexmark X86x
models.202.xx – 280.xx Paper Jam Interventions
Step | Action |
|---|---|
1 | Power off the printer/MFP completely and disconnect the power cable from its power supply. Open Door A by pushing the release latch up and lowering the door.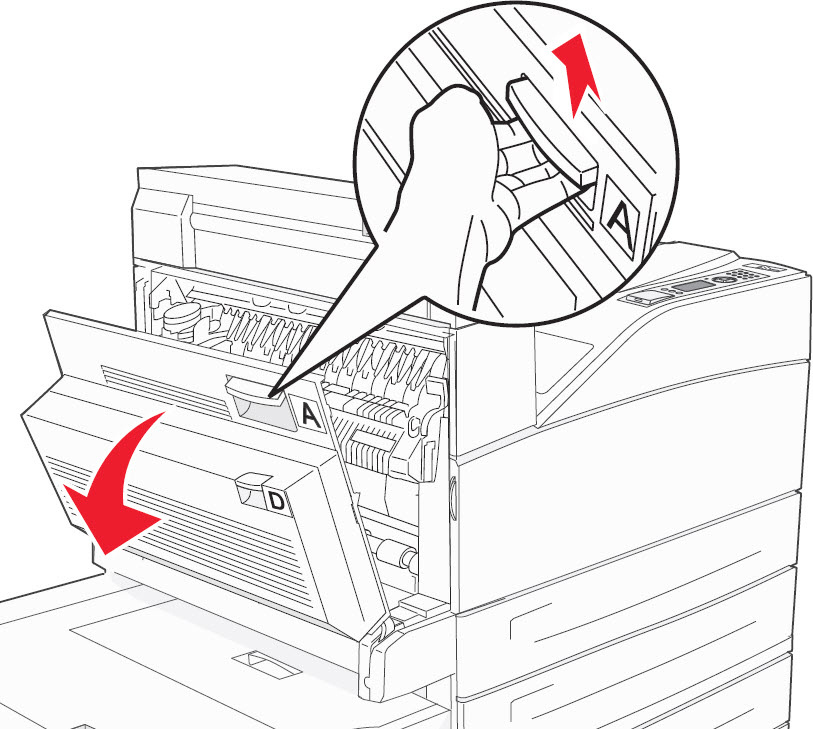 Caution! The jammed page may be covered with unfused toner which can stain garments and skin.In addition, the inside of the printer might be hot. If the page feels hot, allow the surface to cool before removing. |
2 | If the paper is visible, pull the jam up and toward you. Slowly remove the jammed paper to avoid tearing it. If the paper is not visible, then proceed to the steps below.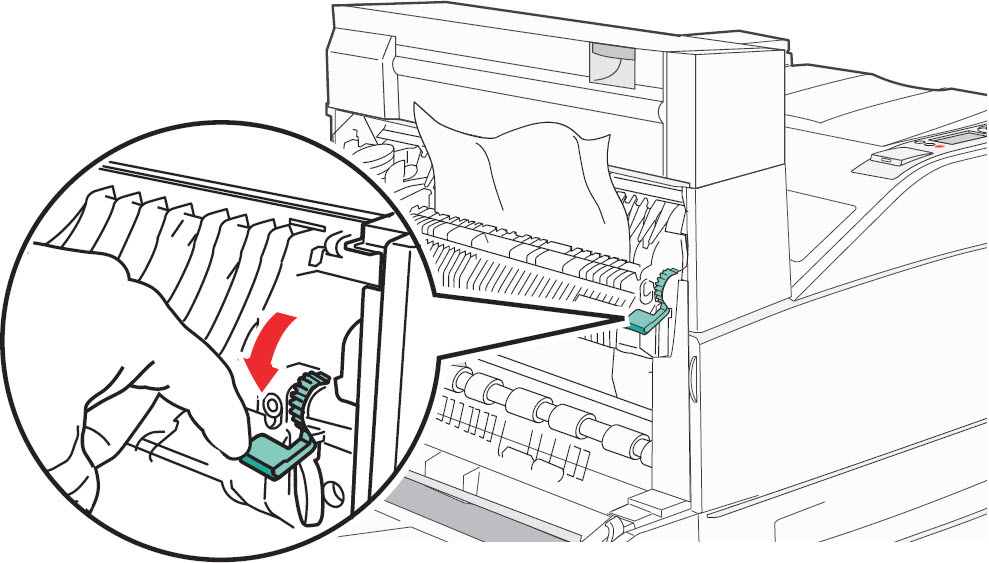 f the jam does not move immediately, stop pulling. Push down and pull thegreen lever to make it easier to remove the jam. Ensure all paper fragments are removed. Do not touch the center of the fuser unit. Doing so will damage the fuser. Also, to prevent any possible damage to the fuser, please do not use sharp objects (i.e., screwdrivers) in removing jammed paper. |
3 | Close Door A .Important! Ensure that the Door A is completely closed. If it is not , it can cause the paper to jam. |
4 | Open Door F , if Door F is present. 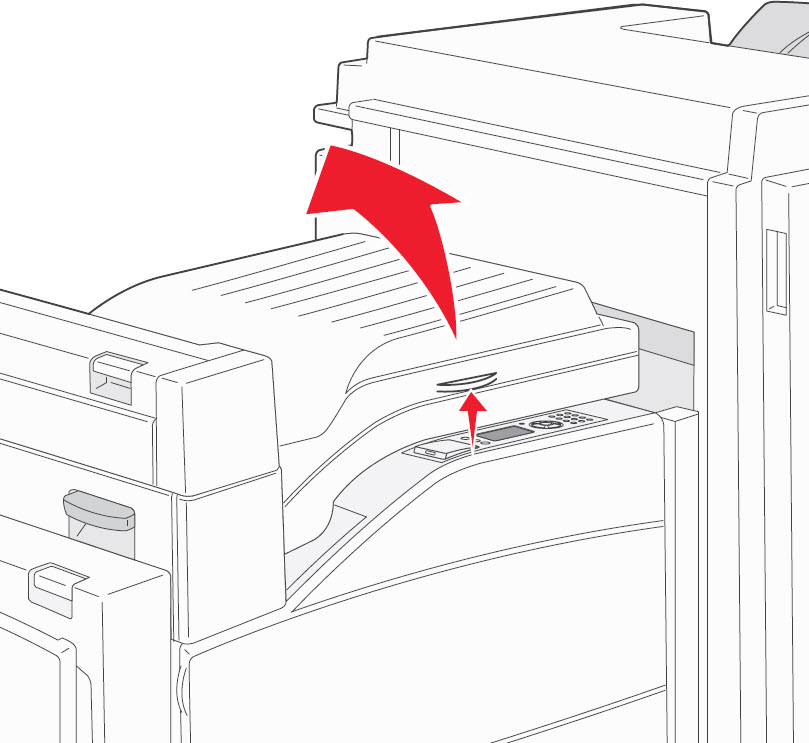 Device will only have a Door F if you have an installed finisher option. If you don’t have an installed finisher option, please skip to Step 7 . |
5 | If the paper is visible, slowly remove the jammed paper to avoid tearing it. Also remove any debris or small pieces of paper from inside the printer/MFP. If you find no jammed paper in the printer/MFP, then proceed to the steps below: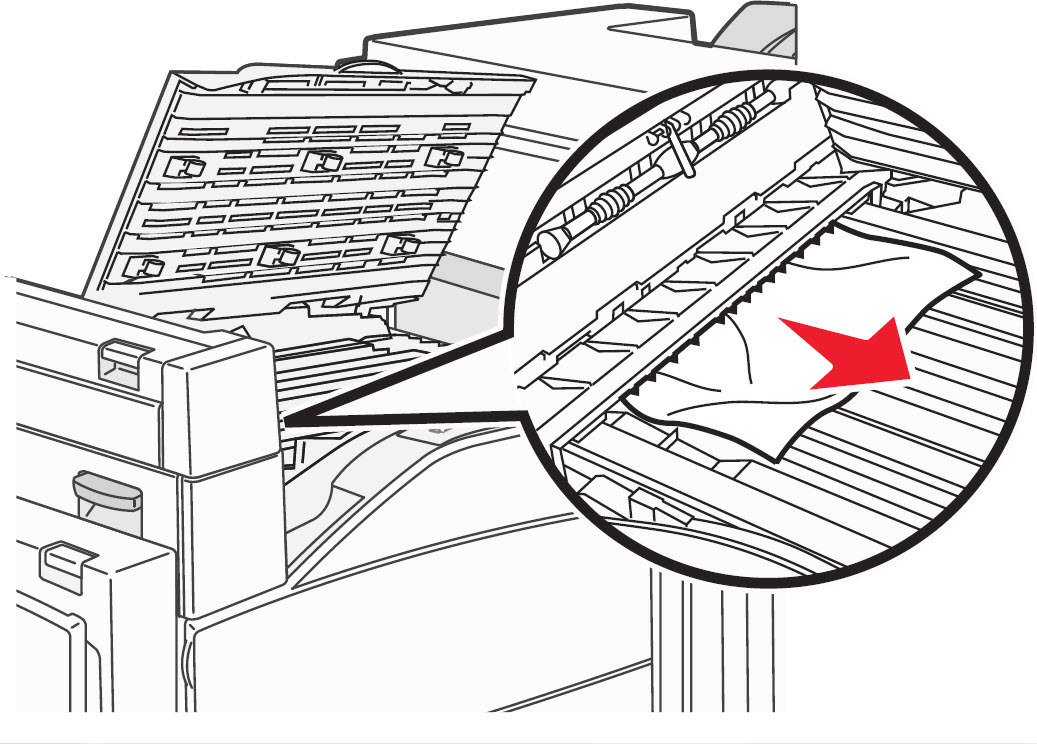 |
6 | Close Door F . |
7 | Power on the printer/MFP and try printing again. If the page prints, the printer is functioning correctly. If the issue returns, please contact Lexmark Technical Support or a local authorized service provider for additional assistance. |
LEGACY ID:
TE385