Tips on How to Handle/Install the Imaging Unit of a Lexmark MX310, MX410, MX510, MX510, MX610, & MX611 Multifunction Printers
Tips on How to Handle/Install the Imaging Unit of a Lexmark MX310, MX410, MX510, MX510, MX610, & MX611 Multifunction Printers
Overview
When handling or installing the Imaging Unit (
IU
), be careful to keep the Photoconductor Drum (PCD
) away from objects that may scratch its surface because such damage will result in Print Quality defects. This document will show some of the proper handling tips.Recommended tips
What to do
| Click Image to Enlarge
|
While installing the IU into the printer, you will want to keep the blue PCD away from the red-outlined areas in the accompanying image. | 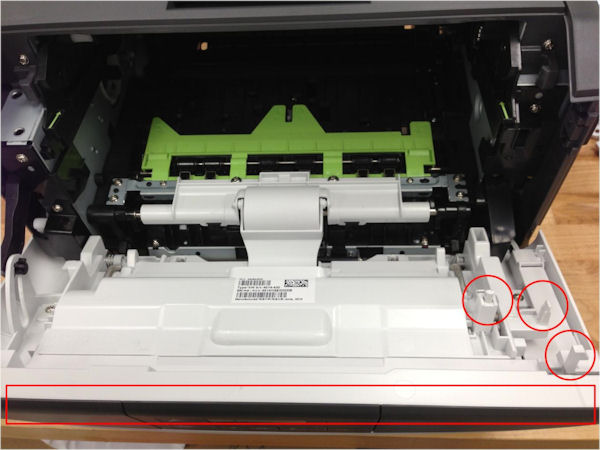 |
The green arrows on the front of the IU and Printer (encircled in red) should be aligned before inserting the IU into the Printer. |  |
You may also refer to Replacing the toner cartridge and imaging unit video for the Lexmark MX310, MX410, MX510, MX510, MX610, & MX611
IU
installation steps.
Still need help?
If you require additional assistance, please close this window and locate 
Get in Touch with Lexmark!
for contact information.
NOTE:
When calling for support, you will need your printer model
/machine type
and serial number
(SN
), as well as the cartridge part number and serial number. If you need help locating these, Please be near the products described in this article to expedite the support process and reduce callbacks.
LEGACY ID:
HO3863