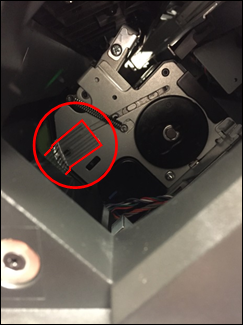
Shipping Tape Found on the Staple Holster of the Multi-Position Staple Punch Finisher
What you will
see
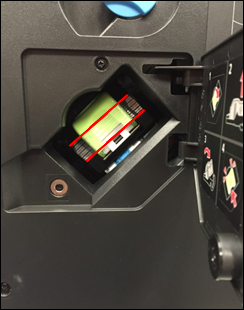
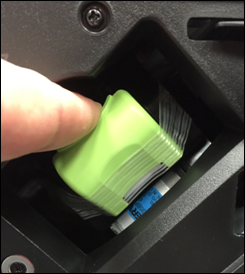
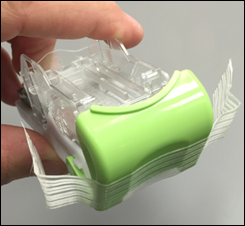
Tape is seen in the stapler area and on the actual staple cartridge of the multi-position staple, hole punch finisher.
These strategically placed pieces of tape are intended to protect the entire stapler assembly
during shipment
. Tape locations
Stapler assembly | Staple cartridge (holster) |
 |  |
Affected products
- CX825,CX860,XC8155,XC8160
- 42K1597, 98 Tall Multi-position staple, hole punch finisher
- 42K1267, 68 Short Multi-position staple, hole punch finisher
Impact of not removing the tape
No physical damage
should result from not removing this tape. When to remove the tape
You should remove this tape during the first refill session; however, removal of this tape during the original installation of the finisher is not necessary.
What not to do!
Do not
attempt to reach into the finisher to remove the tape.Follow one of these
two methods
for removing the tape: Method 1: When cartridge exhausted
- Follow the instructions as they appear on the control panel when the cartridge indicates replacement has become necessary.
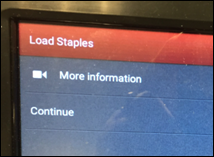
- You will see the tape when you open the staple access door.
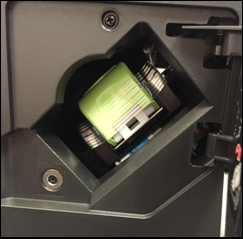
- Pull on the green release lever.NOTE:These instructions are on the inside of the staple door.
- Remove the tape from the holster. Follow the replacing the staple cartridge instructions. See also the User's Guide reference toReplacing the staple cartridge in the multi-position staple, hole punch finisher.
Method 2: Before cartridge is exhausted
- Select theStatus/Supplieson the control panel.
- SelectHardware.
- Scroll down the screen and look forStaples, Status OK.
- SelectStaples.
- SelectReplace Staples Now.
- Follow the same procedure forreplacing the staple cartridge.
Still need help?
If you need additional assistance, please close this window, go to your product's support page and locate 
Get In Touch with Lexmark!
for contact information.
NOTE:
When calling for support, you will need to provide your printer model/machine type
and serial number
(SN
). Please be near the products described in this article to expedite the support process and reduce call-back situations.
LEGACY ID:
SO7923