How to Replace the Developer Unit
How to Replace the Developer Unit
Overview
Affected products
Click on Properties in the title section above for a full list of printer models.
Developer unit replacement procedure for CS31x, 41x, 51x, and C54x color laser printers
Step
| Action
| Illustration
|
1
| Grasp the front door by the side handles and pull it forward. Caution—Hot Surface! The inside of the printer may be hot. To avoid injury, allow the components to cool off before continuing. | 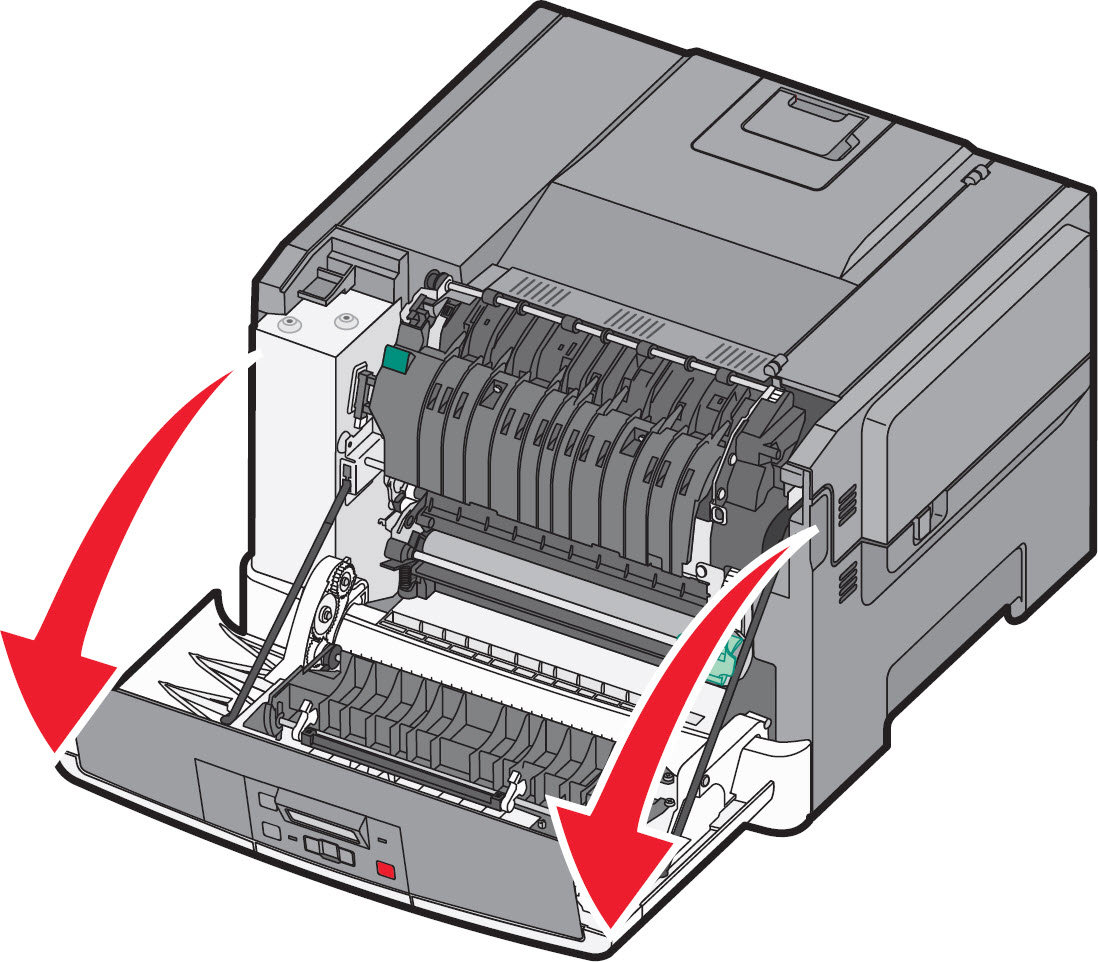 |
2
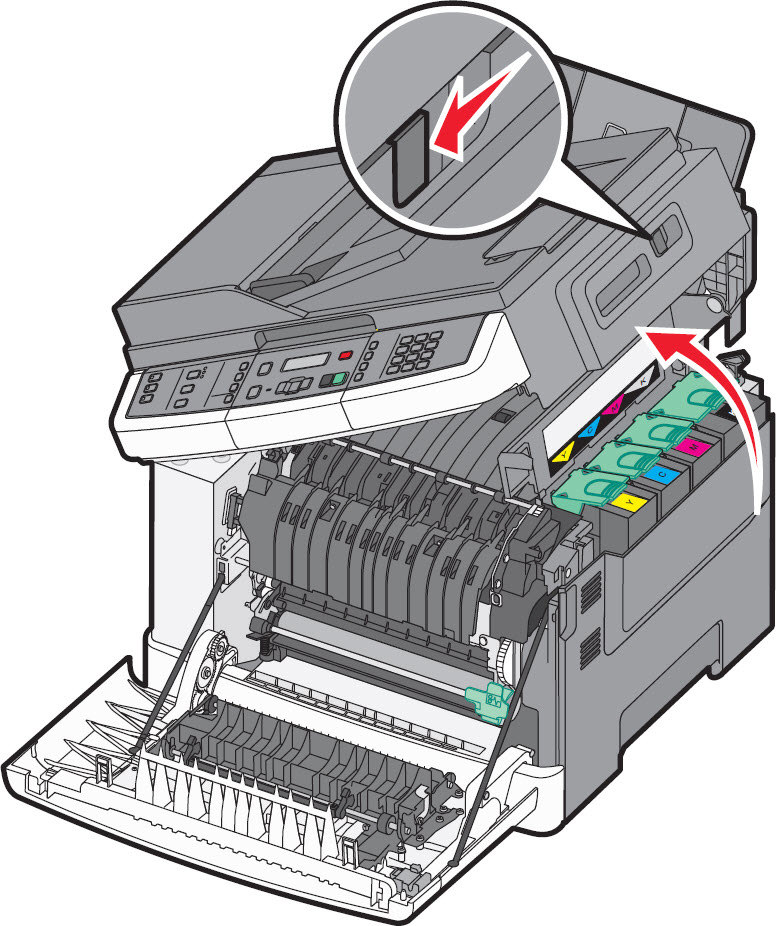
| Open the top door by sliding the button forward. | 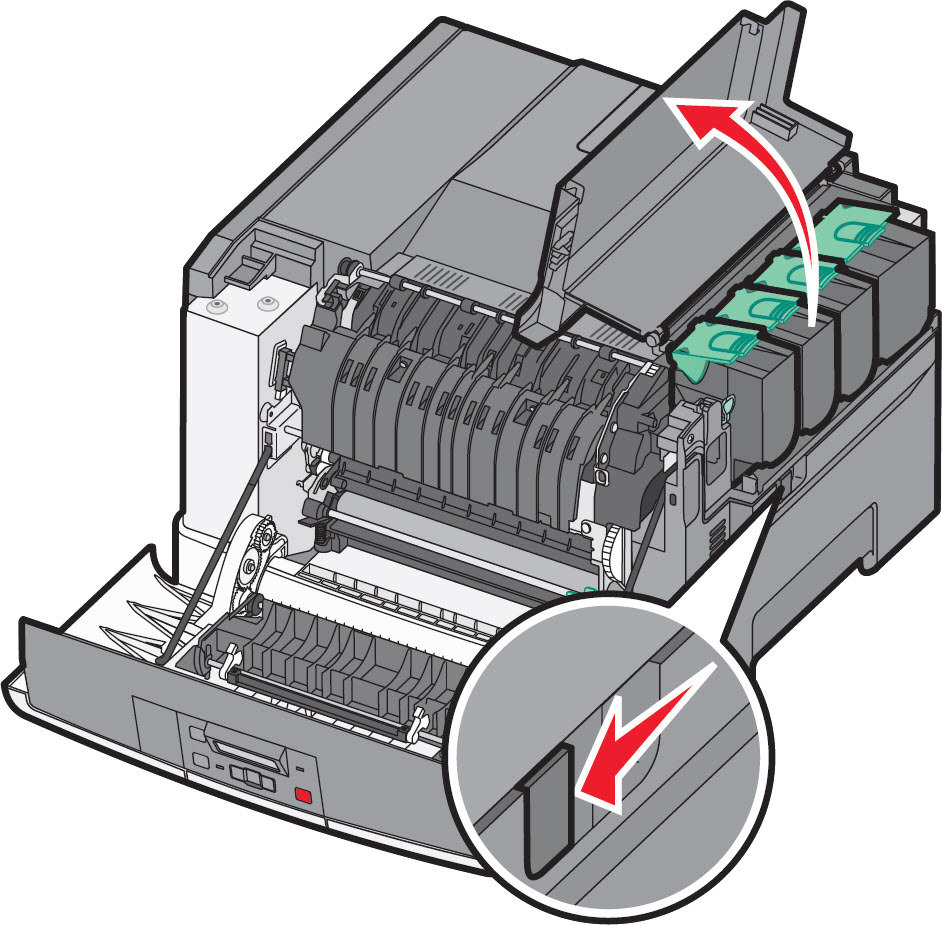 |
3
| Remove the toner cartridges by lifting the handles and then gently pulling away from the imaging kit . | 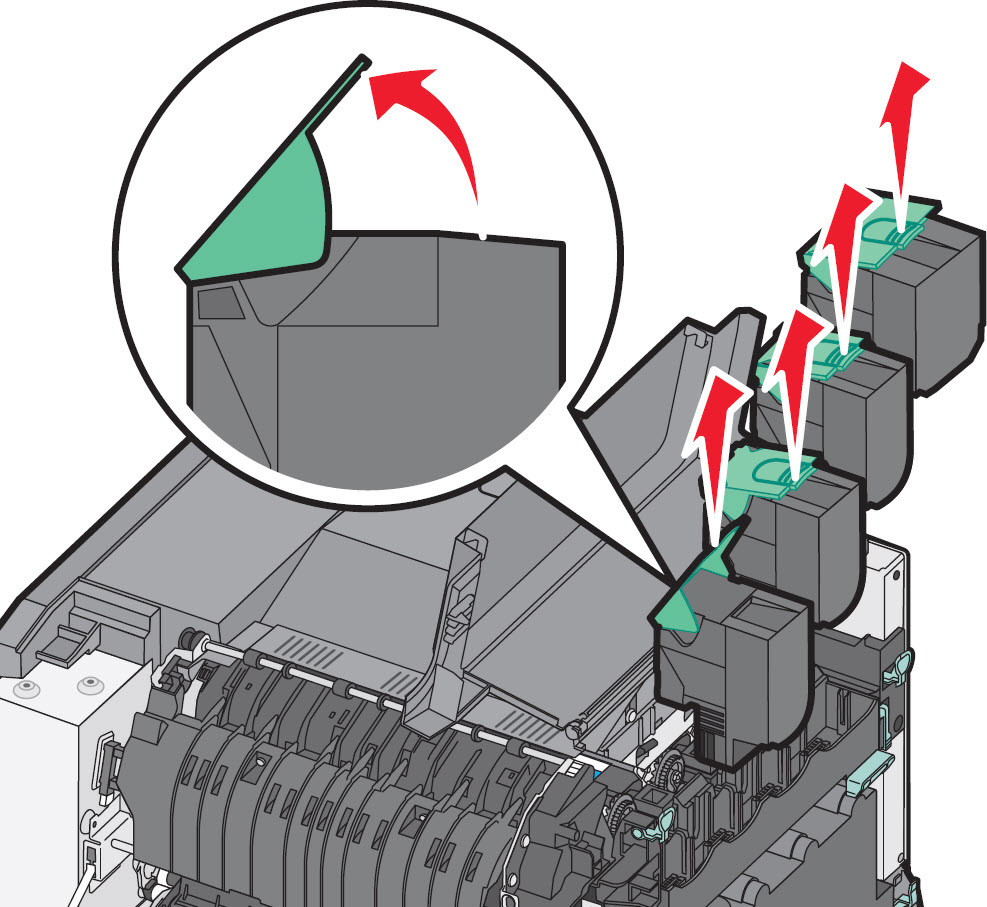 |
4
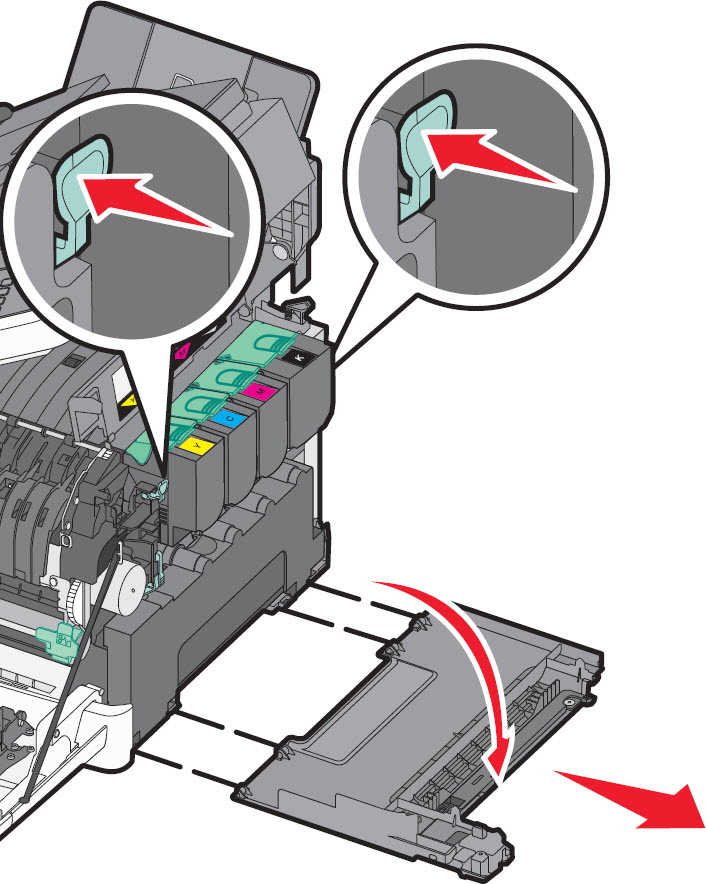
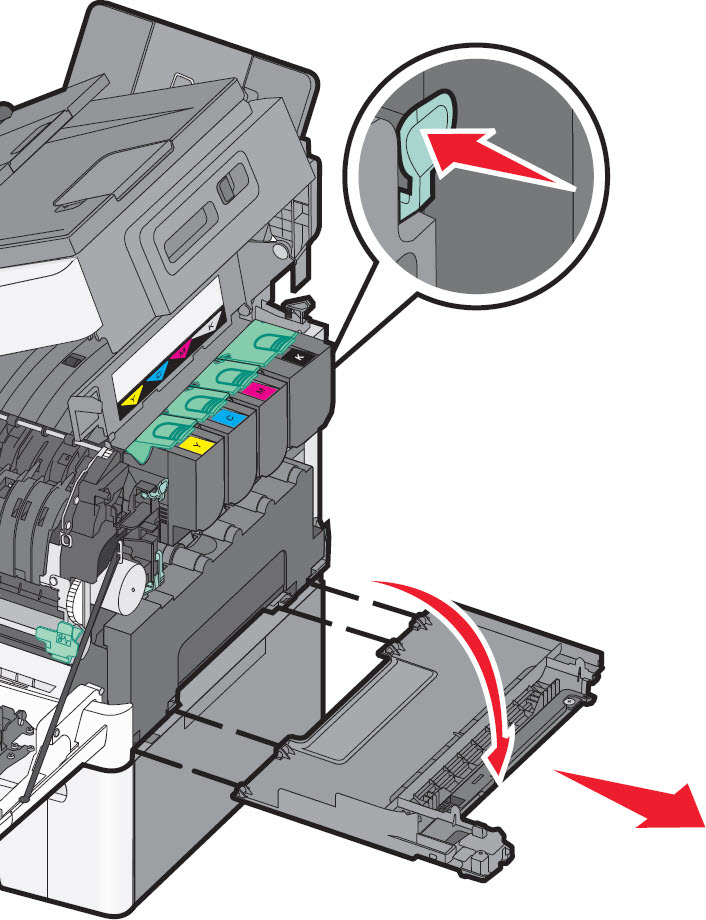
| Remove the right side cover . | 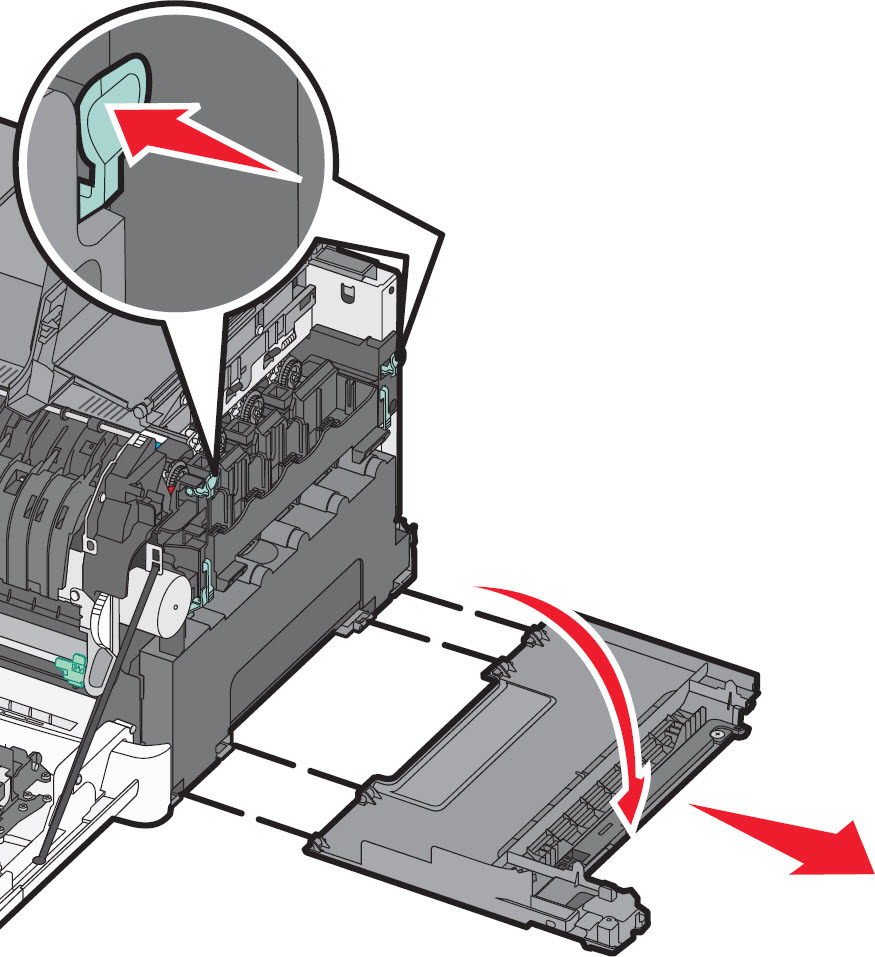 |
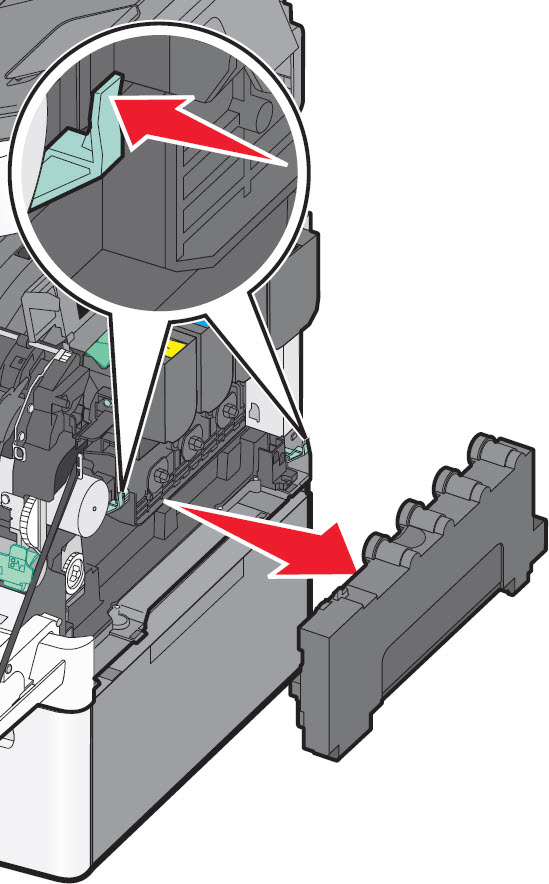
5
| Press the green levers on either side of the waste toner bottle , and then remove it. | 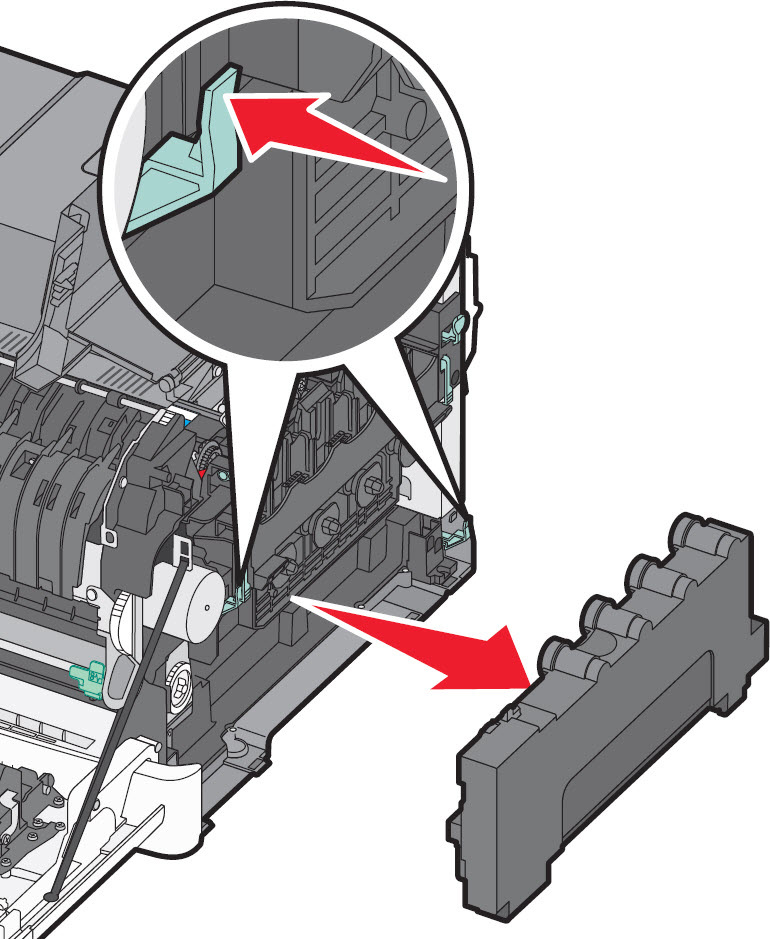 |
6
| Lift the blue levers on the imaging kit , and pull the kit towards you. | 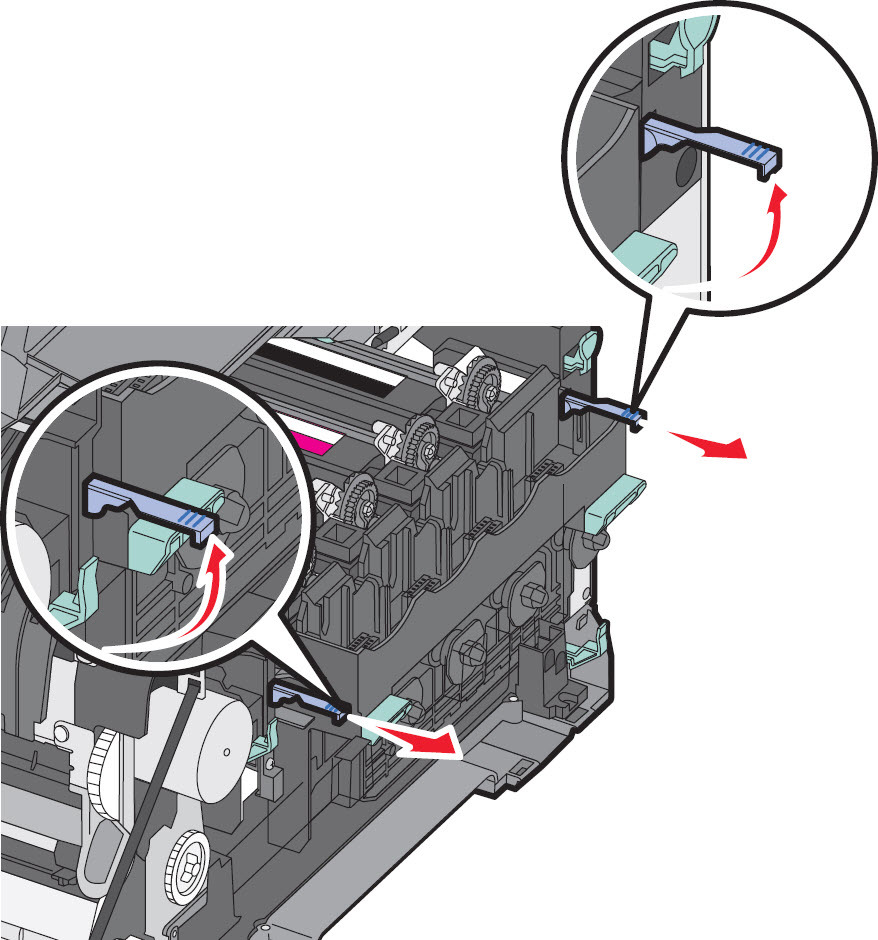 |
7
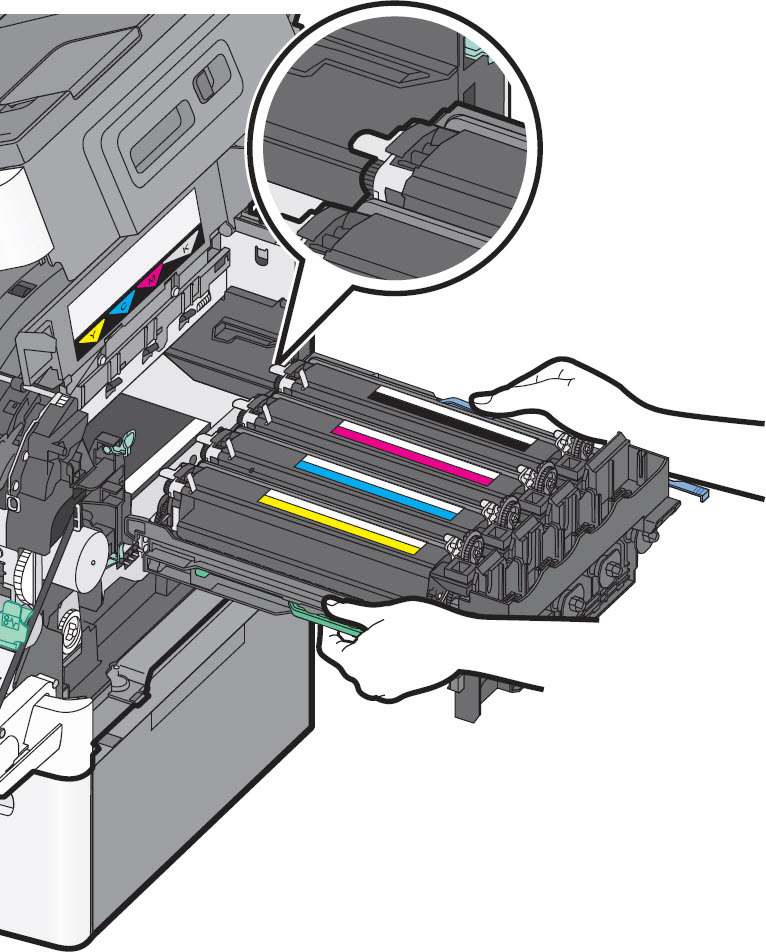
| Press down on the blue levers , grasp the green handles on the sides, and then pull the imaging kit out of the printer.Warning
—Potential Damage! Do not touch the underside of the imaging kit as this could damage it. | 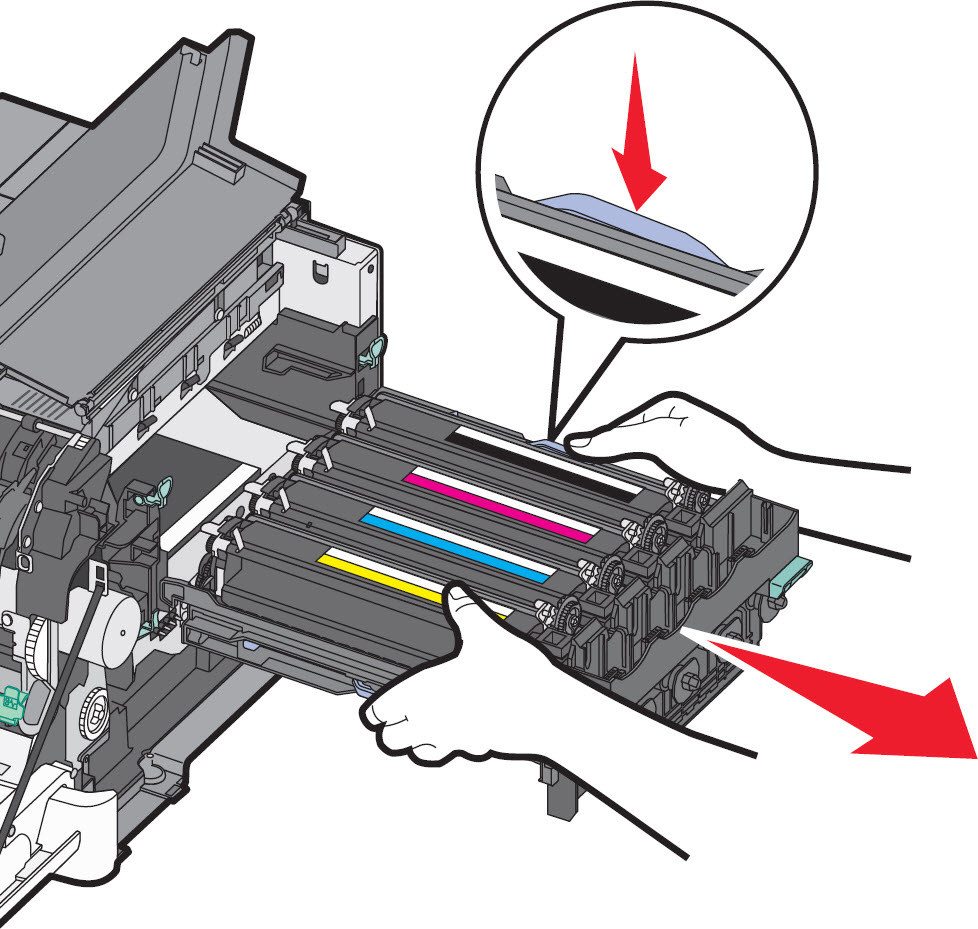 |
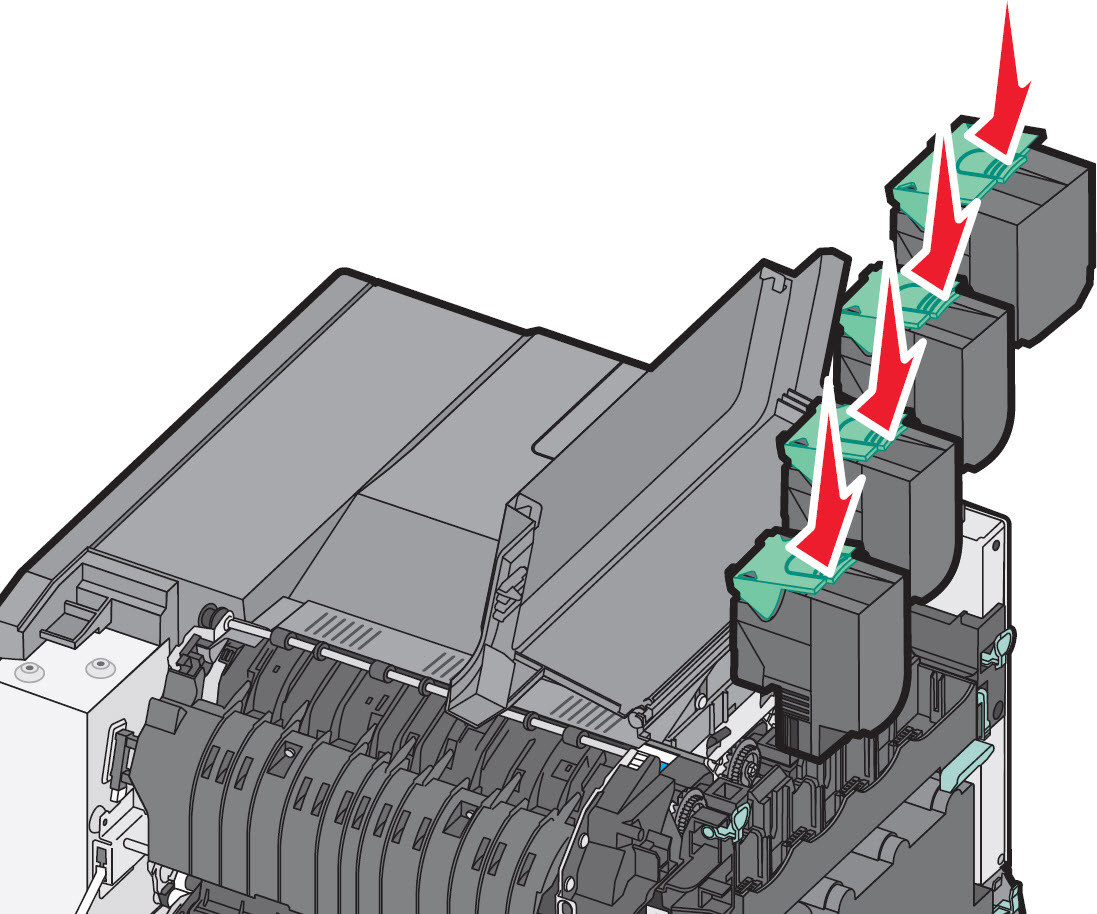
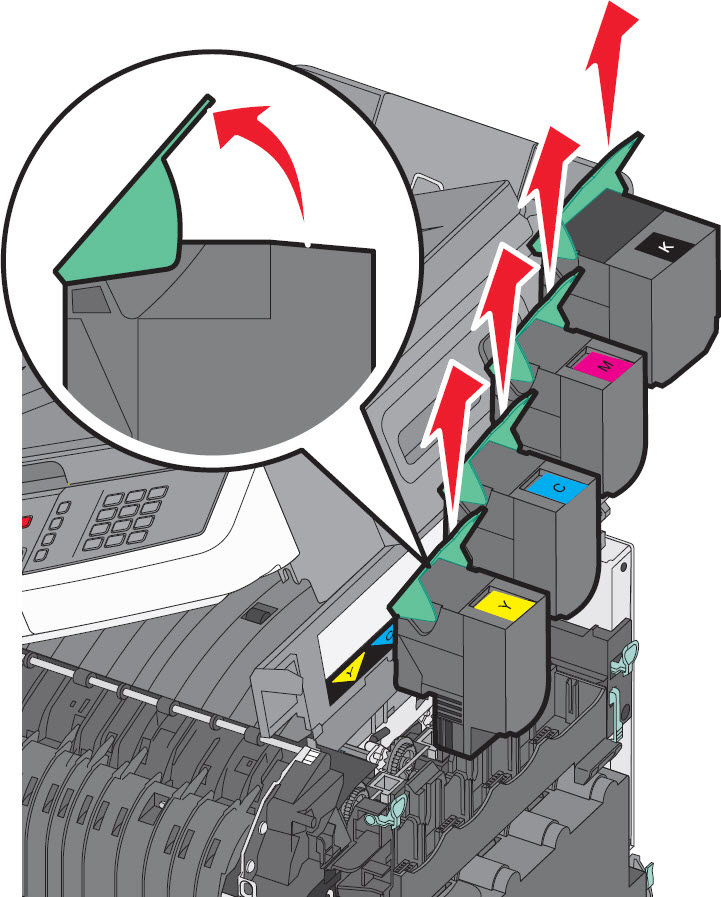
8
| Remove the used developer unit . | Black Developer Unit
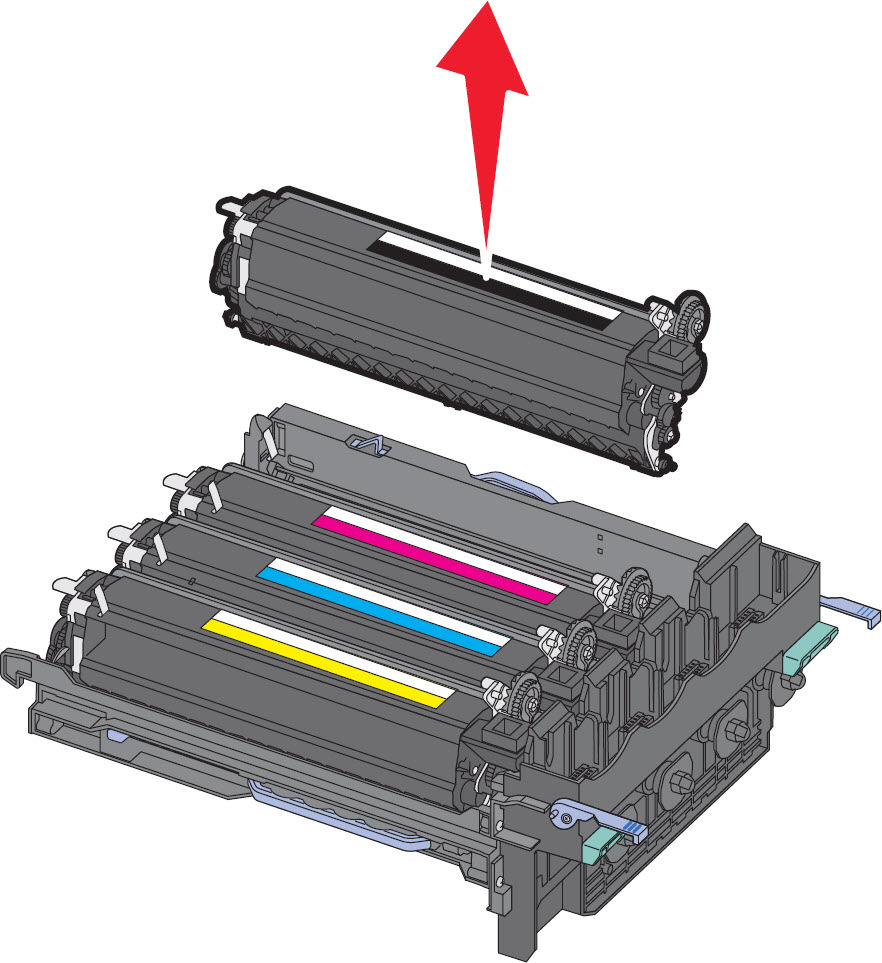 Yellow
, Cyan andMagenta Developer Units
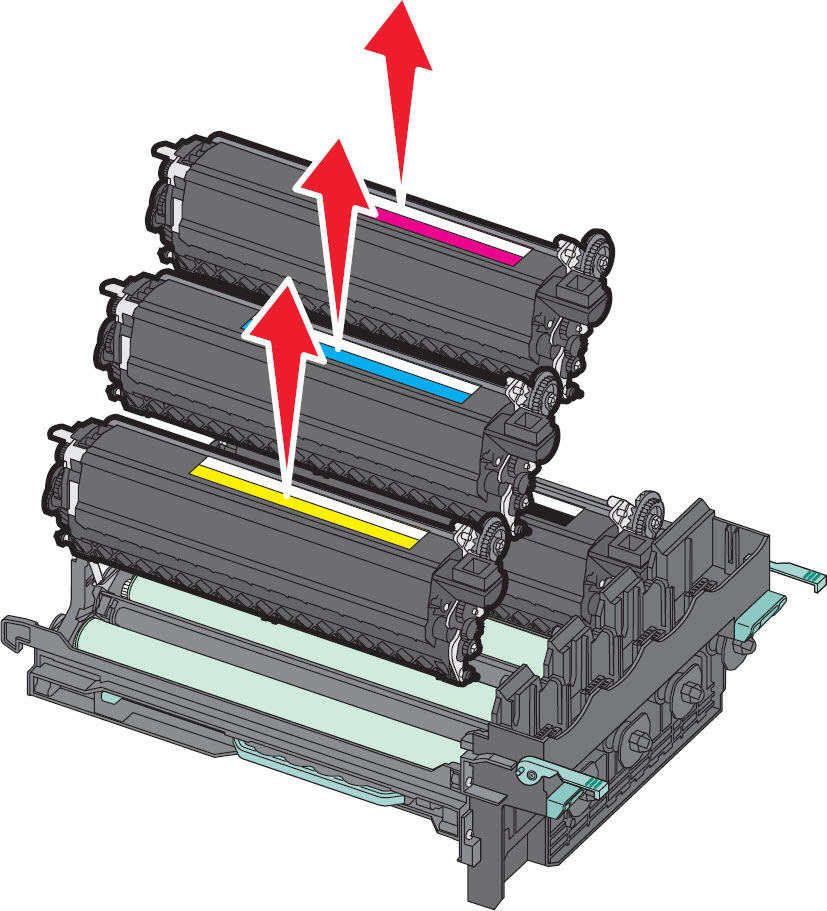 |
9
| Unpack the new developer unit . Leave the red packaging on the developer unit itself in place. | No Image
|
10
| Place the old developer unit in the package provided. | No Image
|
11
| Gently shake the developer unit from side to side. | No Image
|
12
| Remove the red shipping cover from the developer unit . | 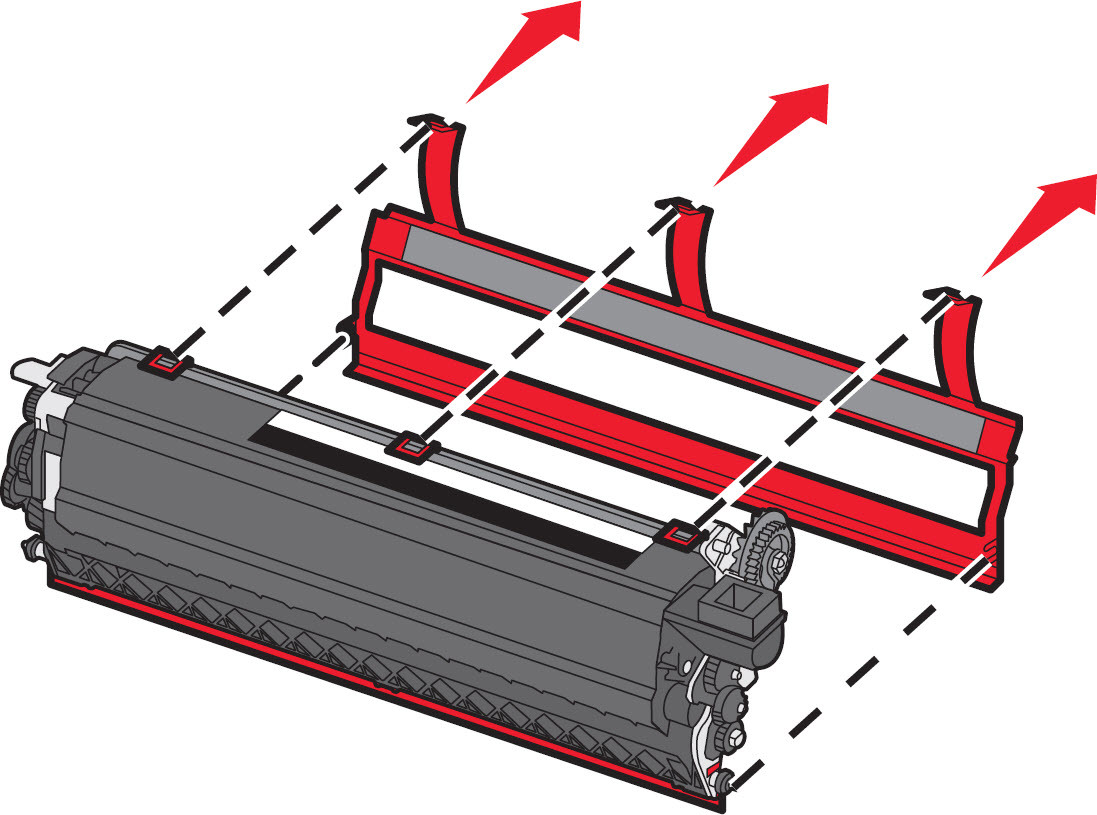 |
13
| Insert the new developer unit . | 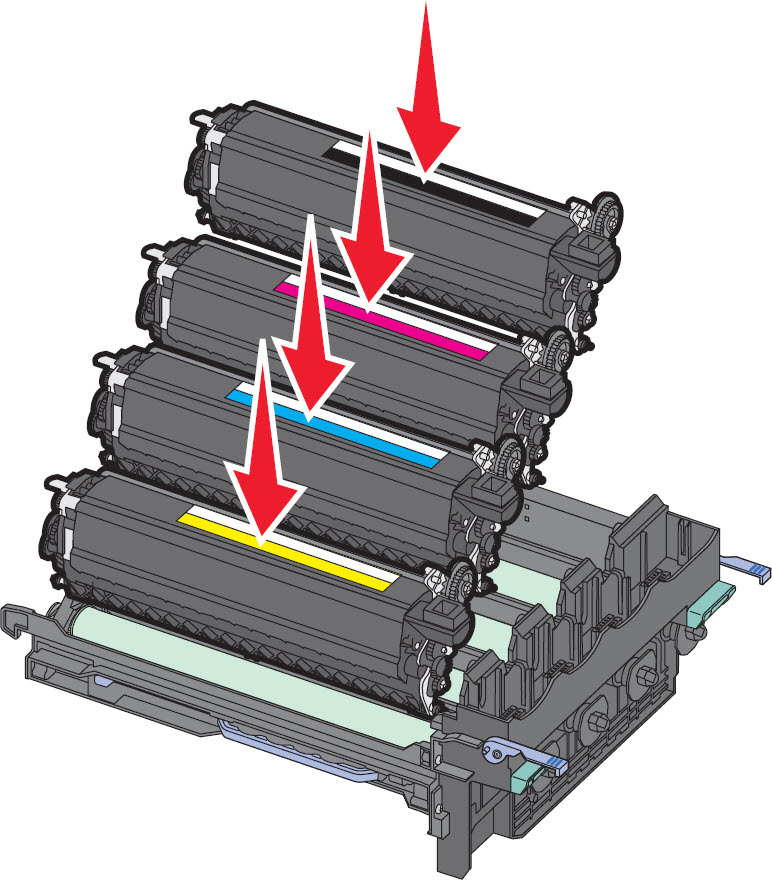 |
14
| Align and insert the imaging kit . | 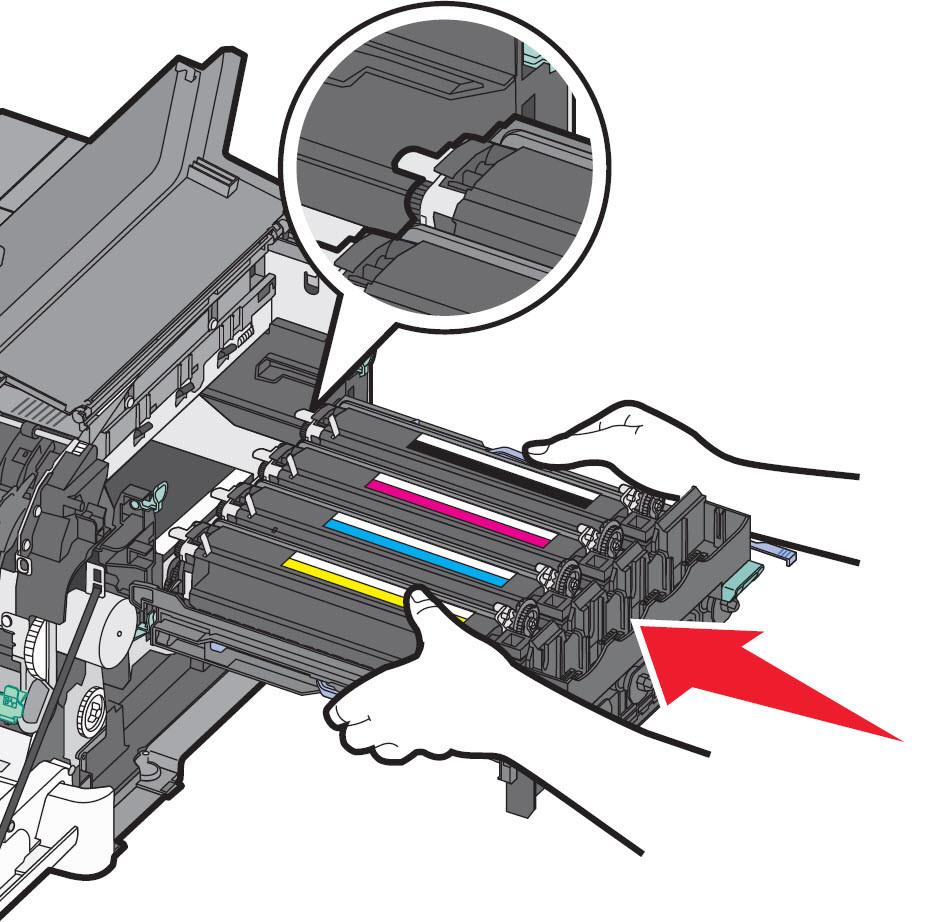 |
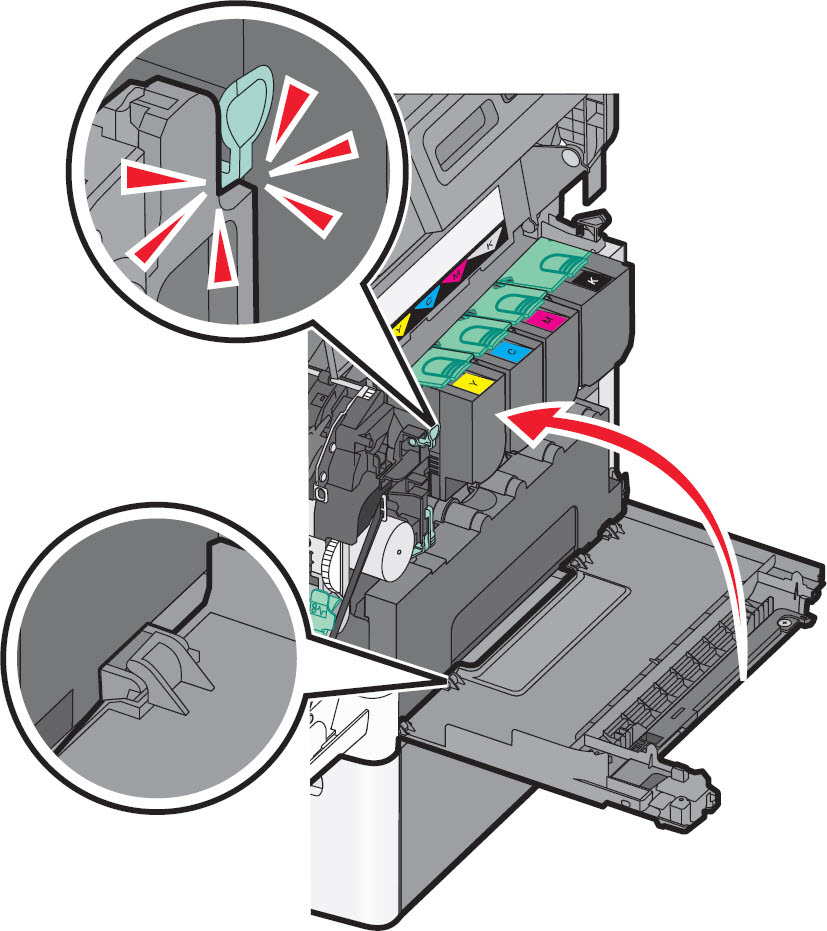
15
| Gently, but firmly push the blue levers down until the imaging kit drops into place. | 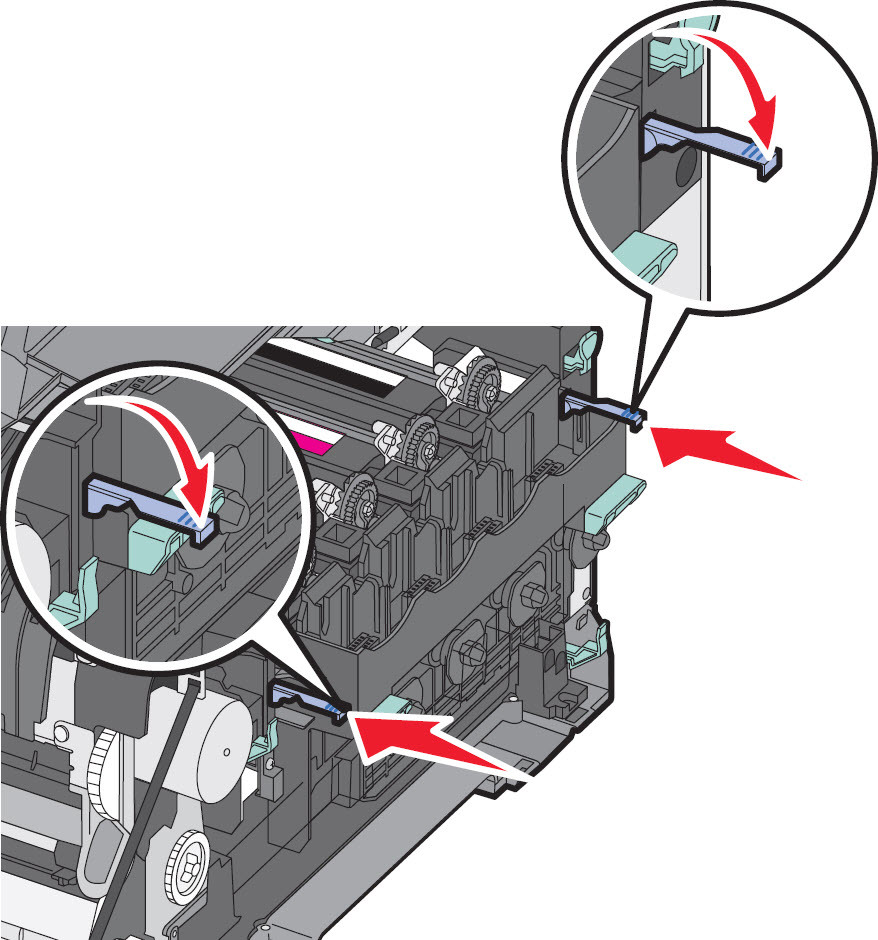 |
16
| Reinstall the waste toner bottle . | 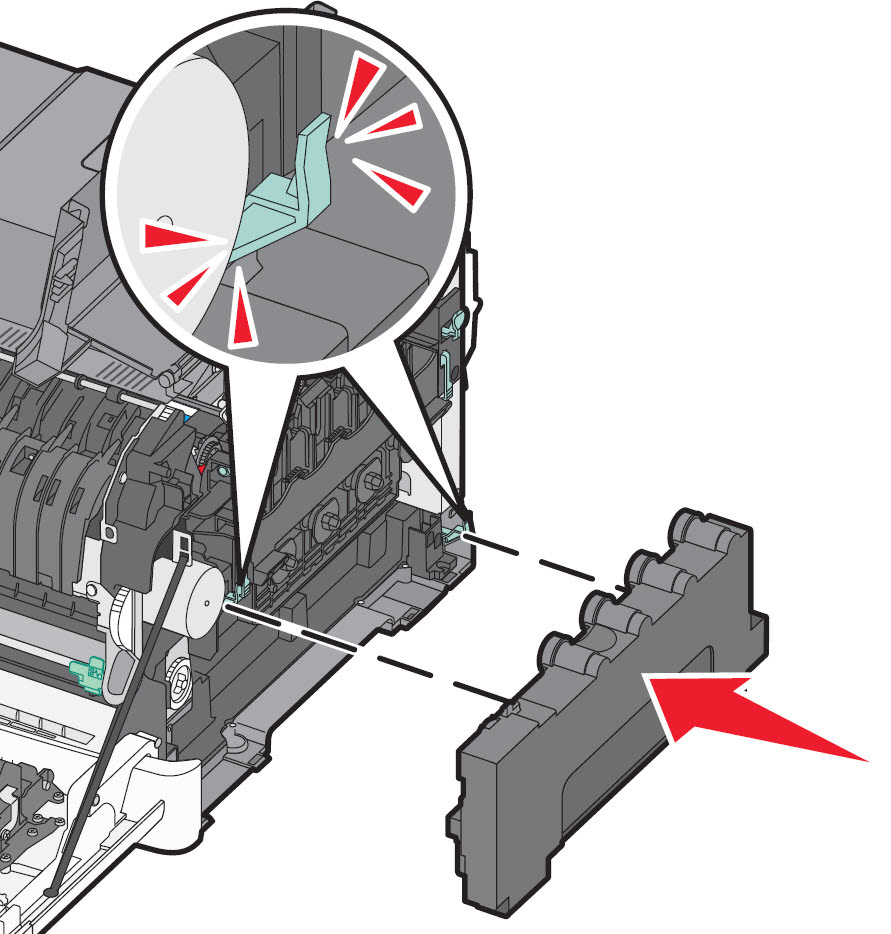 |
17
| Reinstall the right side cover . | 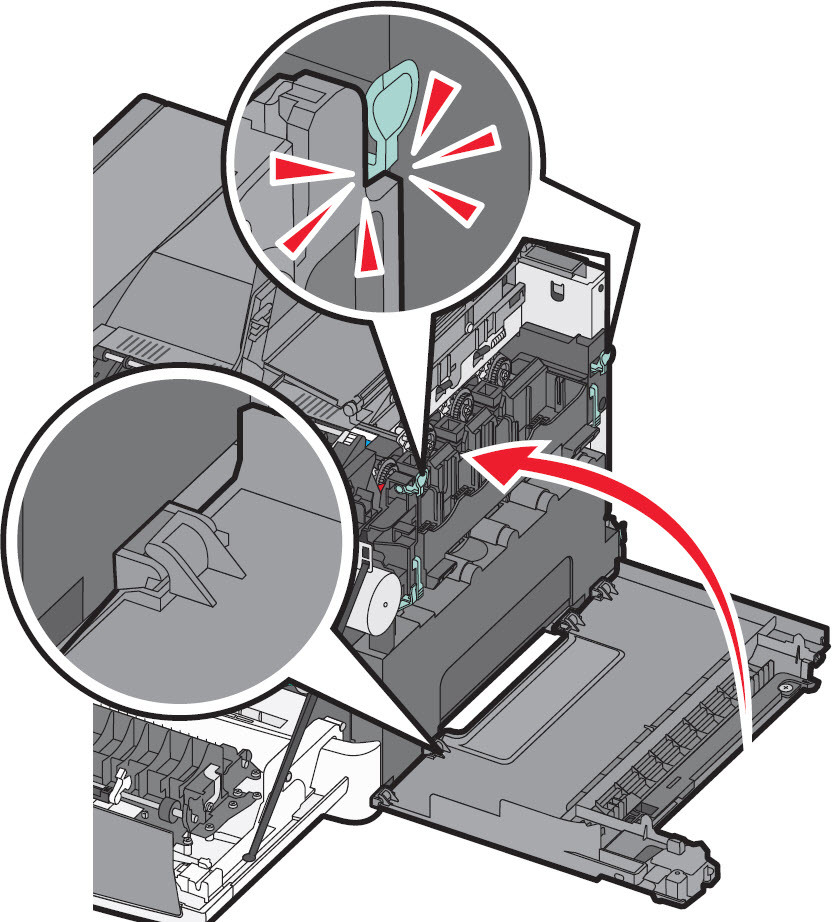 |
18
| Reinstall the toner cartridges
|  |
19
| Close the top cover . | 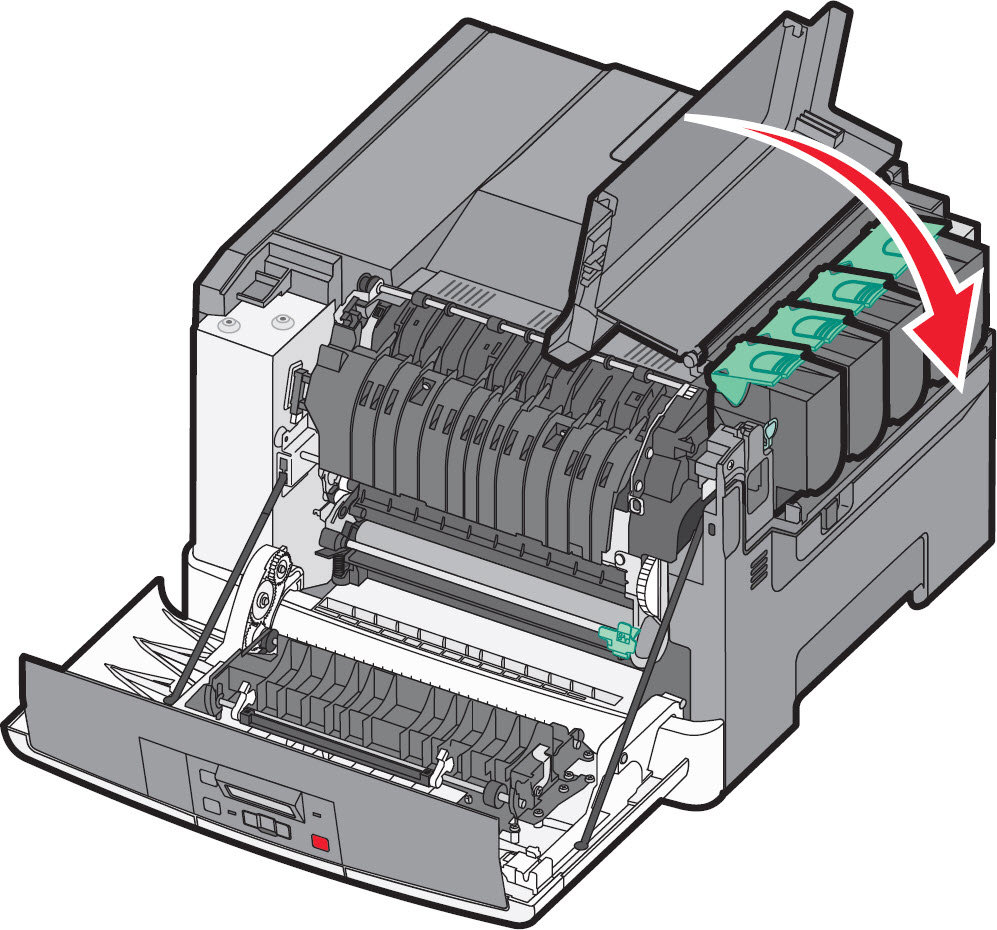 |
20
| Close the front door . | 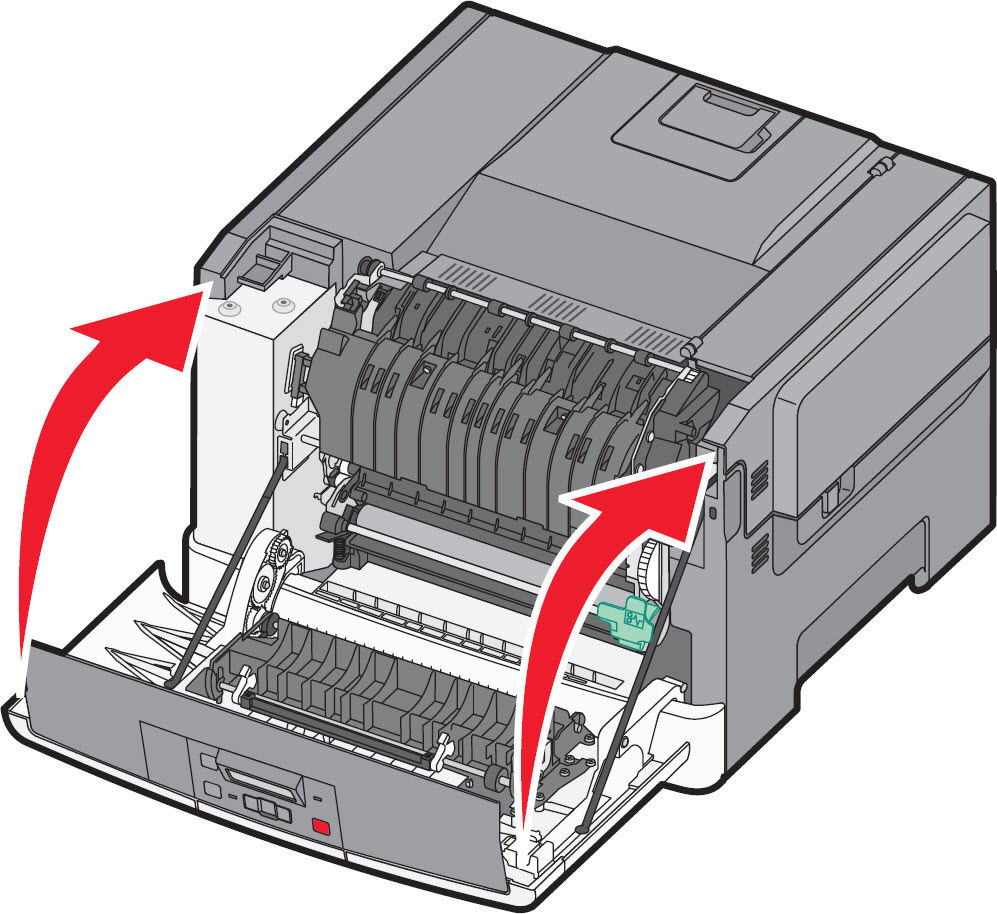 |
Developer unit replacement procedure for CX31x, 41x, 51x, and C54x color laser mfps
Step
| Action
| Illustration
|
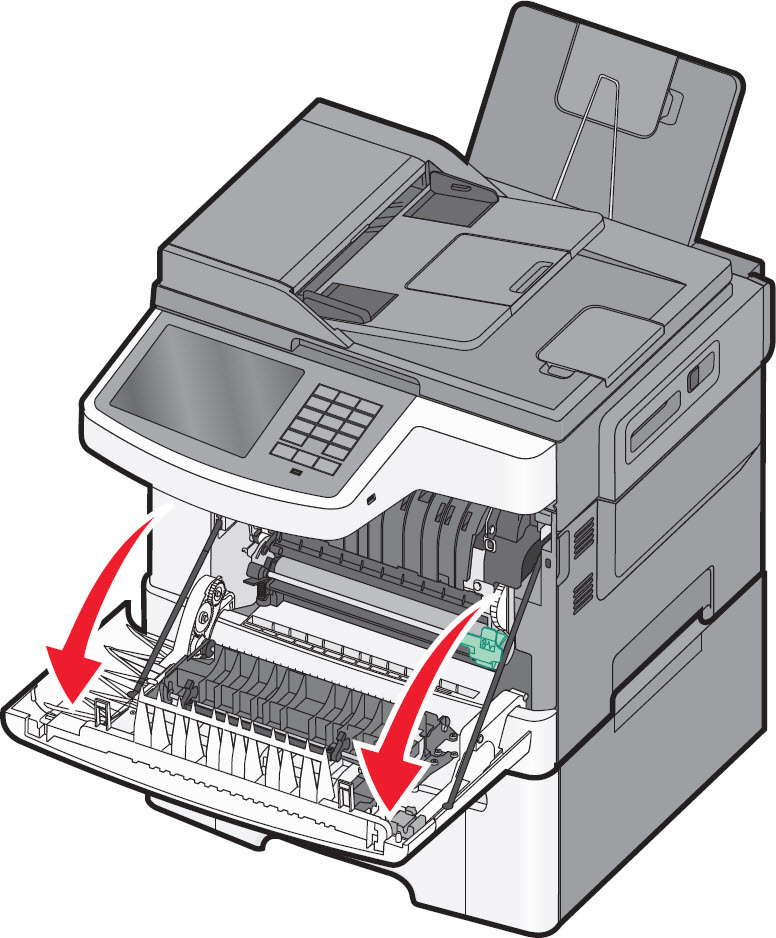
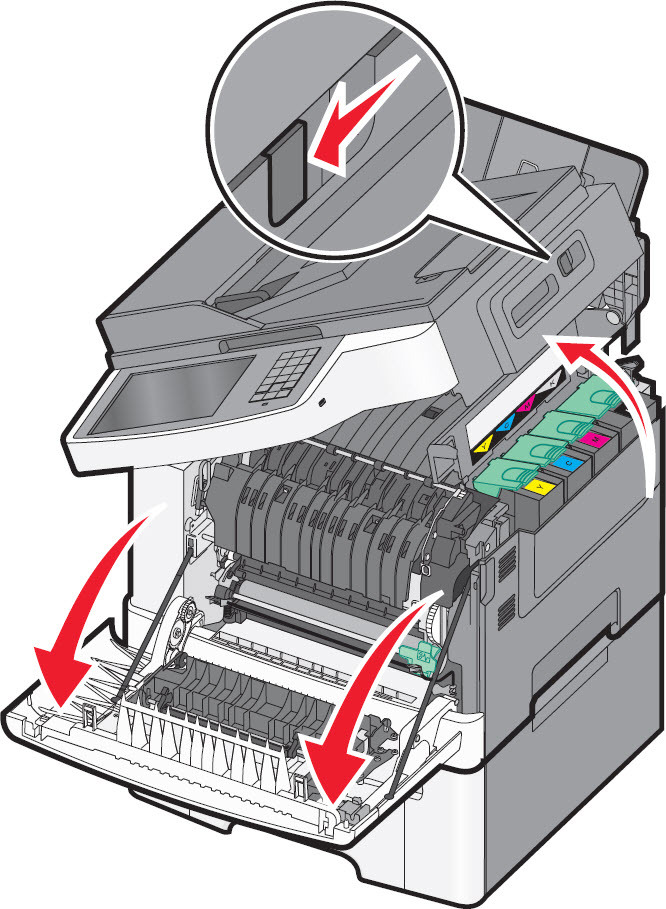
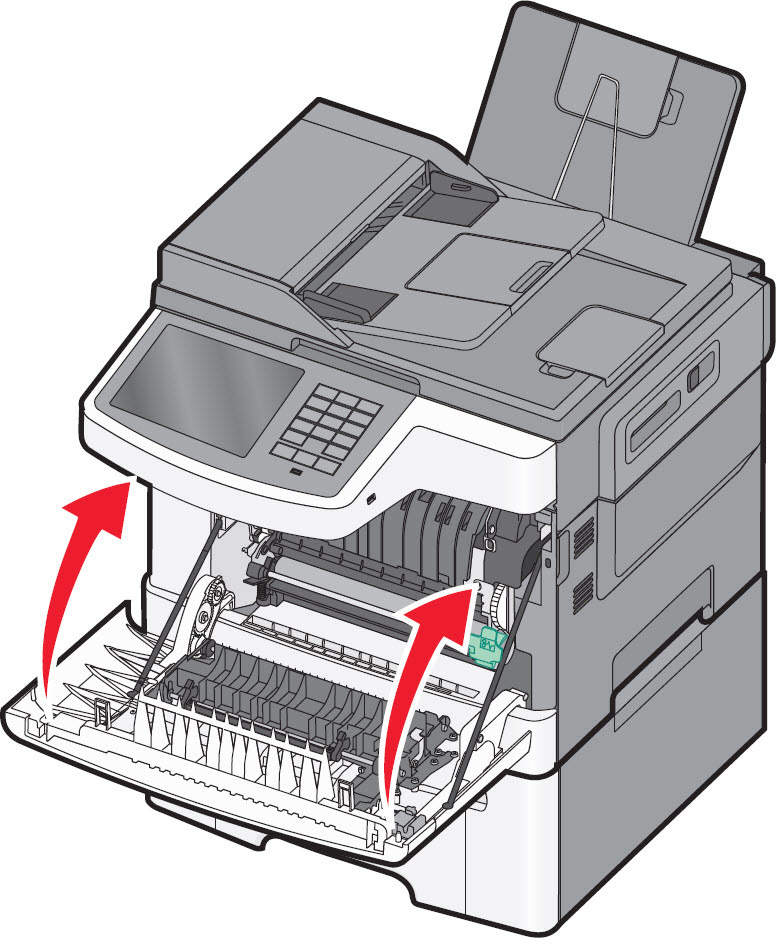
1
| Grasp the front door at the side handholds, and then pull it toward you to open it.Caution—Hot Surface! The inside of the MFP may be hot. To avoid injury, allow the components to cool off before continuing. | For Lexmark X543/4/6
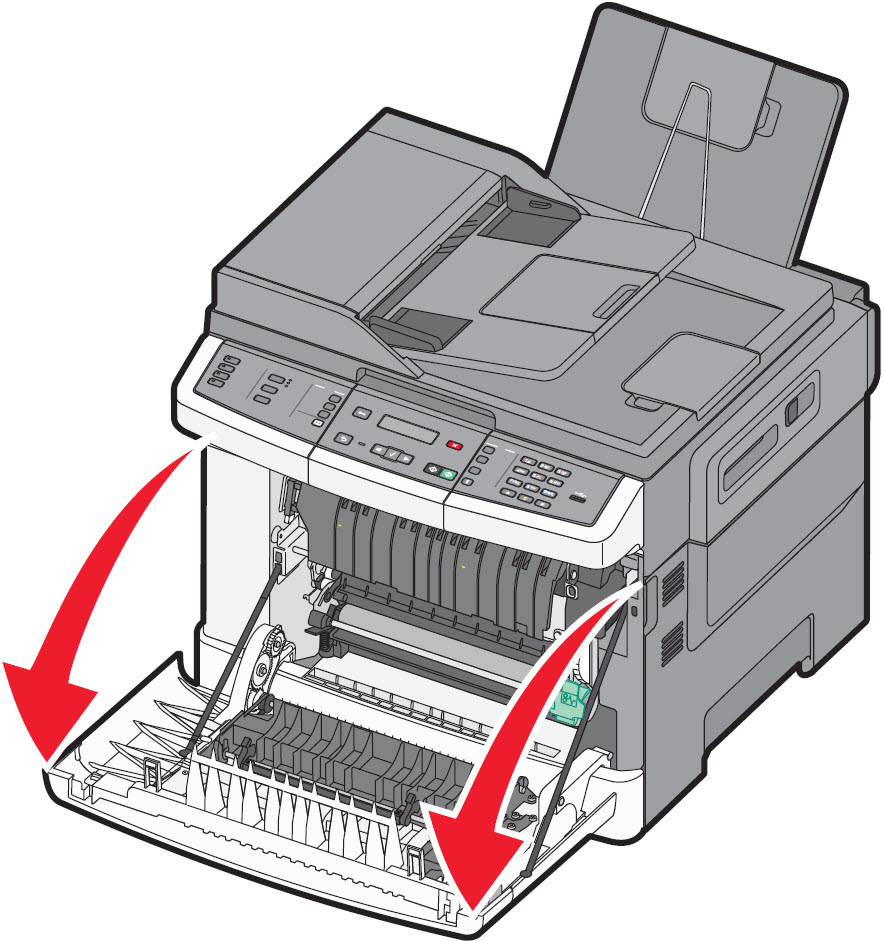 For Lexmark X548
 |
2
| Open the top door by sliding the button forward. | For Lexmark X543/4/6
 For Lexmark X548
 |
3
| Remove the toner cartridges by lifting the handles and then gently pulling away from the imaging kit . | For Lexmark X543/4/6
 For Lexmark X548
 |
4
| Remove the right side cover . | For Lexmark X543/4/6
 For Lexmark X548
 |
5
| Press the green levers on either side of the waste toner bottle , and then remove it. | For Lexmark X543/4/6 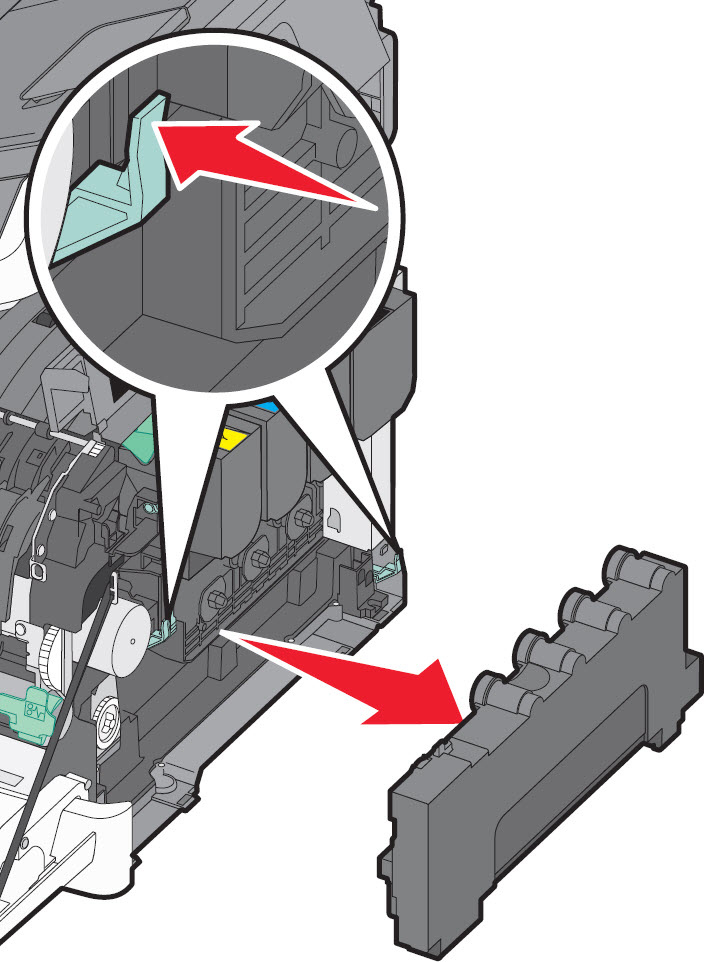 For Lexmark X548
 |
6
| Lift the blue levers on the imaging kit , and pull the kit towards you. | 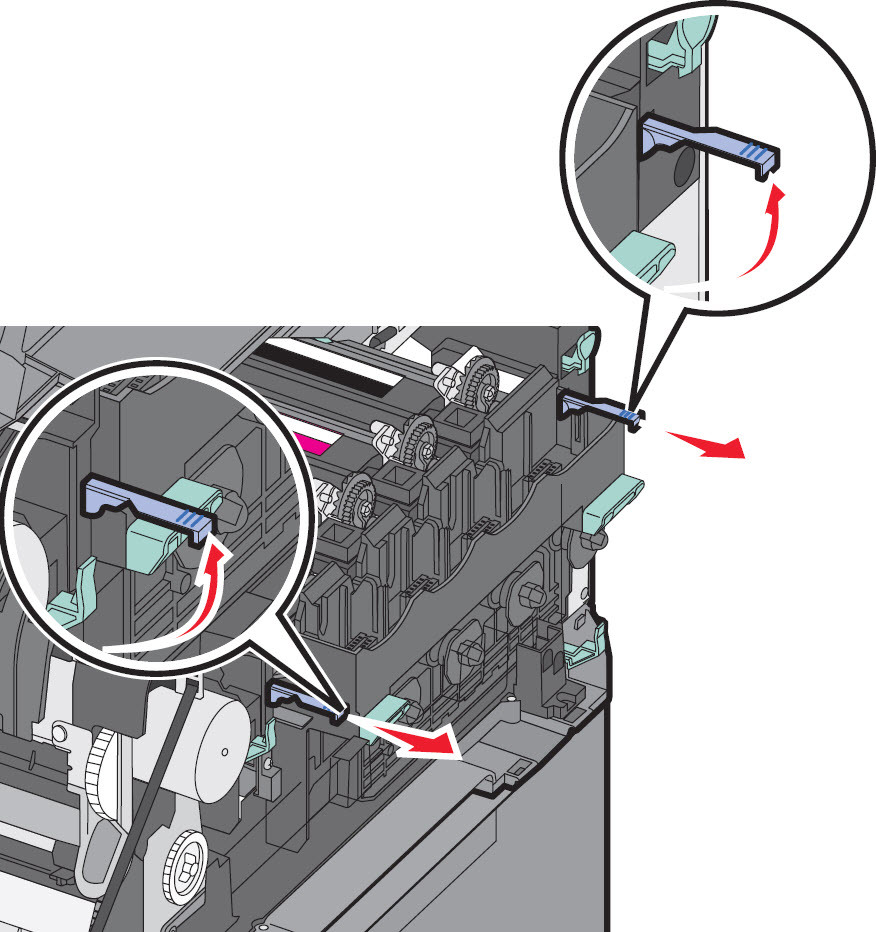 |
7
| Press down on the blue levers , grasp the green handles on the sides, and then pull the imaging kit out of the MFP.Warning
—Potential Damage! Do not touch the underside of the imaging kit as this could damage it. | For Lexmark X543/4/6 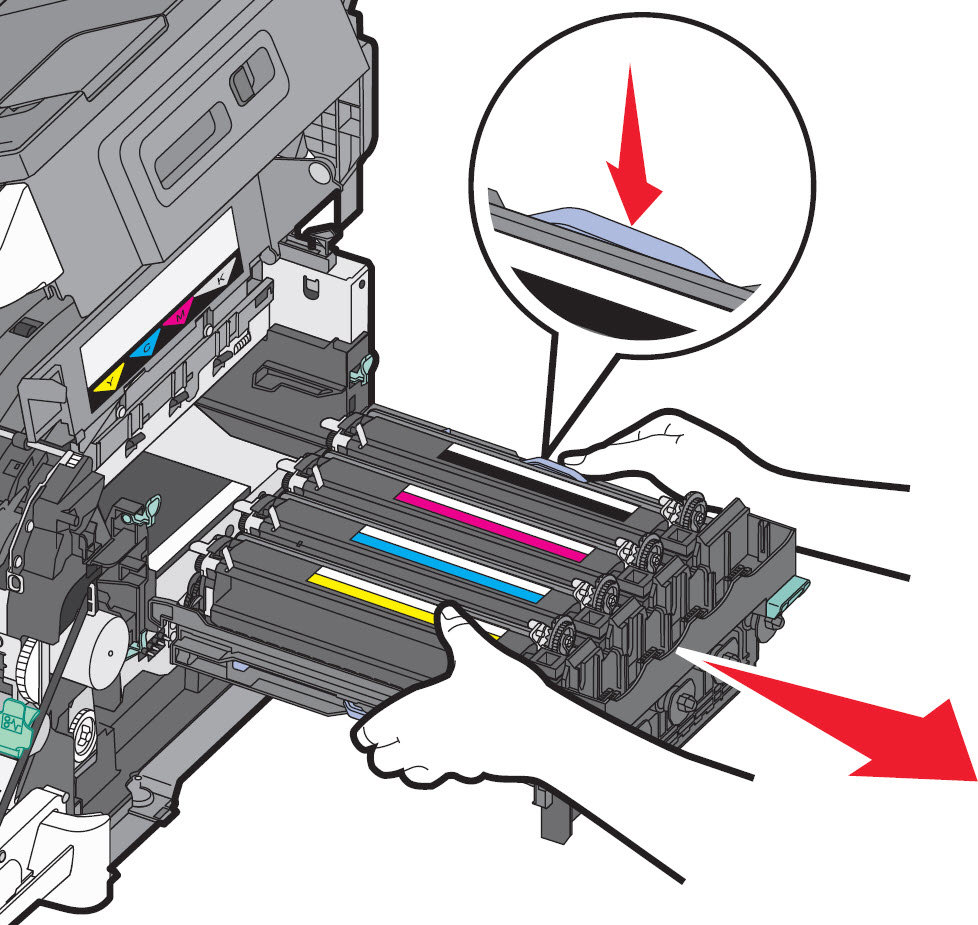 For Lexmark X548
 |
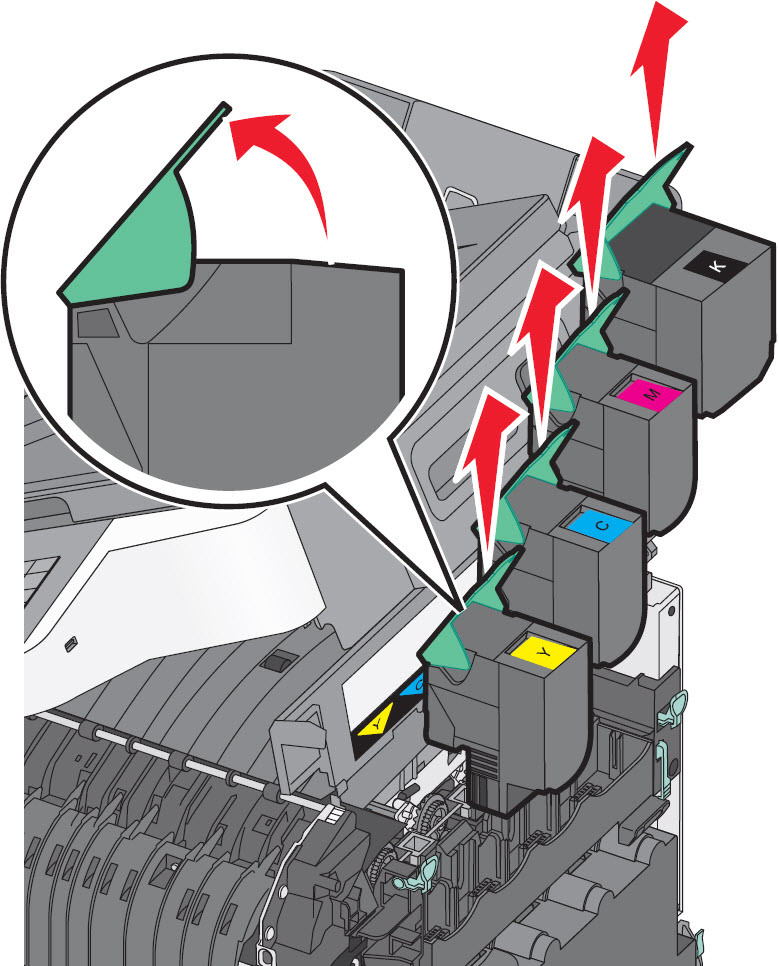
8
| Remove the used developer unit . | Black Developer Unit
Yellow
, Cyan andMagenta Developer Units
|
9
| Unpack the new developer unit . Leave the red packaging on the developer unit itself in place. | No Image
|
10
| Place the old developer unit in the enclosed package provided. | No Image
|
11
| Gently shake the new developer unit from side to side. | No Image
|
12
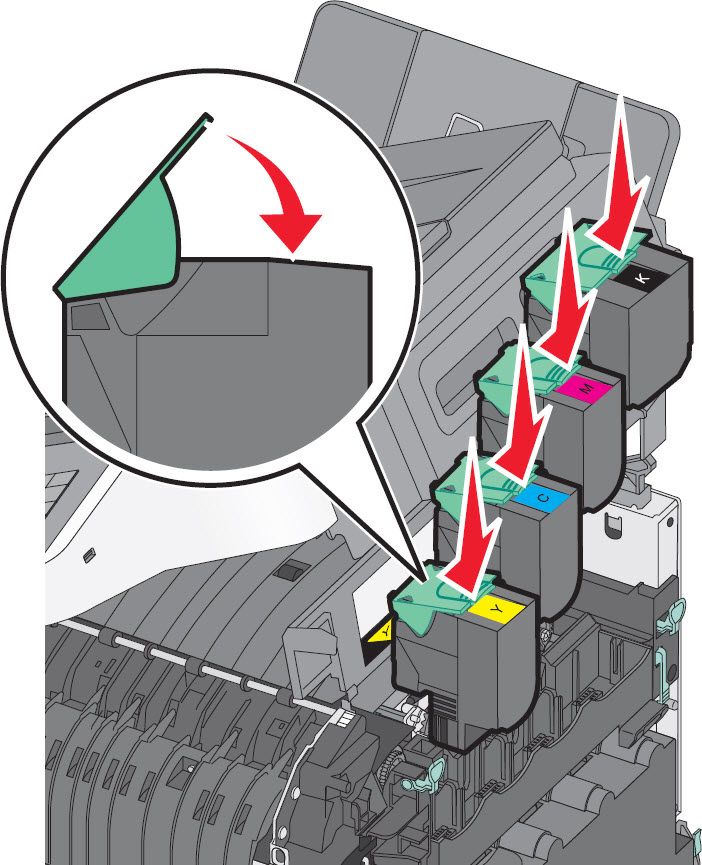
| Remove the red shipping cover from the developer unit . | |
13
| Insert the new developer unit . | |
14
| Align and insert the imaging kit . | For Lexmark X543/4/6 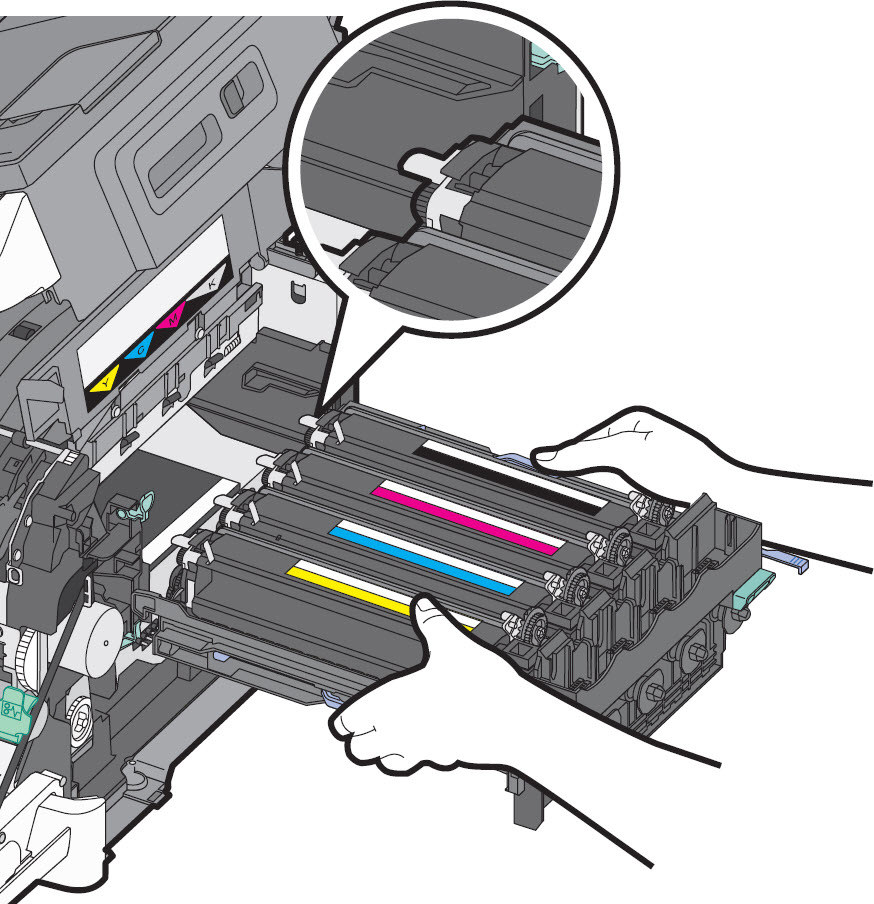 For Lexmark X548
 |
15
| Gently, but firmly push the blue levers down until the imaging kit drops into place. | 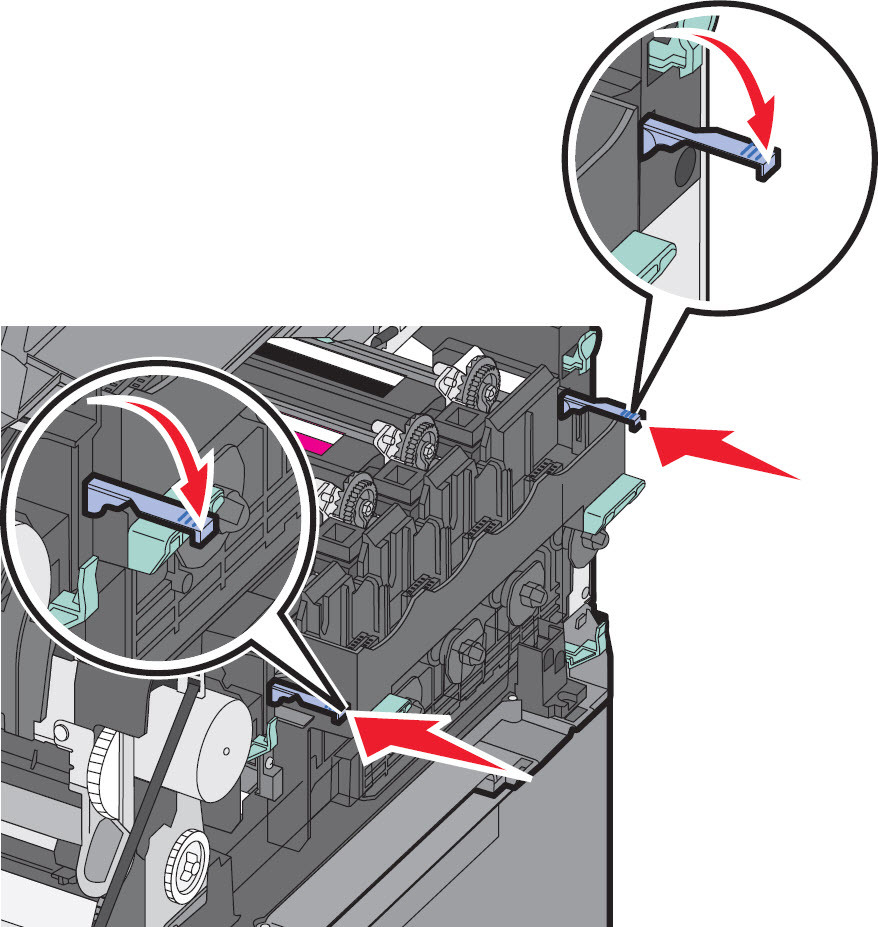 |
16
| Reinstall the waste toner bottle . | For Lexmark X543/4/6 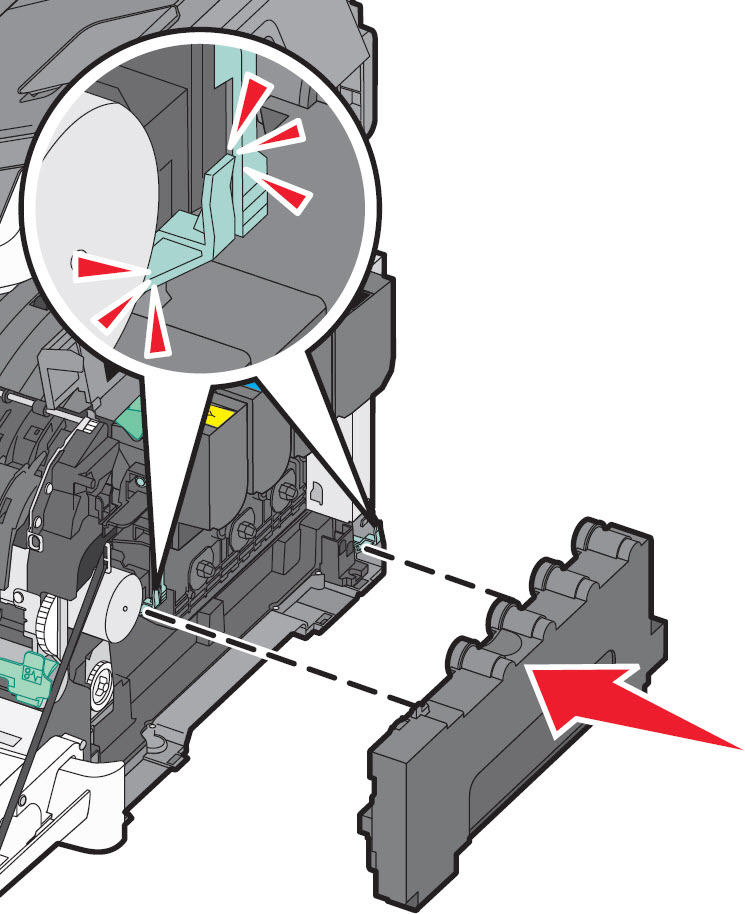 For Lexmark X548
 |
17
| Reinstall the right side cover . | For Lexmark X543/4/6 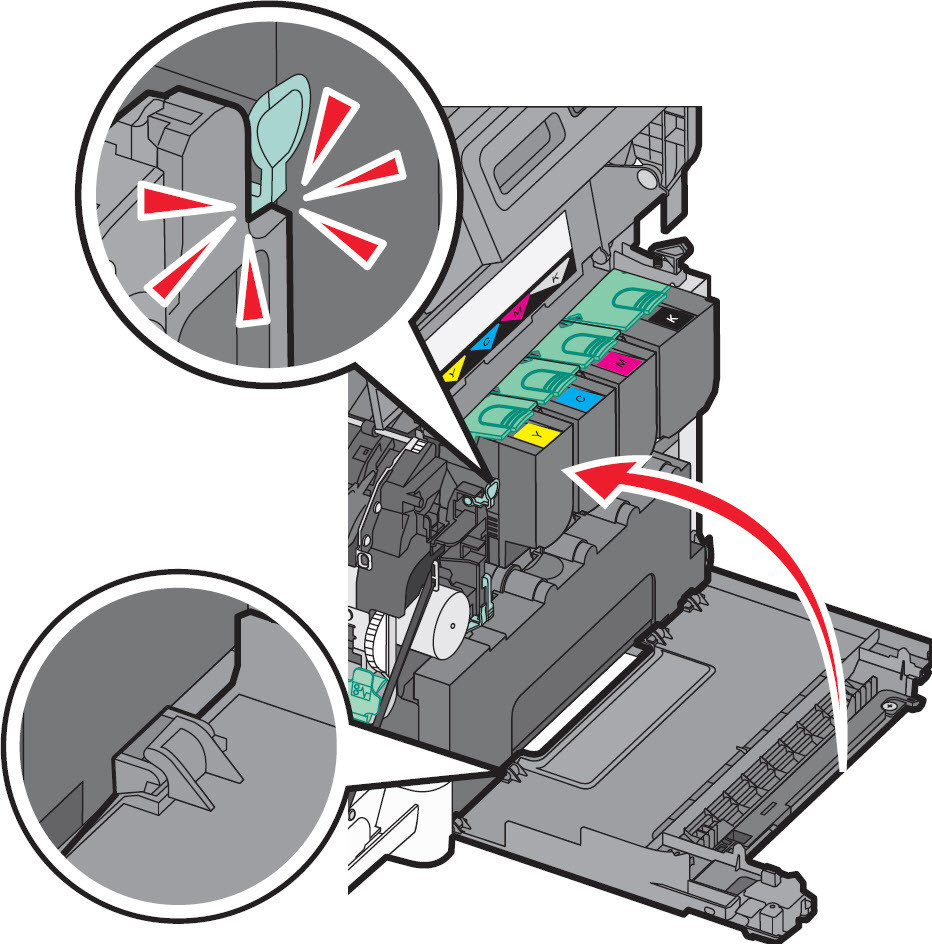 For Lexmark X548
 |
18
| Reinstall the toner cartridges
| For Lexmark X543/4/6 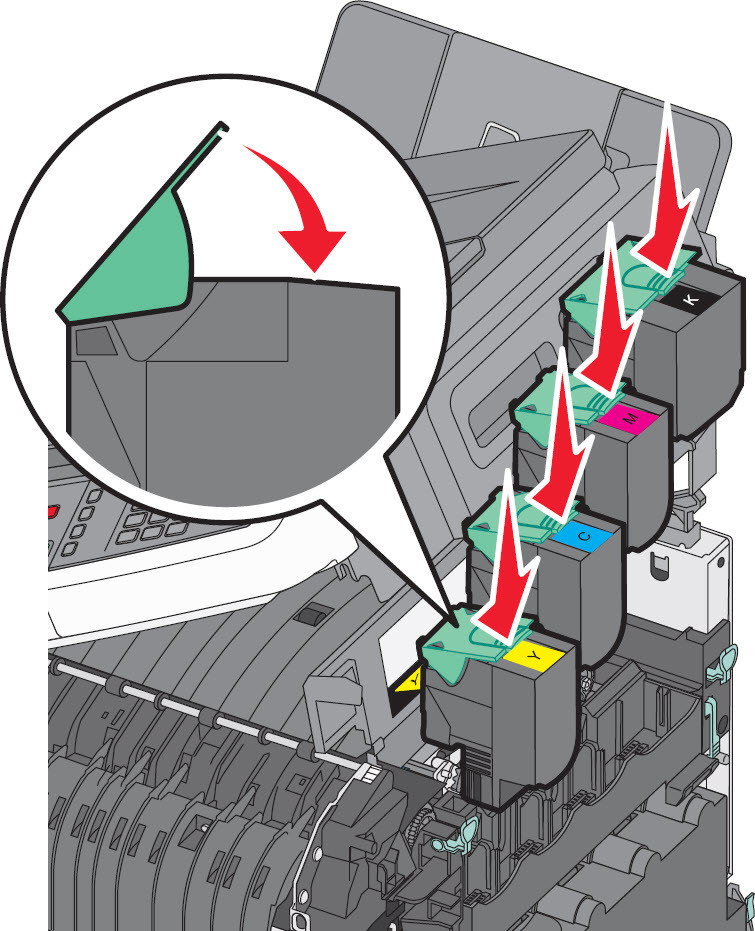 For Lexmark X548
 |
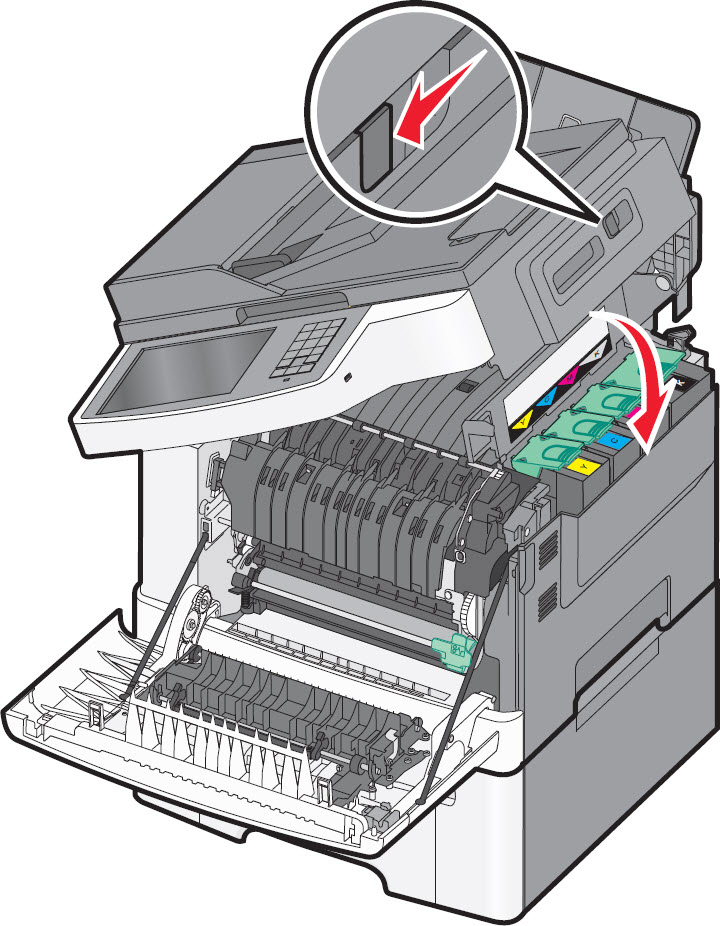
19
| Close the top cover . | For Lexmark X543/4/6 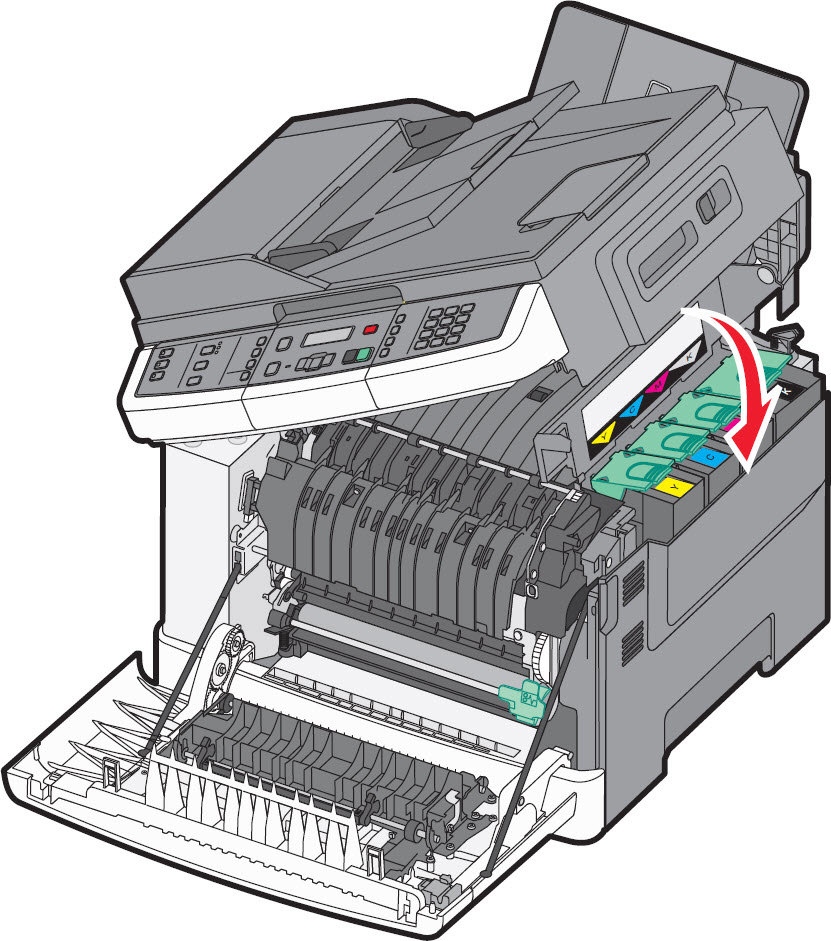 For Lexmark X548
 |
20
| Close the front door . | For Lexmark X543/4/6 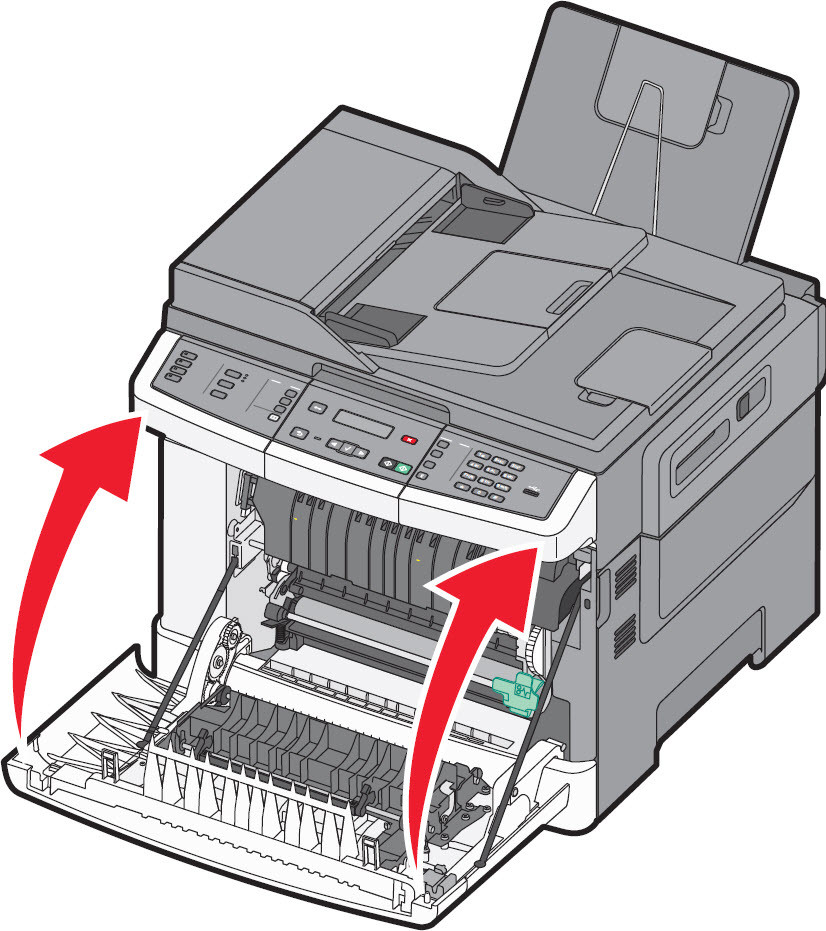 For Lexmark X548
 |
Still need help?
If you require additional assistance, please close this window, go to your product's support page and locate 
Get In Touch with Lexmark!
for contact information.
NOTE:
When calling for support, you will need your p
rinter model/machine type
and serial number
(SN
). If you need help locating these, please click here. Please be near the products described in this article to expedite the support process and reduce call-back situations. LEGACY ID:
SO4604