Troubleshooting a 202.03 Paper Jam
Troubleshooting a `202.03? Paper Jam
Issue description
A
202.03 Paper Jam
error message appears on the printer control panel display. The error indicates one or more sheets of paper are jammed on the printer's standard output bin
, in the Fuser area
, or prior to entering the Fuser.Paper Jam Locations
The paper jam can be located in either one of the two locations below:
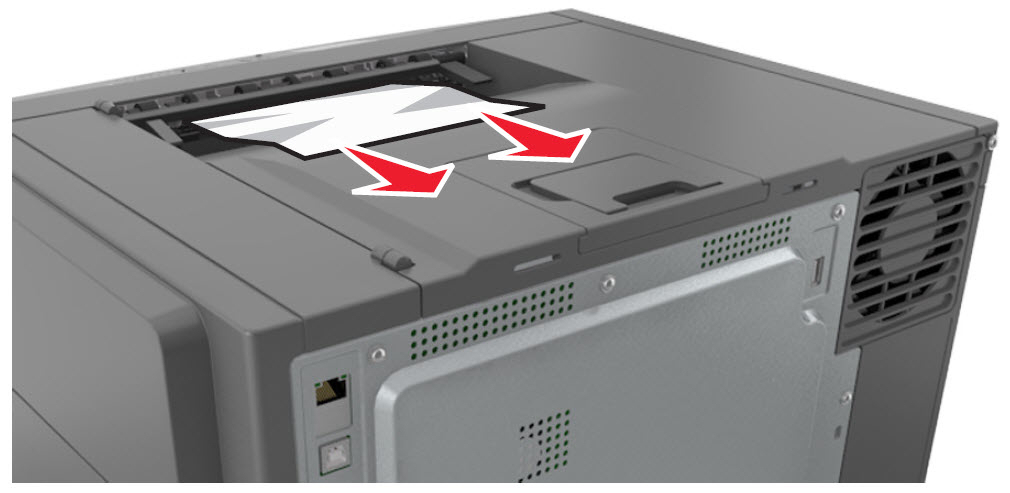 Standard Output Bin Jam (SFP) |  Fuser Area Jam (SFP) | 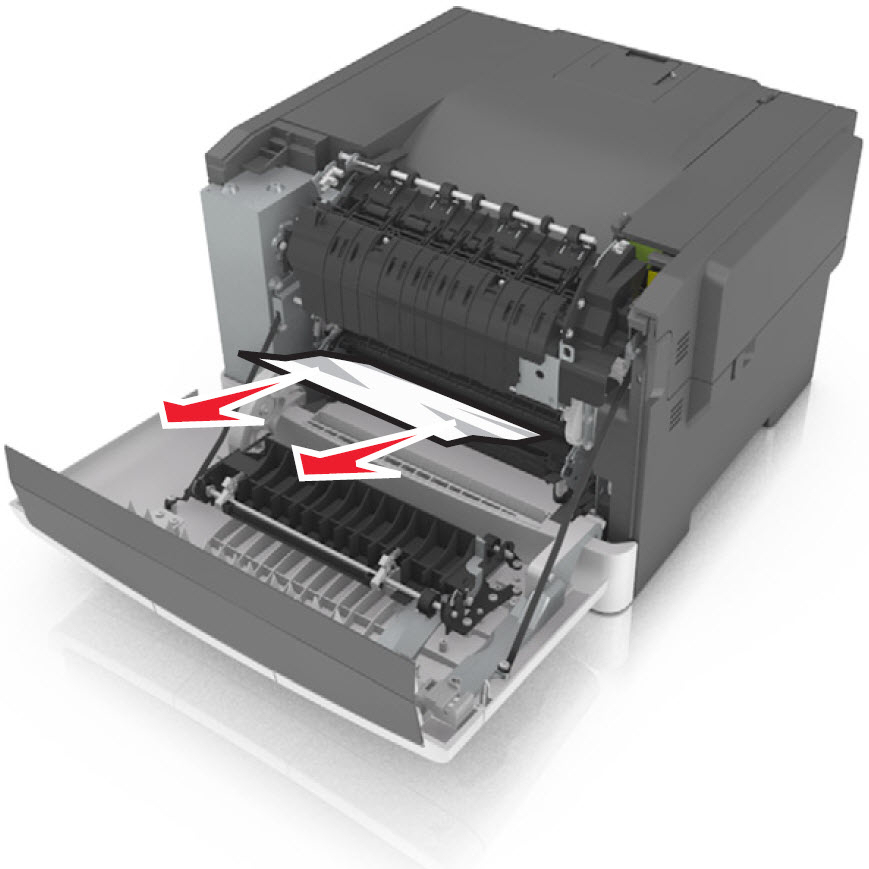 Paper Jam Before Fuser (SFP) |
 Standard Output Bin Jam (MFP) | 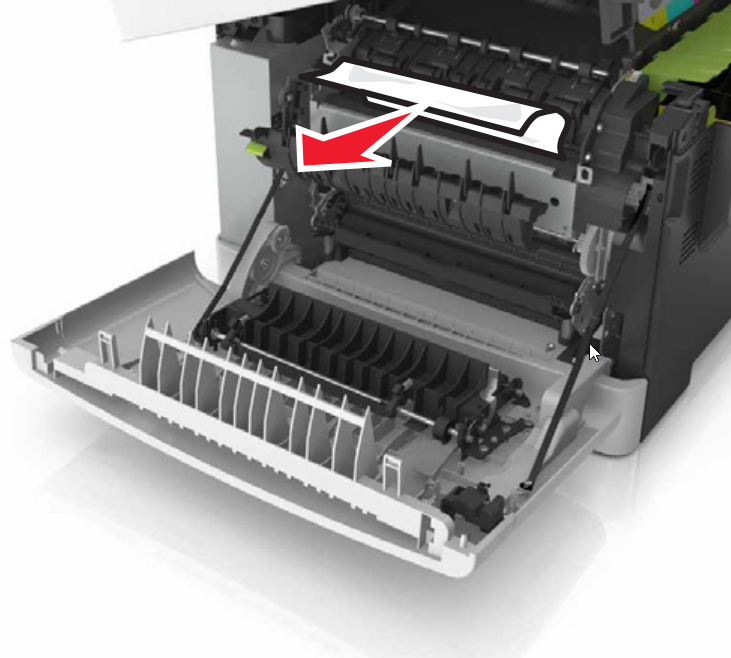 Fuser Area Jam (MFP) | 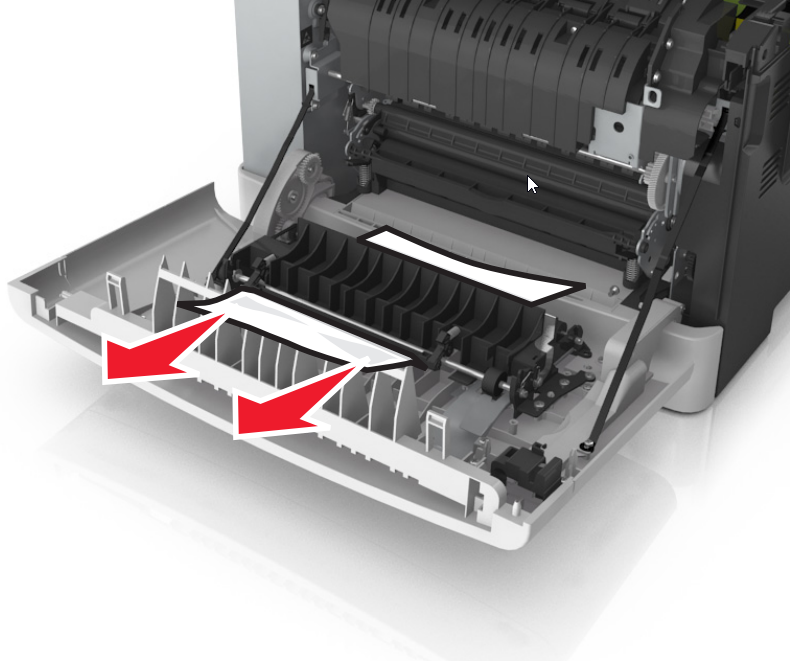 Paper Jam Before Fuser(MFP) |
Solution
- Be sure any previous jams have been completely removed.
- Make sure that the affected paper tray (could be any input source) is loaded properly.
- Verify that thepaper size,type, andweightare within specification for the input source.Light-weight papercan jam more easily in the fuser. Set to light paper mode if running light media with heavy coverage.
- If the paper in the printer shows signs of excessivewrinkle,crease, ordampness, or if the sheets arebentorwavy, or haveream glueorcurl, there is probably too much moisture in the paper. Replace the paper in the printer with new paper from an unopened ream.
Overview
A
202.03 Paper Jam
can indicate three different types
of Paper Jams
if the sensor is working properly:- Paper stopped in the fuser paper path that obstructs the sensor.
- Paper Jammed internal to the fuser that does not reach the sensor.
- Paper stopped before reaching the fuser.
If the customer seeks service for a “
202.03 Paper Jam
” issue, go through all of the customer-level checks before recommending any sort of service on the printer. If issue persists after performing the steps mentioned above, try the following suggestions below.If necessary, refer to the 202.xx fuser exit sensor service check.
Service action
Before replacing any parts, the technician should do the following:
- If this paper jam happens at OOB, open the front door to check for any ITU packaging material.
- Check the fuser motor; it may not be functioning properly.
- Look for exit roller movement in the Output Bin area when printing a page.There is no Fuser Motor test in the Diagnostics Menu.
- Check the Fuser Motor Cable and replace cable if damaged.
- Replace the Fuser Motor if the rollers are not turning and the cables checked out okay.
- Check the fuser exit sensor; it may not be functioning properly.
- Test the fuser exit sensor by placing a small piece of paper under the fuser duplex diverter and closing the door.There is no Fuser Exit sensor test in the Base Sensor Tests.The printer should post a 202.01 error. If not, replace the Fuser Exit Sensor.
- Check the Fuser Exit Sensor Cable andreplace cable if damaged.
- Replace the fuser exit sensorif the sensor test fails and the cables checked out okay.
If the above items are verified then proceed with the following steps:
- For remote fix opportunity, go through the steps in the Customer section if the customer has not already done so.
- PerformPrint Testsfrom theDiagnostics Menu.Does the leading edge of the media make it out of the Image Transfer Unit (ITU) and reach the Fuser?
- If Yes, proceed toStep 5.
- If No, proceed to the next step.
- Remove the Waste Toner Bottle (WTB) andImaging Kitto inspect theITU.Is the ITU damaged?
- If Yes,Replace the ITU and WTB.
- If No, proceed to the next step.
- Print a test page and verify if the Image is shifted or compressed.Are the images shifted or compressed?
- If Yes, proceed to the next step.
- If No, replace the ITU Guide.
- Check the Fuser rolls for contamination. Are the Fuser rolls contaminated?
- If Yes, Perform the Fuser Cleaning process.
- If No, Replace Fuser.
LEGACY ID:
SO7173