How to Configure Windows Firewall to Communicate with IPSec Configured Printer
Before you begin
Verify the printer's IPSec settings are properly configured on the printer.
Actual success is confirmed when you are no longer able to access the device's EWS from the host IP address. However, after enabling a firewall rule, your connection to the printer should return. Alternatively, you may be able to use another workstation/server with a different IP address to connect to the printer.
Example showing IPSec
activation
- Access the printer's web page; i.e., http://printer_IP_addressreplacingprinter_IP_addresswith the printer's IP address.
- Click on Security (Configuration).
- Click on IPSec.
- Enter the necessary values underConnections: Pre-Shared Key Authenticated Connections.
Host 1 Address
– Print server IP or workstation IPKey
– Create a password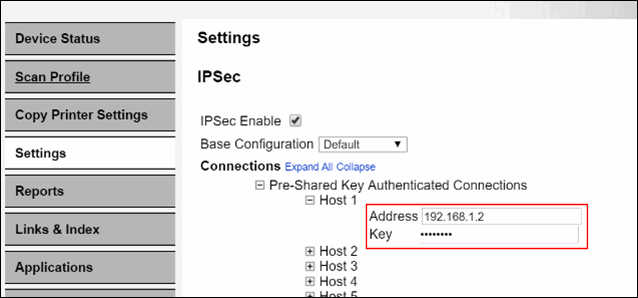
- ClickSubmit.
Configuring Windows firewall rule to accept printer connection
- OpenWindows Firewall with Advanced Securityand access itsProperties.
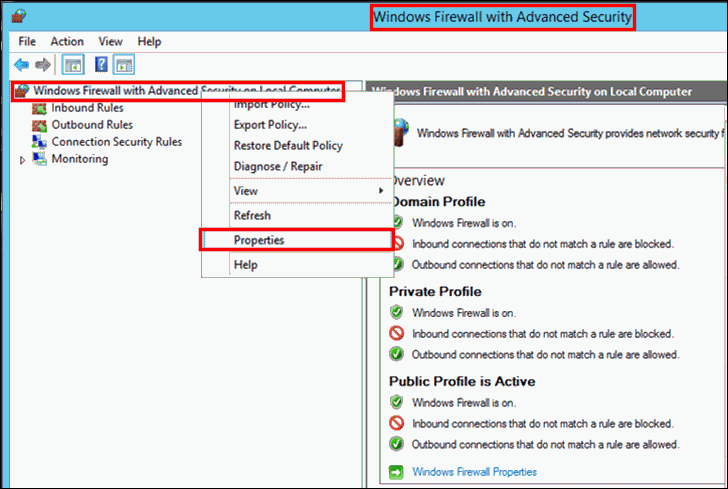
- Access theIPSec Settingstab and click onCustomize.
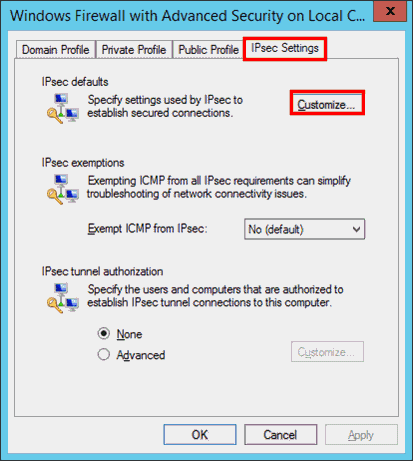
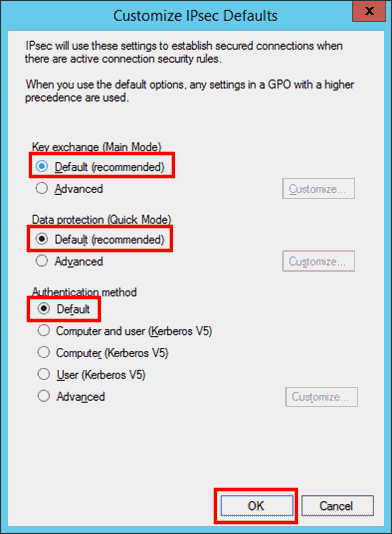
- Verifyall threesettings are using theDefaultsettings and then clickOK. (See last page for the default settings behind theAdvancedconfiguration.)
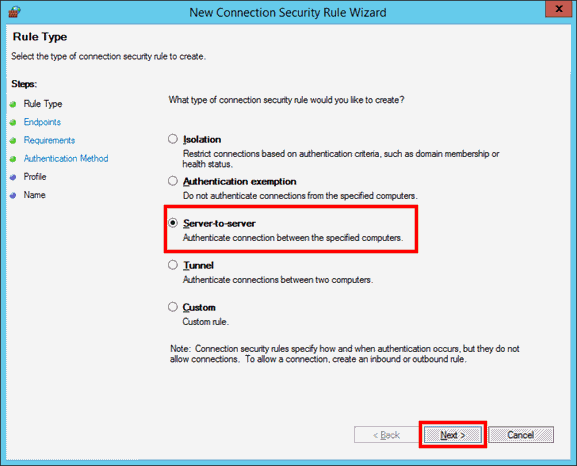
- Right-click onConnection Security Rulesand click onNew Rule.

- SelectServer-to-servertype; click onNext.
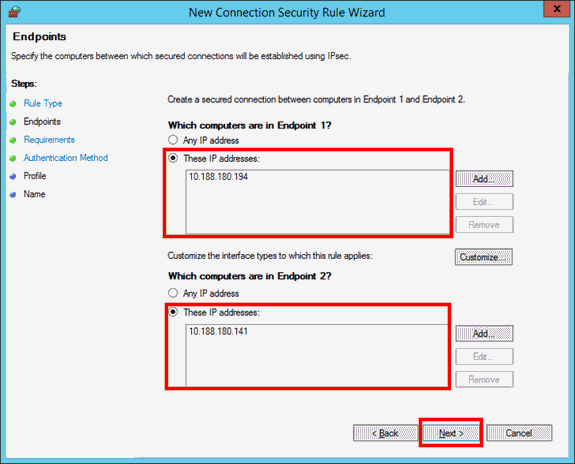
- Add theIP addressof the server forEndpoint 1, andIP addressfor printer or multiple printers underEndpoint 2. Click onNext.
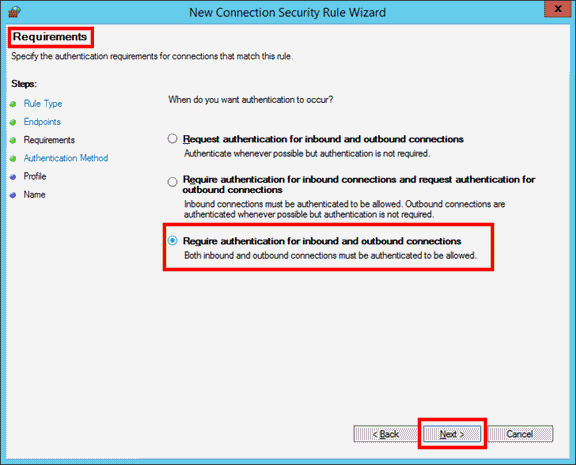
- SelectRequire authentication for inbound and outbound connections, and click onNext.
- SelectAdvancedbutton, then click onCustomize…

- In theFirst authentication method, click on theAddbutton.
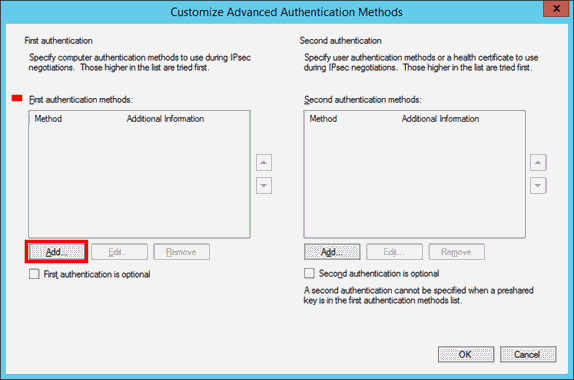
- SelectPreshared keyandtypetherequired key/passphrase. ClickOKto return to the previous screen.
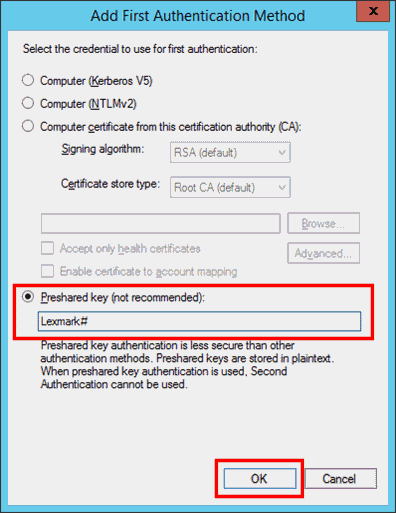
- ClickOK.
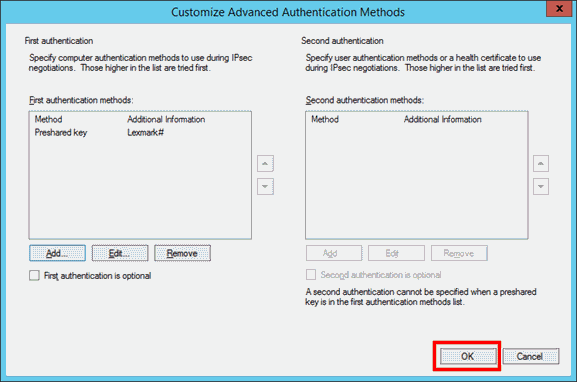
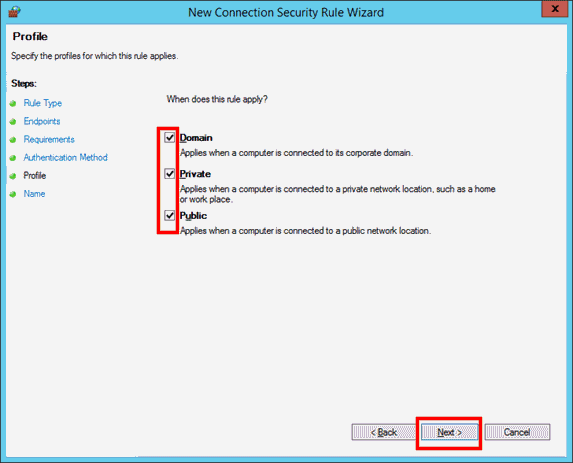
- Keep the defaults that are already pre-selected for you. Click onNext.
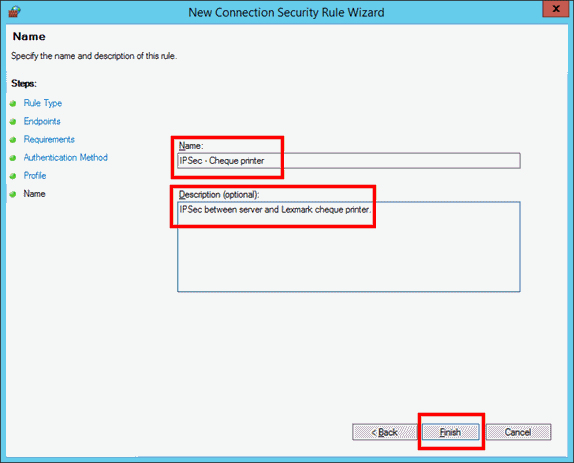
- Enter an appropriateNameandDescription. Click onFinish.
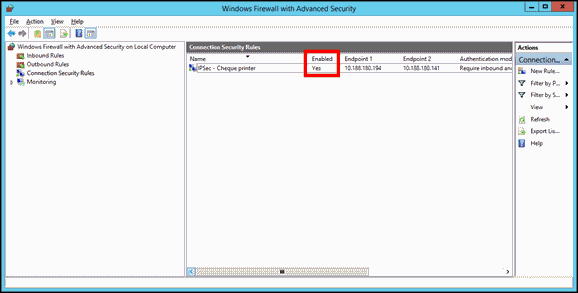
- Make sure that thesecurity ruleyou just created isEnabled.
Tests to confirm successful configuration
- Access the printer's EWS with the security rule enabled and repeat again with the rule disabled.
- Perform a simple ping test with the security rule enabled and repeat again with the rule disabled.
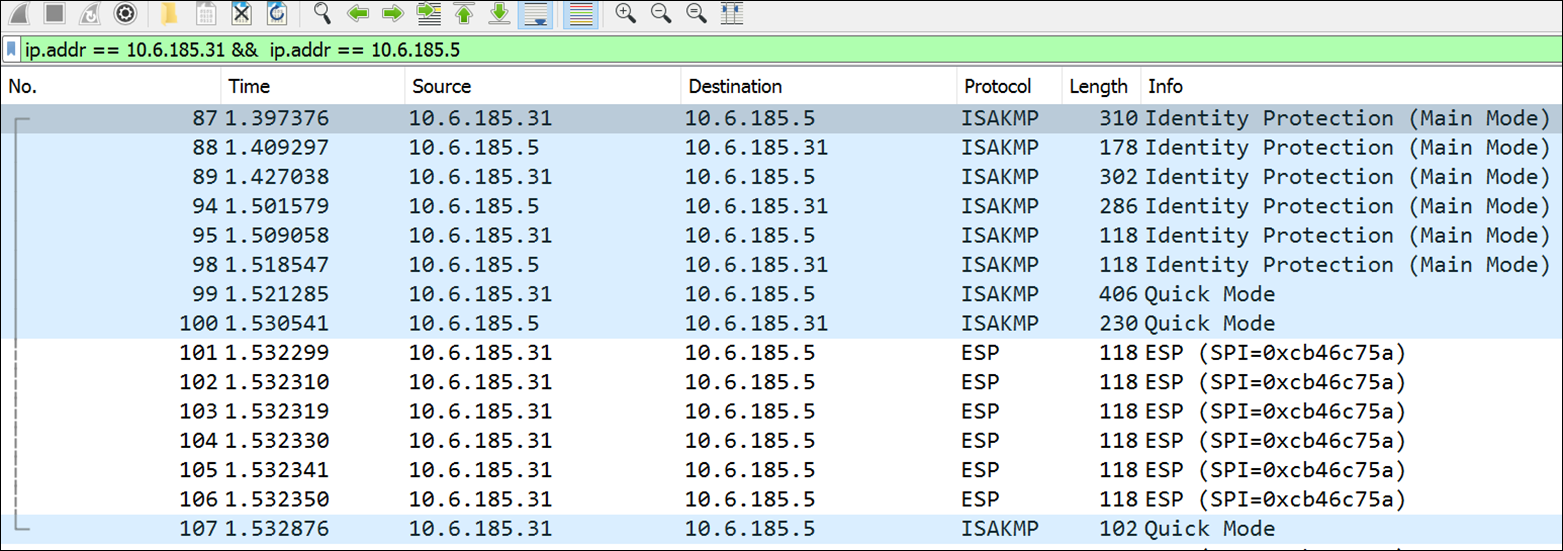
- From the host, perform a Wireshark network trace to the device to reveal the protocols utilized in IPSec transmission mode.
Expanded view of IPSec default settings

Still need help?
If you require additional assistance, please close this window, go to your product's support page and locate 
Get In Touch with Lexmark!
for contact information.
NOTE:
When calling for support, you will need your printer model/machine type
and serial number
(SN
).
Please be near the products described in this article to expedite the support process and reduce call-back situations.
LEGACY ID:
HO4057