How to Setup Internet Information Services (IIS) for Scan-to-FTP with Microsoft Windows 7, 8, and 10
Enabling IIS to allow Scan-to-FTP with Lexmark MFPs
Turning on
FTP Server services
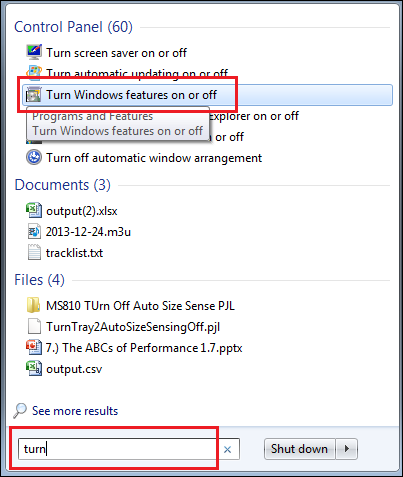
1. Click
Start
and begin to type Turn Windows features on or off
, and select it when it appears in the list. Alternatively, type
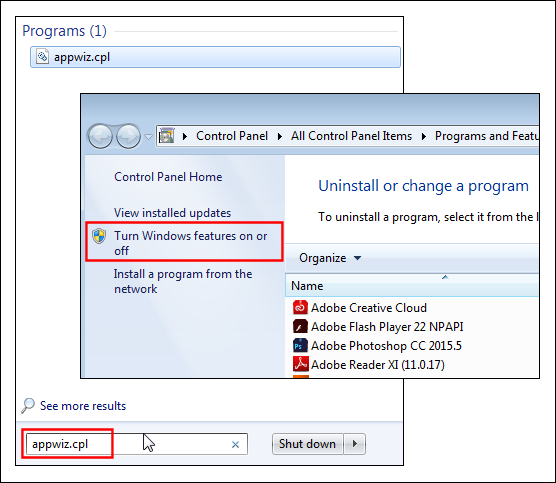
appwiz.cpl
, double-clickon appwiz.cpl, and thenclick on Turn Windows features on or off
. Illustration
| Alternative method illustration
|
 |  |
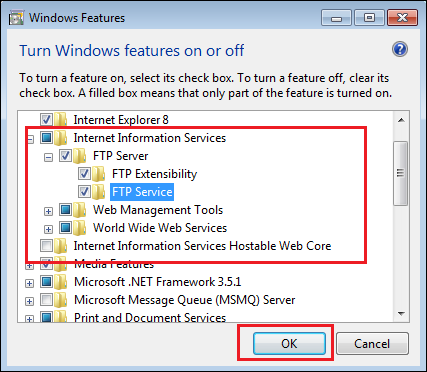
- Navigate toInternet Information Servicesand check theFTP services,as shown in the pic below.
Adding FTP site
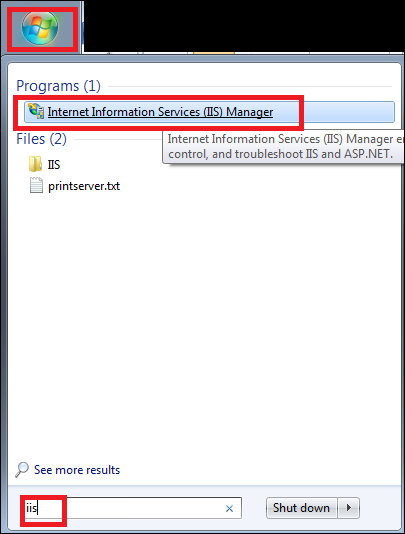
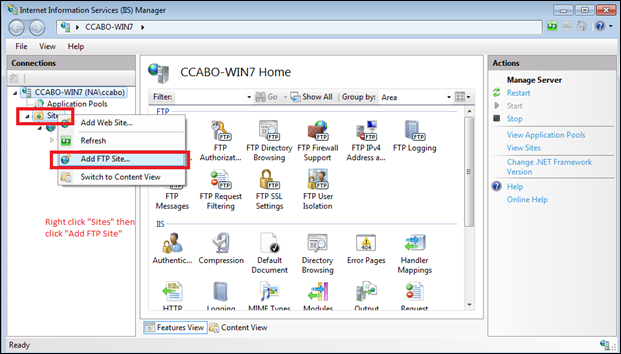
- RunIIS Manager. ClickStartand typeIIS, and thenInternet Information Services (IIS) Manager.
- Right-click “Sites”, then selectAdd FTP site.
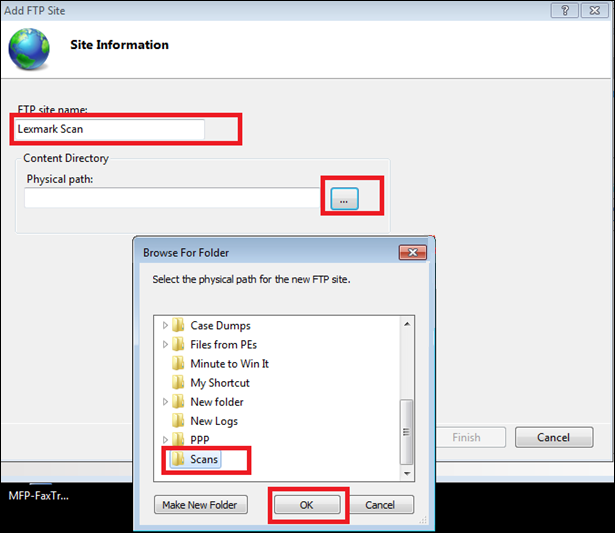
- Type inany namefor the FTP site, clickBrowseto select thedestination folder, and thenOKfollowed byNext.
Selecting Binding and SSL Settings
- UnderBinding and SSL Settings, selectNo SSL, and then clickNext.
NOTE:
Take note of port #21
. This is normally a source of Unable to establish TCP connection
to server
error messages. Verify that all hardware/software firewalls allow exceptions to this port. 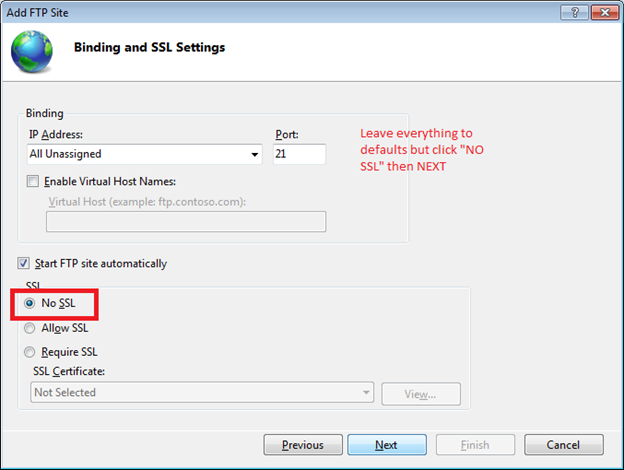
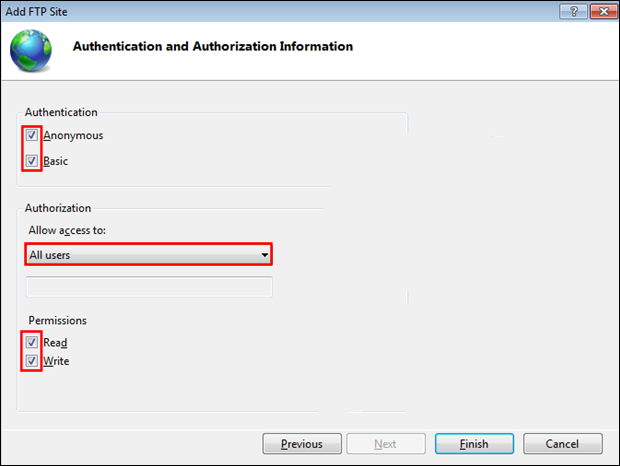
- This brings you toAuthentication and Authorization Information.
- UnderAuthentication, selectAnonymousandBasic.
- UnderAuthorization, selectAll Users.
- UnderPermissions, selectReadandWrite.
- ClickFinish.
Completing your setup
After completing the steps above, you will still need to create your
FTP Shortcut
with these following settings:- Server = the IP address of the computer
- Username = Anonymous
- Password = <blank>
Or,
- Server = the IP address of the computer
- Username = Username created for the computer
- Password = Password of the username above
Still need help?
If you require additional assistance, please close this window, go to your product's support page and locate 
Get In Touch with Lexmark!
for contact information.
NOTE:
When calling for support, you will need your printer model/machine type and serial number (SN).
Please be near the products described in this article to expedite the support process and reduce call-back situations.
LEGACY ID:
HO4029